Making guide · 18 illustrated sections
Origami Bluebell
Follow 18 illustrated sections. Download the complete making guide and matching paper.
Illustrated steps
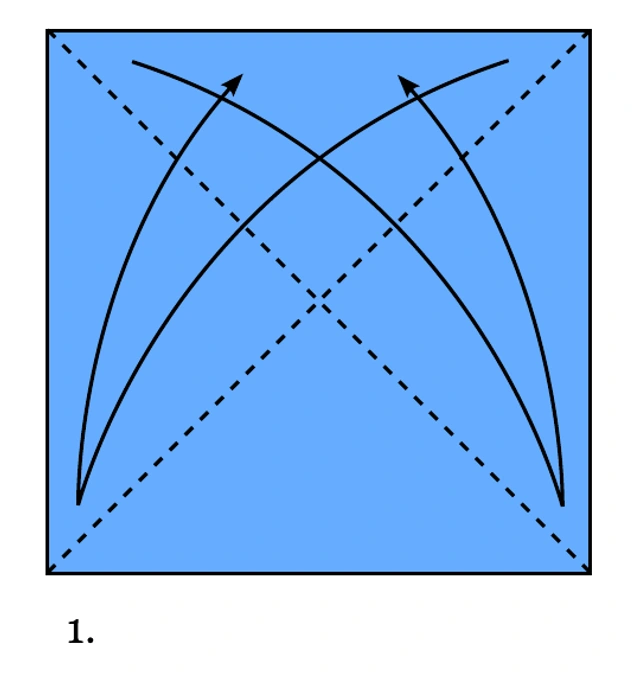 1
Colored side up: crease both diagonals and unfold.
 2
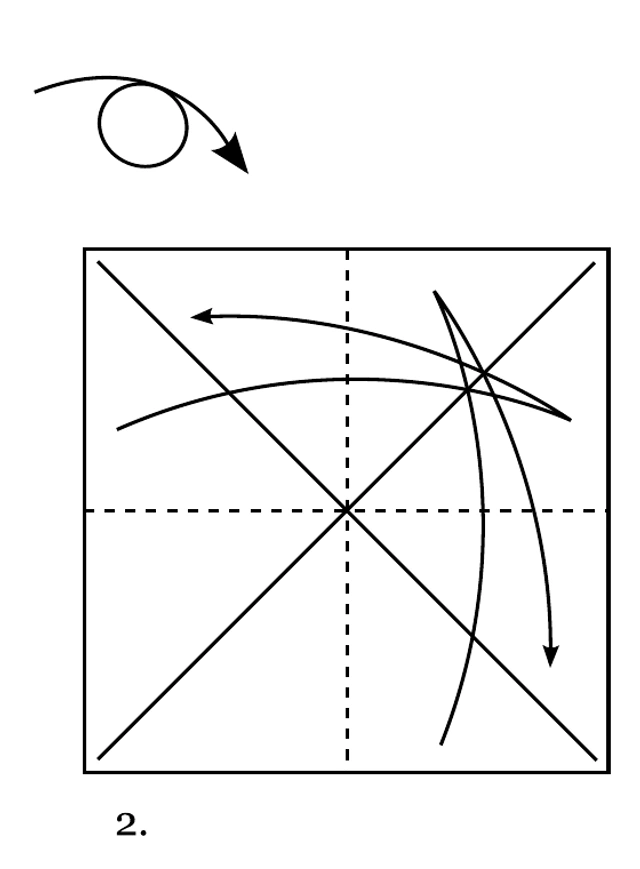
Turn over. Crease the horizontal and vertical midlines, then unfold.
 3
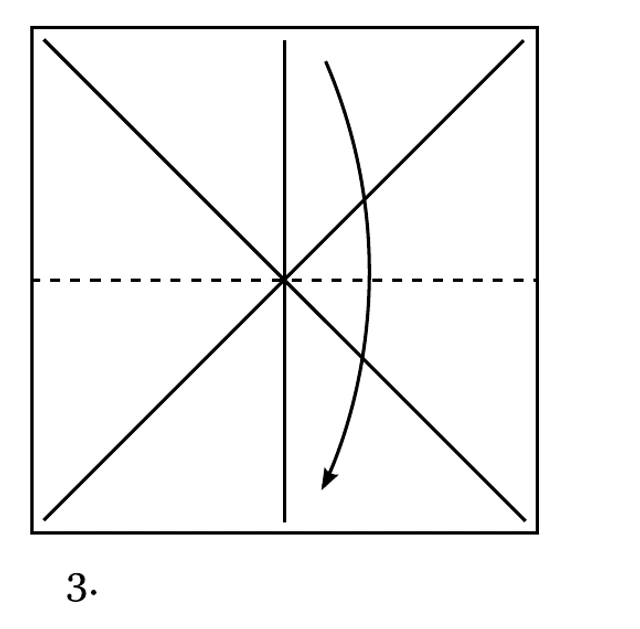
Fold the top edge down to the bottom edge.
 4
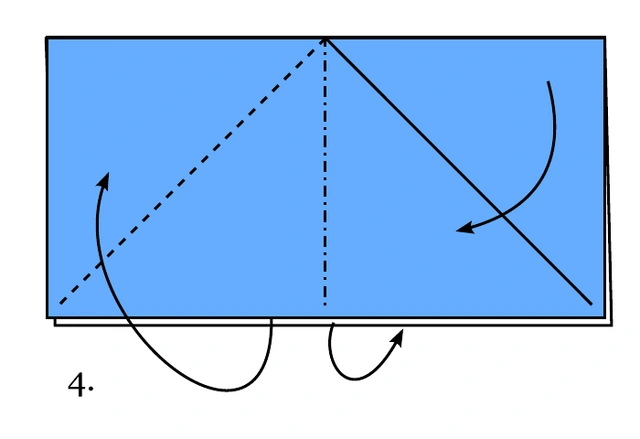
Push both short sides inward along the existing diagonal creases.
 5
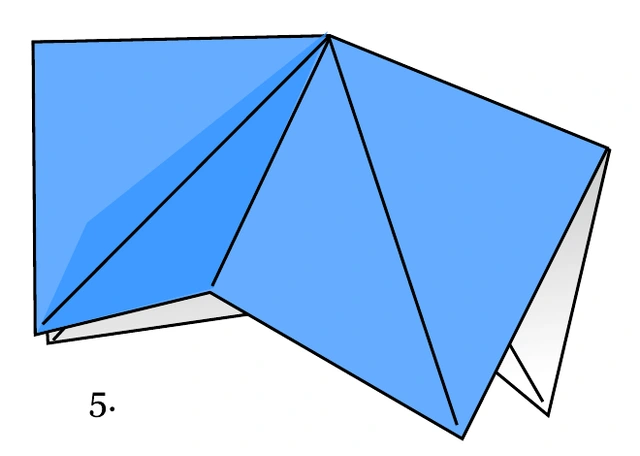
Bring the layers together as the square base collapses.
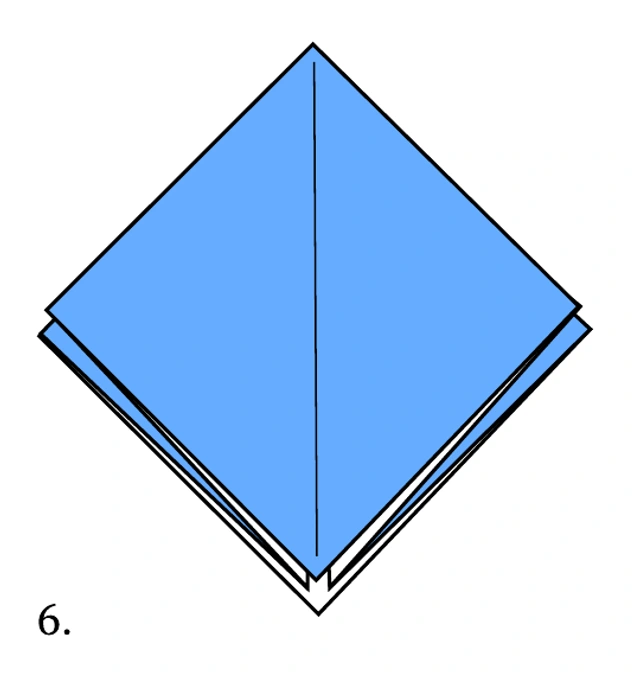 6
Flatten the square base with its open corners pointing down.
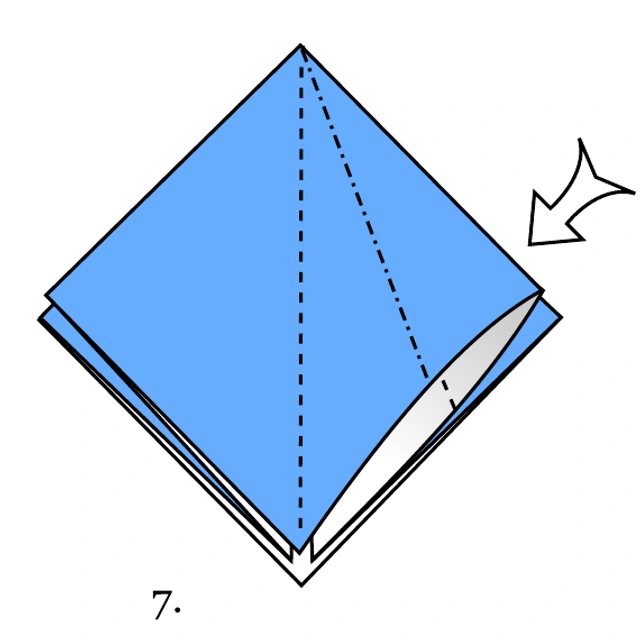 7
Open the right-hand top pocket and squash it toward the center.
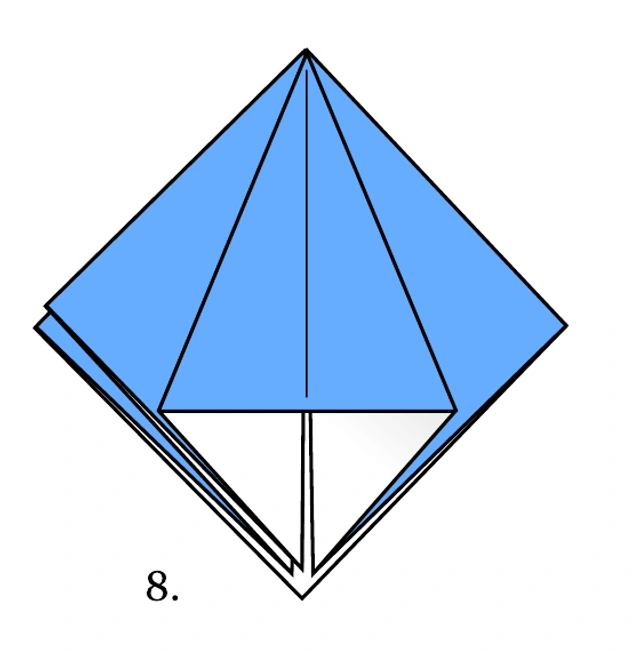 8
Check that the squashed flap is centered and symmetrical.
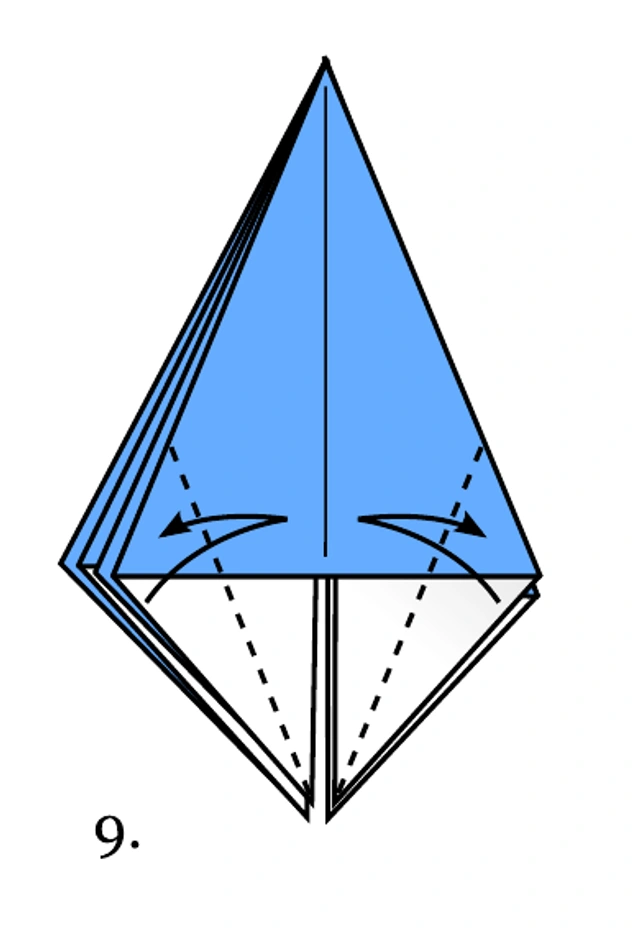 9
Precrease the two lower edges of that flap to the center; unfold.
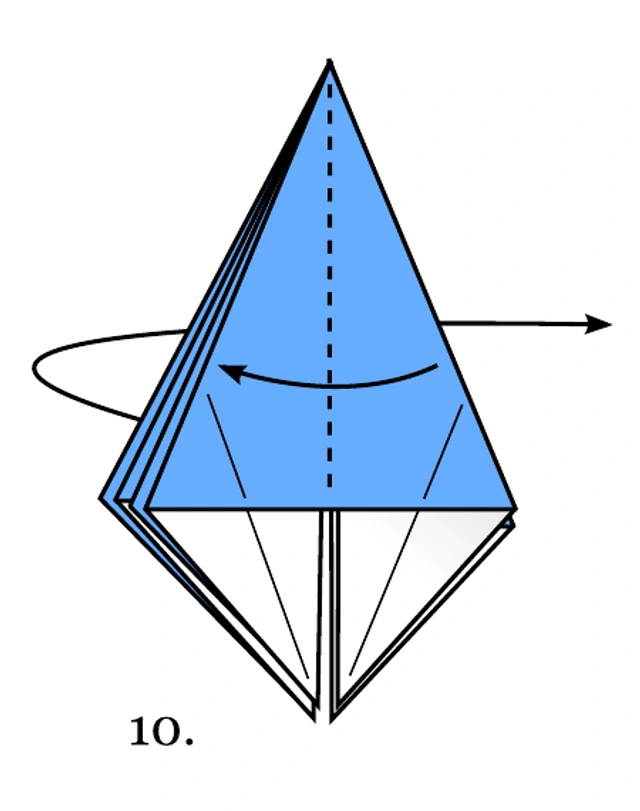 10
Turn the pages of the model to expose the prepared flap.
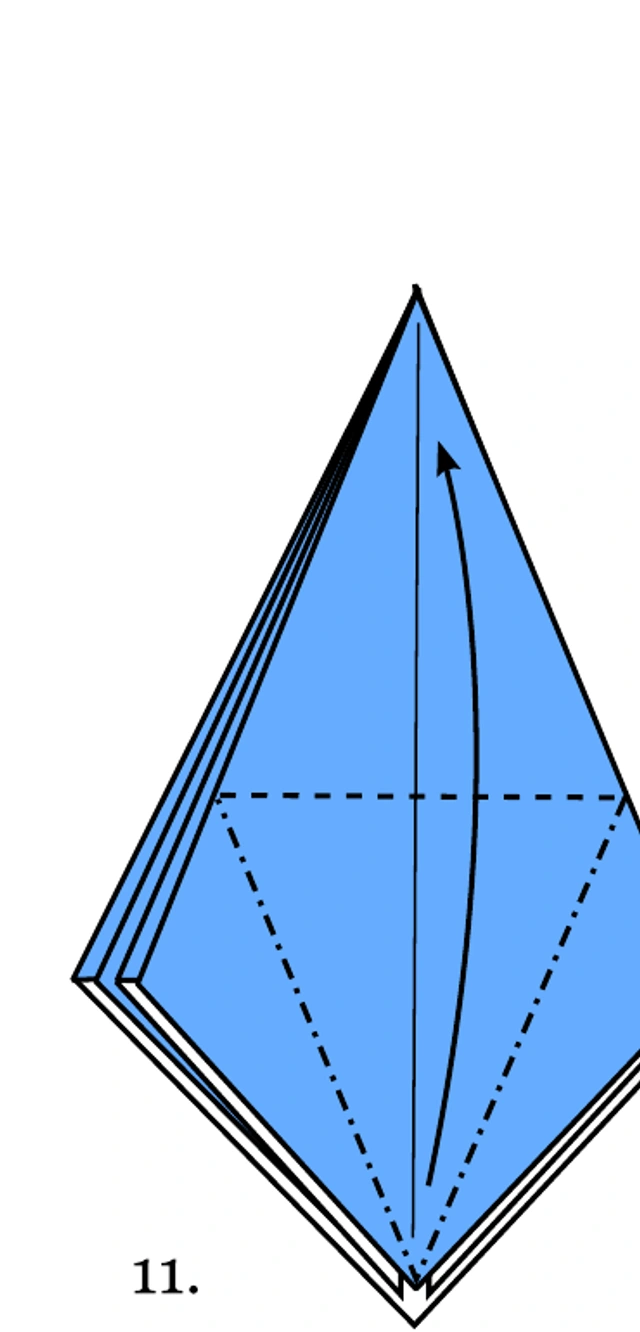 11
Lift the lower point along the arrow, using the diagonal and horizontal creases.
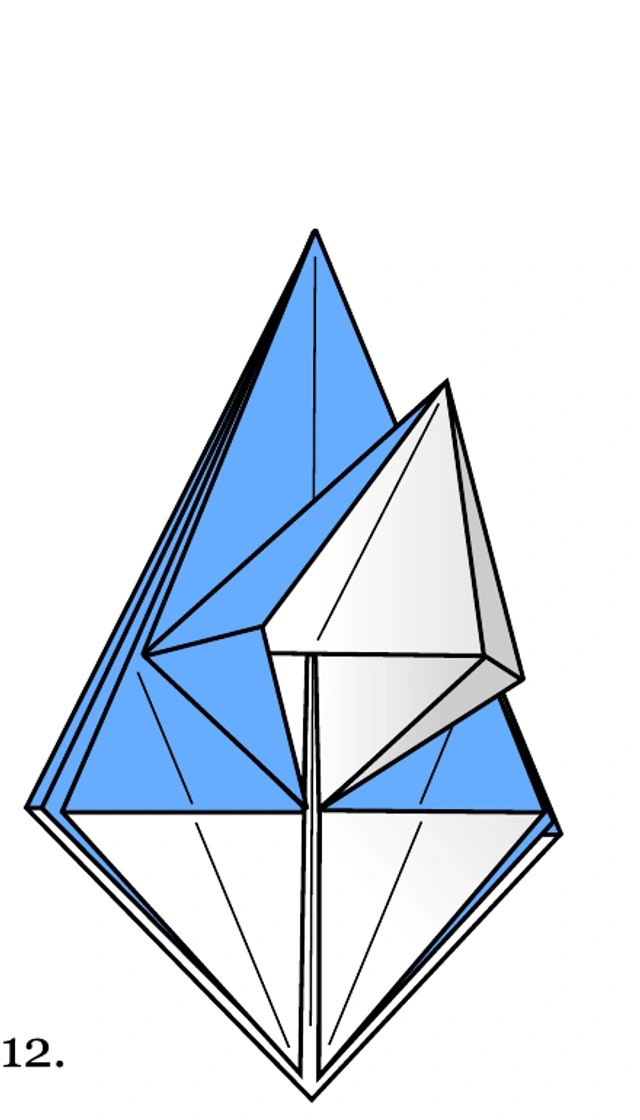 12
Petal-fold: bring the side edges inward and flatten the lifted point.
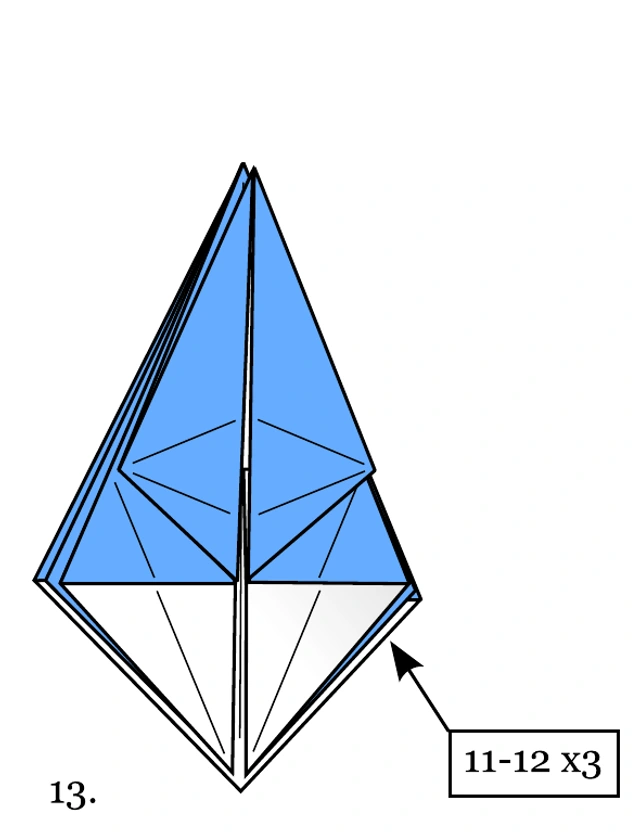 13
Repeat steps 11–12 on the other three equivalent flaps.
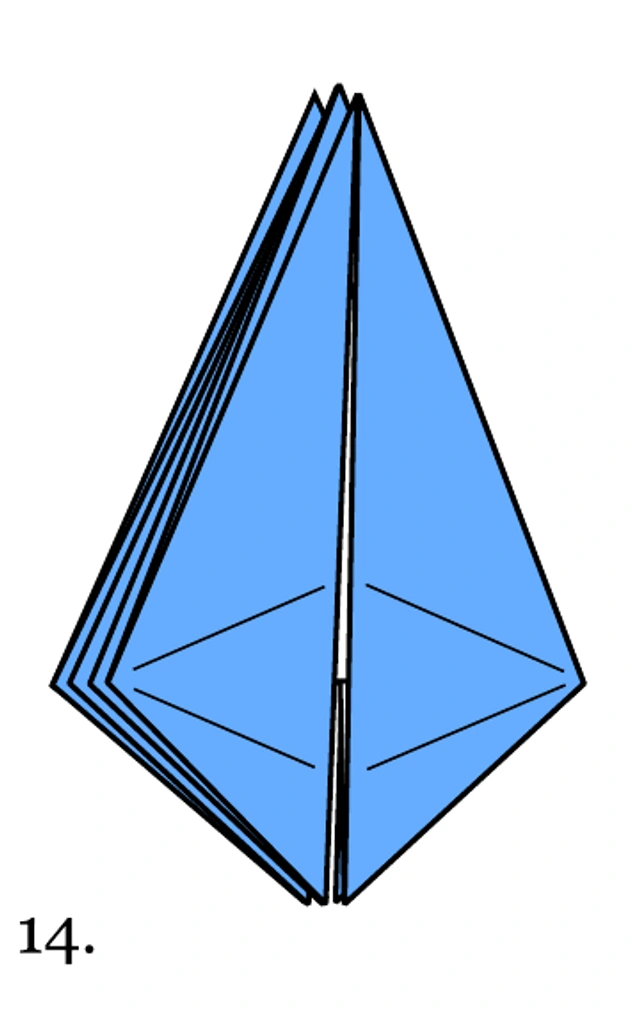 14
The completed frog-base structure should be flat and symmetrical.
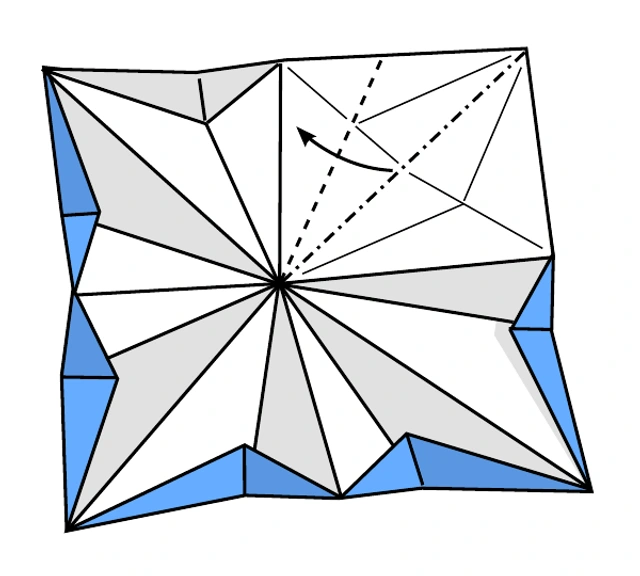 15
Unfold the model carefully to the large square shown; preserve all the creases.
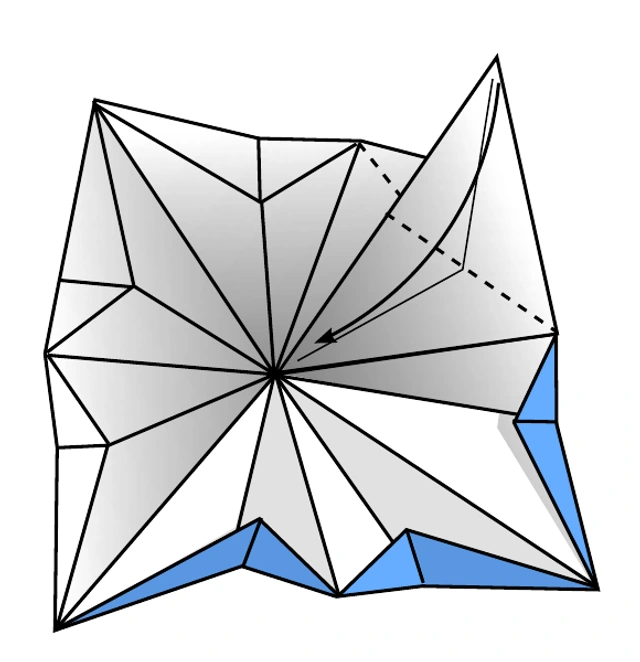 16
In one quadrant, raise the flap and reverse the marked diagonal folds as shown.
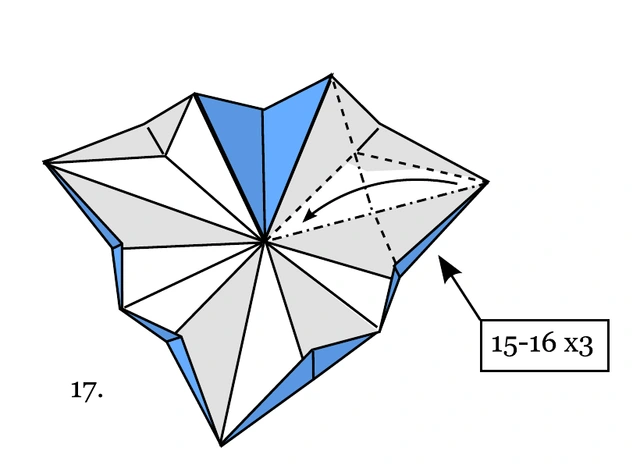 17
Repeat the quadrant operation three more times, then bring the four sides together into the hollow bell.
 18
Check the completed structure against the original finished diagram, then gently adjust the folds.
Full folding diagram · click to enlarge
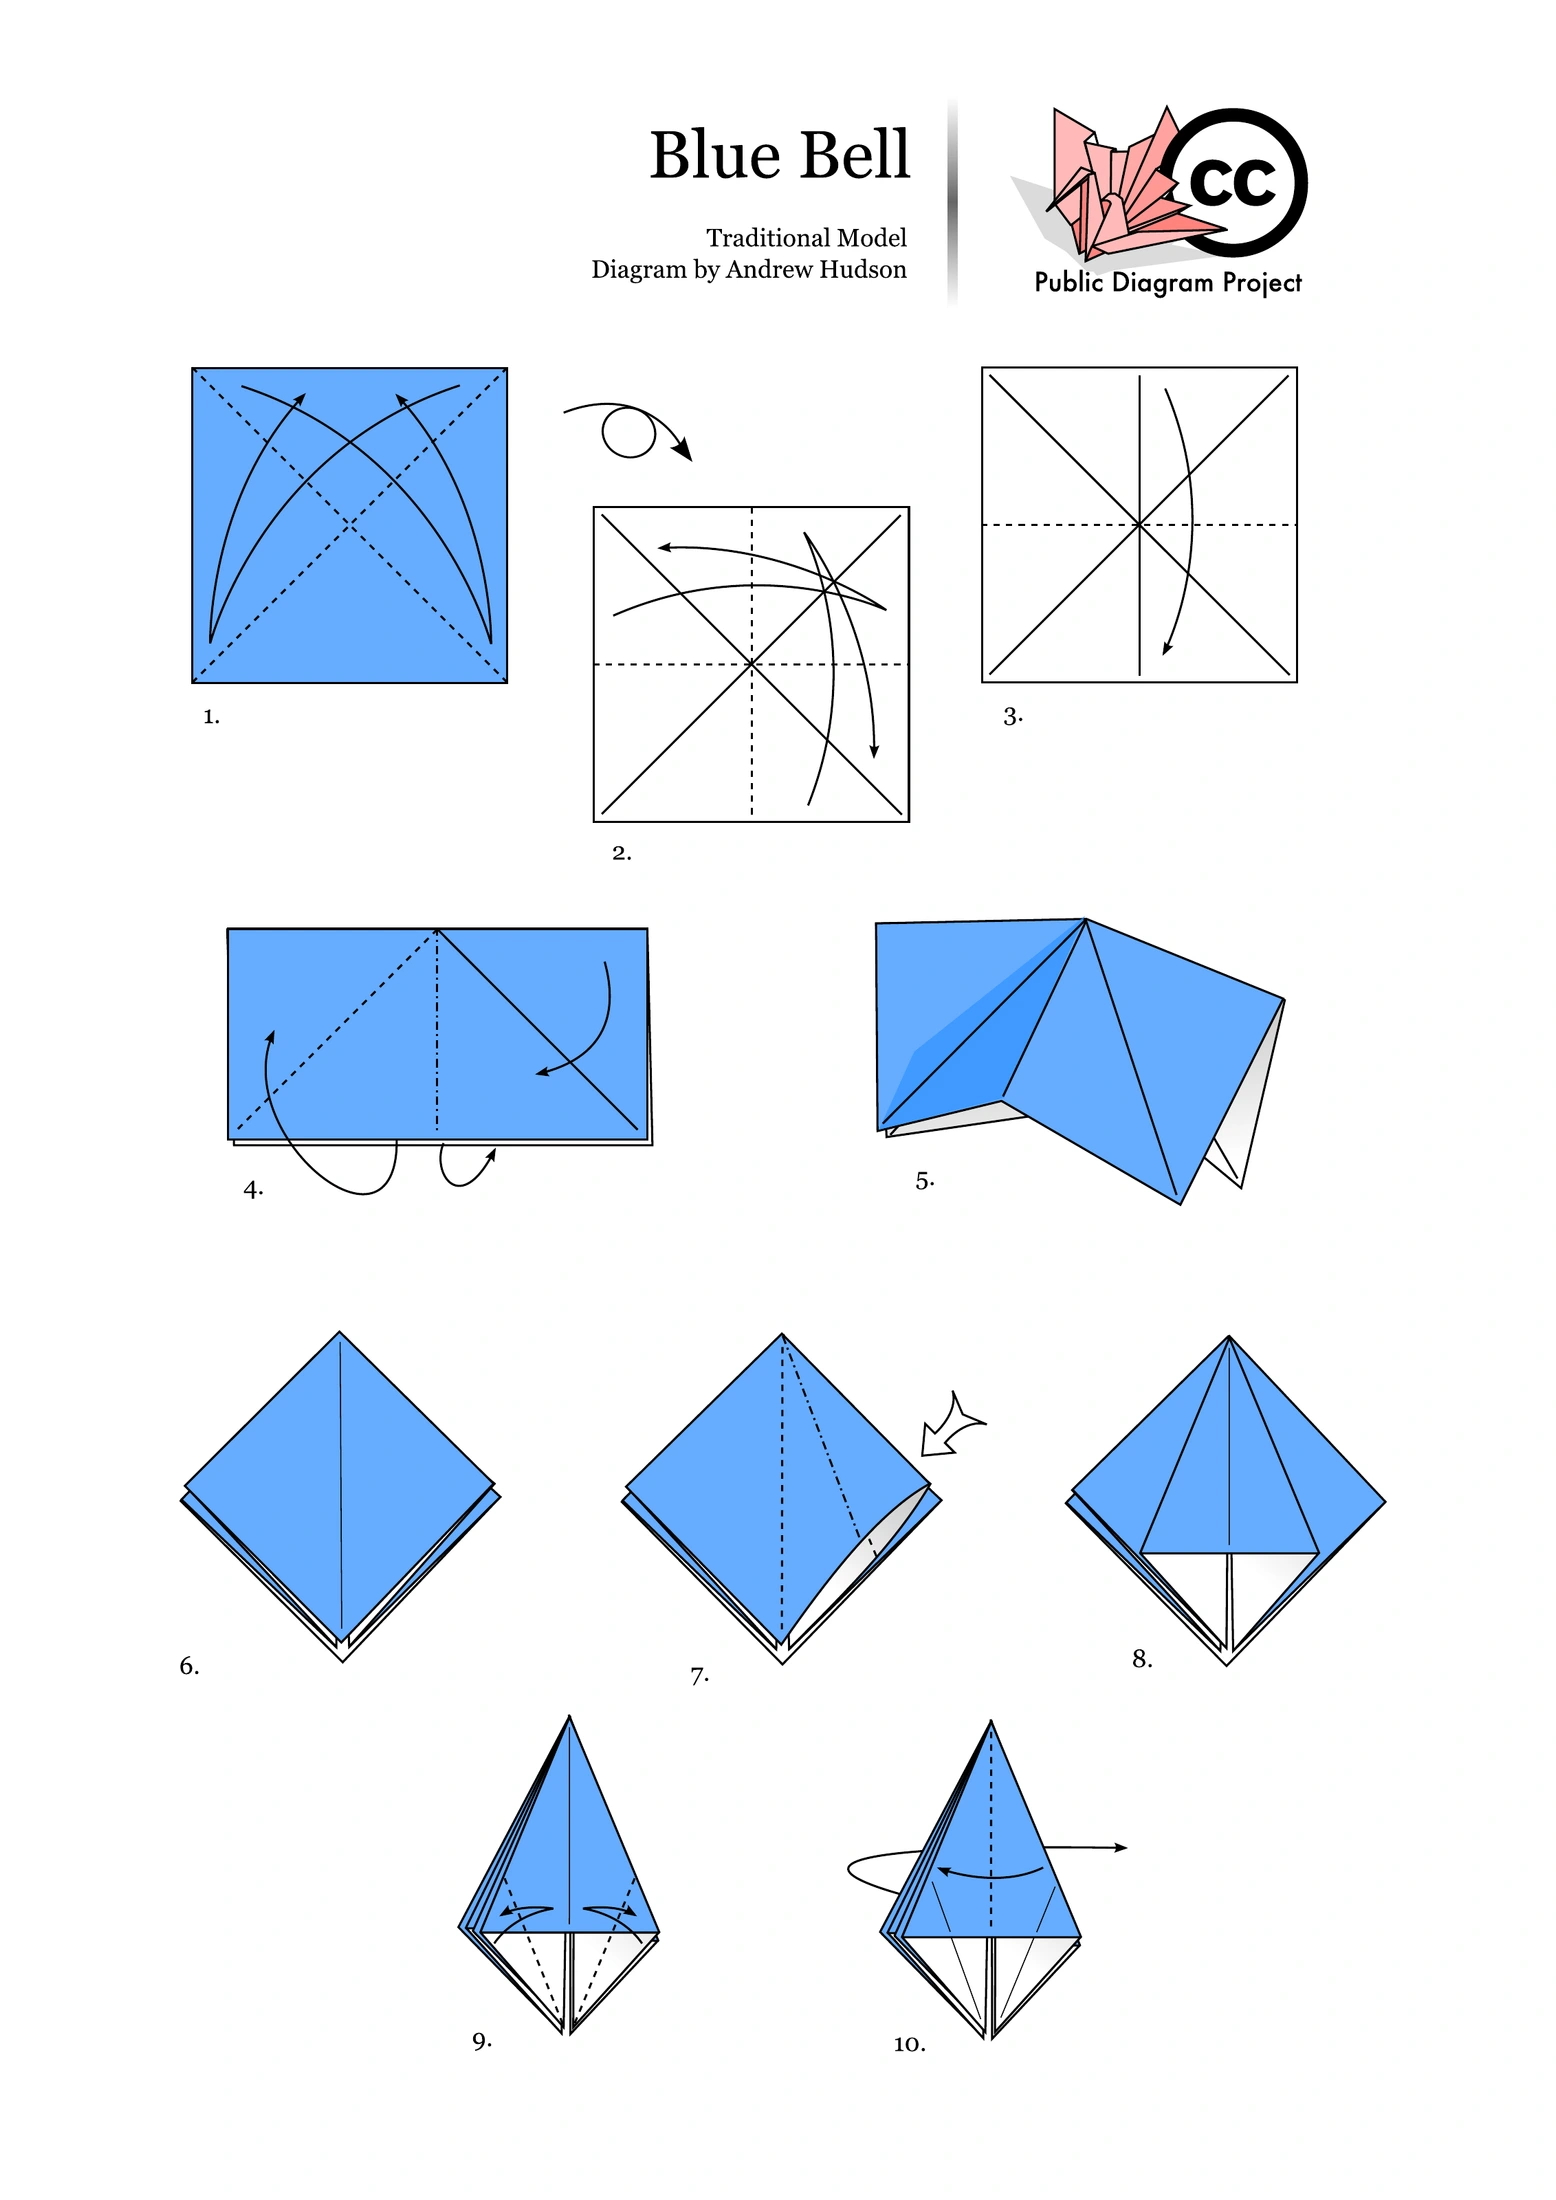
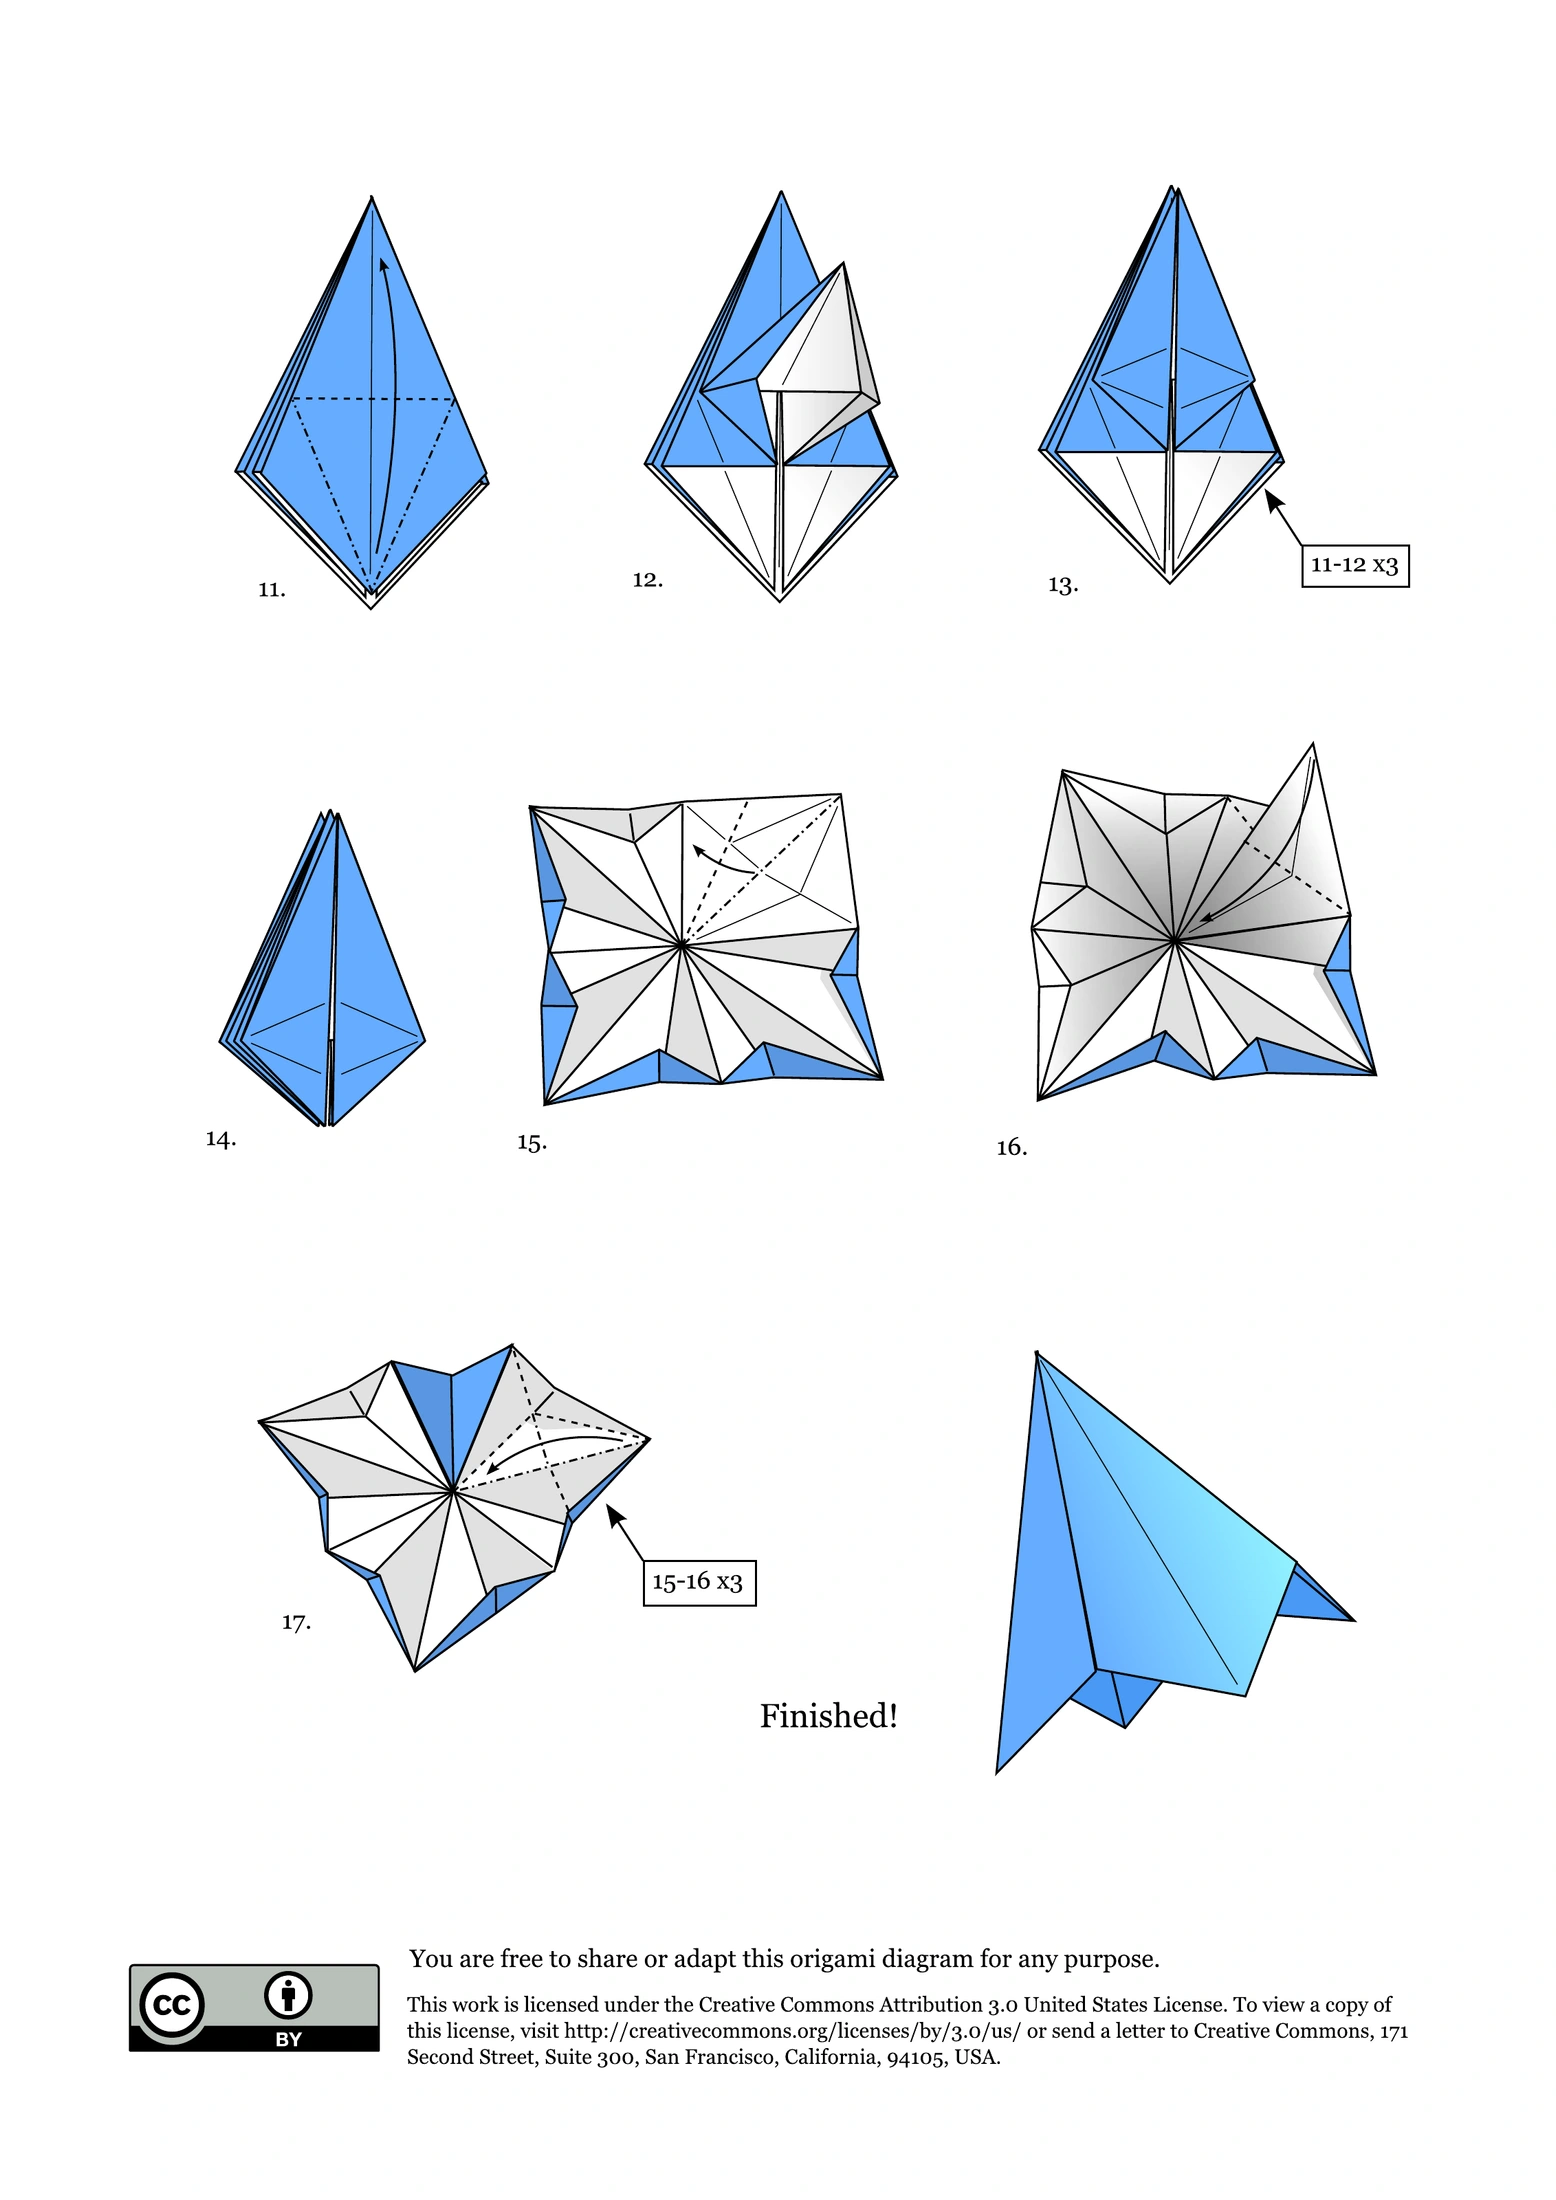
Figures retain the original folding sequence. Grey/white represent paper faces, not mandatory colors. Use thin paper and crease accurately. Instructions have been compared with the source; no physical test fold has been performed by this site.
Andrew Hudson / Public Diagram Project · Traditional model · CC BY 3.0 US
Diagram credits
- Andrew Hudson / Public Diagram Project · Traditional modelhttps://ahudsonorigami.wordpress.com/2011/11/07/bluebell/
- CC BY 3.0 UShttps://creativecommons.org/licenses/by/3.0/us/