बनाने की मार्गदर्शिका · 17 illustrated sections
ओरिगामी सारस
Follow 17 illustrated sections. Download the complete making guide and matching paper.
चित्र सहित चरण
 1
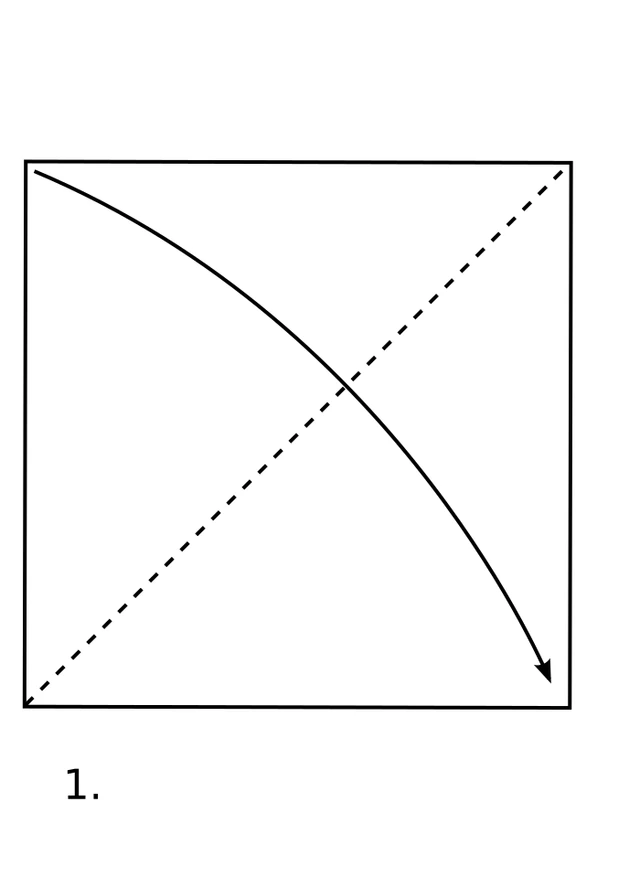
Start with a square, white side up. Fold the upper-left corner to the lower-right corner to form a triangle.
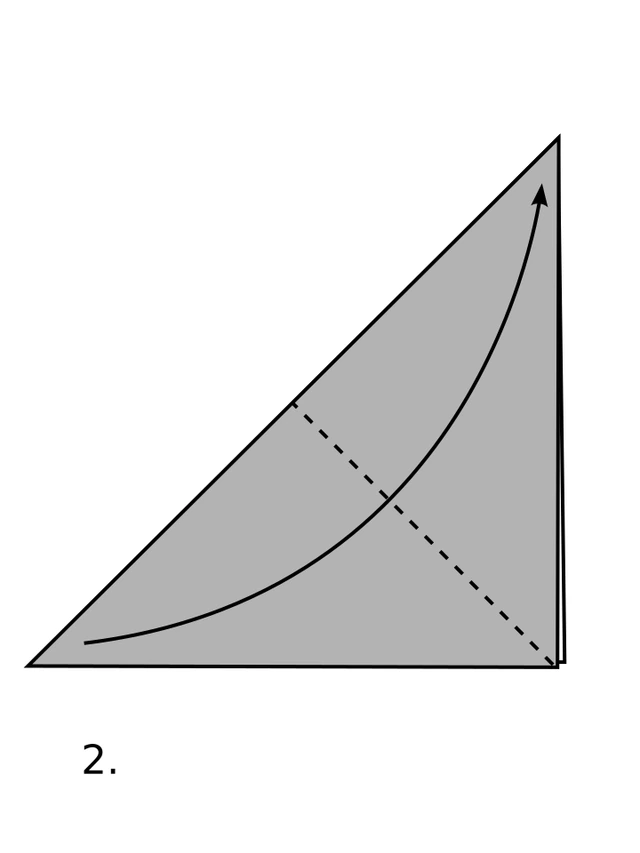 2
Fold the lower-left corner of the triangle to its upper-right corner and crease.
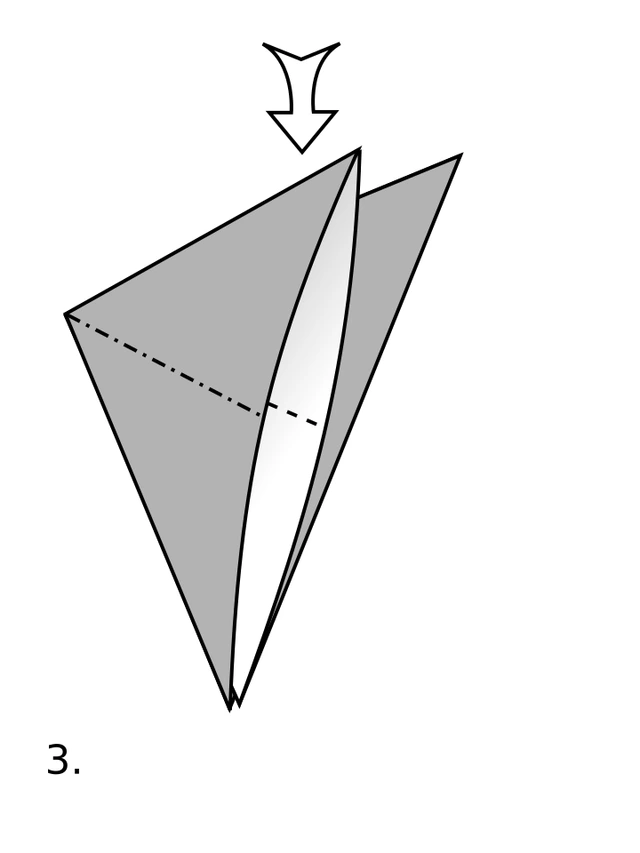 3
Open the upper triangular pocket and squash it downward into a square.
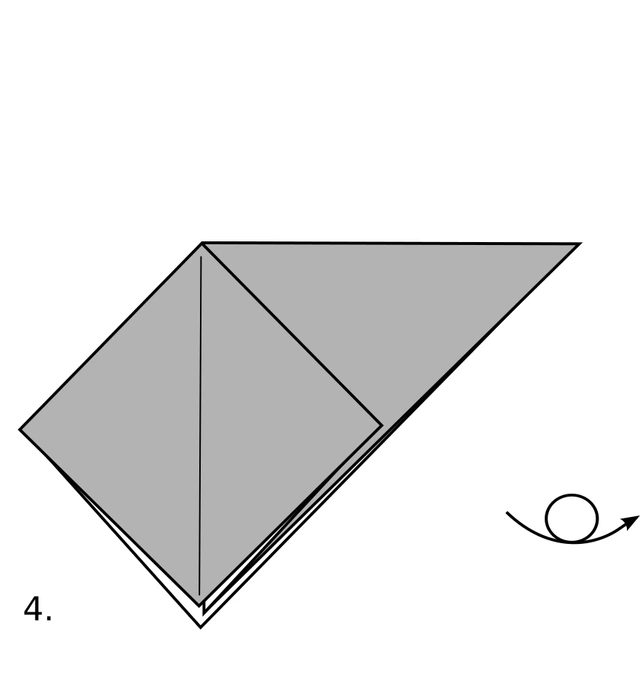 4
Turn the whole model over; do not merely rotate it on the table.
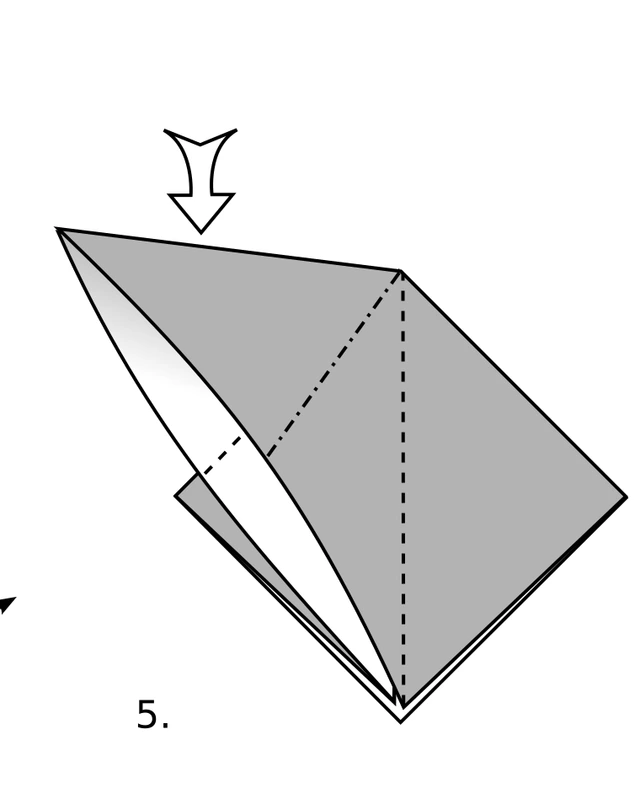 5
Open and squash the remaining pocket as in step 3. Keep the open corners pointing down.
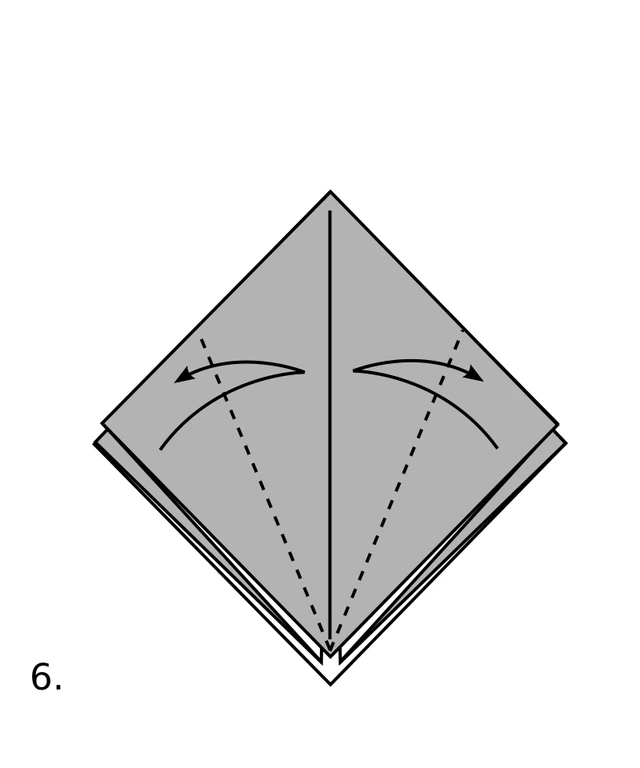 6
On the front top layer only, fold the lower sloping edges to the center, crease, and unfold.
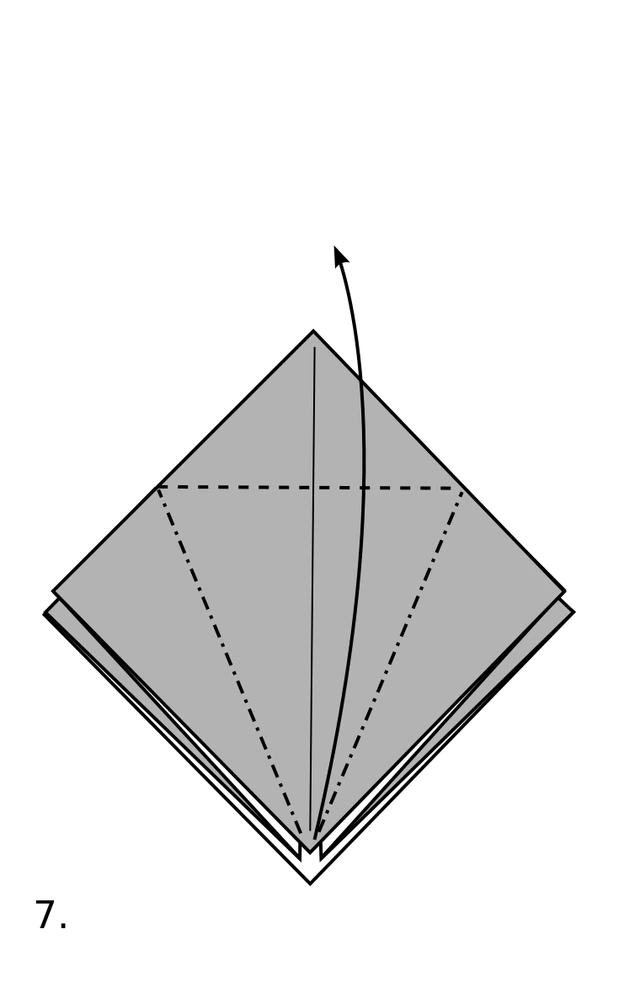 7
Crease the top triangle across the ends of those folds and unfold. Lift the bottom corner of the front layer.
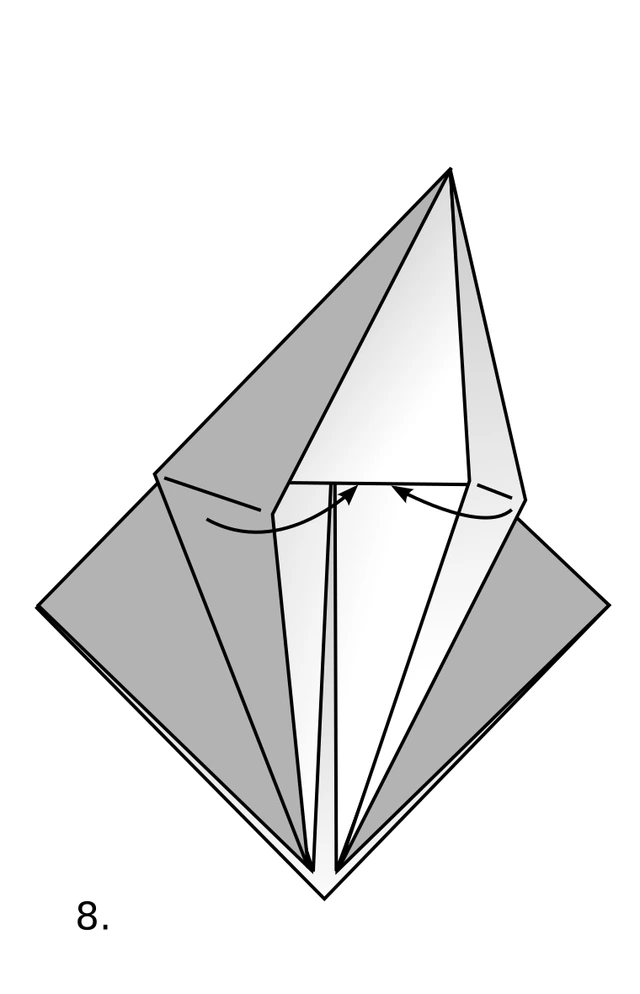 8
Keeping the back flat, open the front pocket. Bring its sides inward along the creases and flatten into a long diamond.
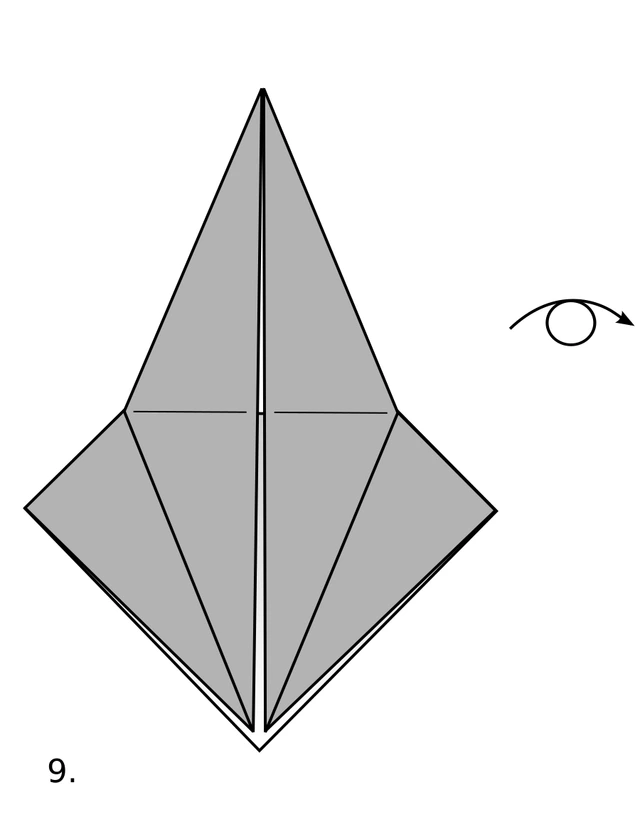 9
The front petal fold is complete. Turn the whole model over.
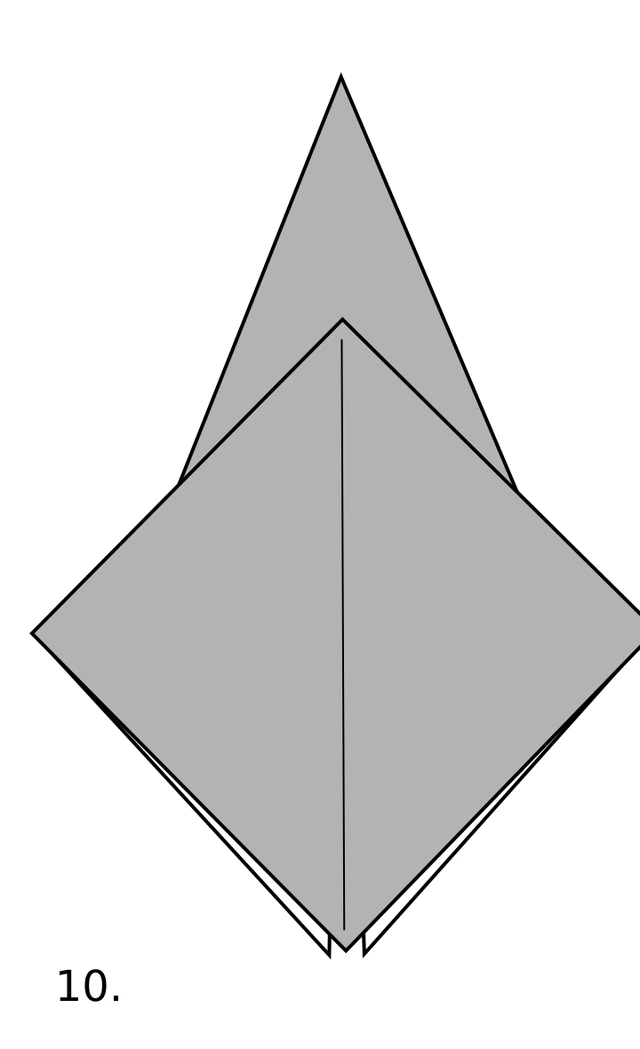 10
The reverse is still square. Repeat the preparatory folds from steps 6 and 7.
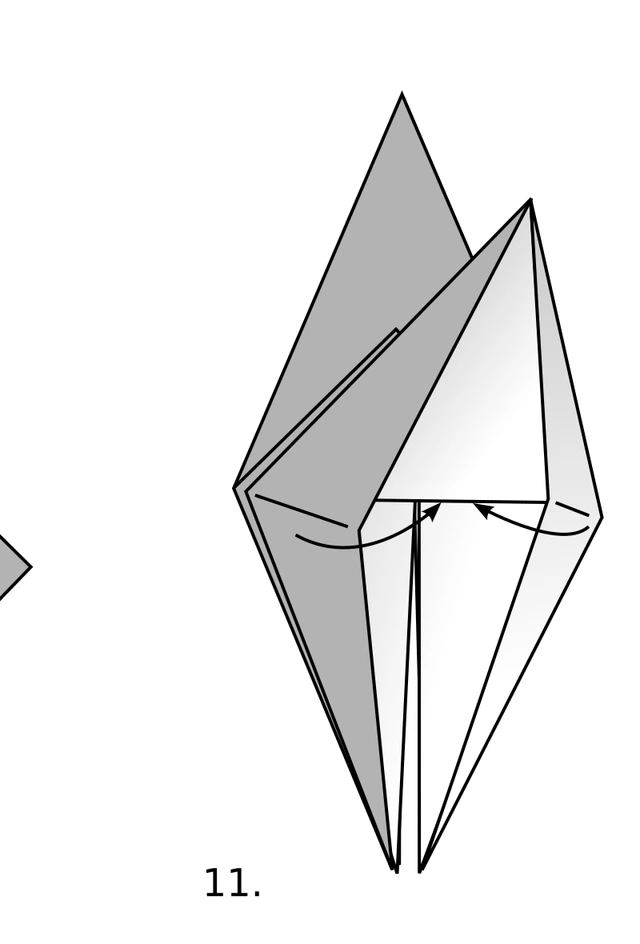 11
Repeat the petal fold from step 8 on the reverse to form a matching long diamond.
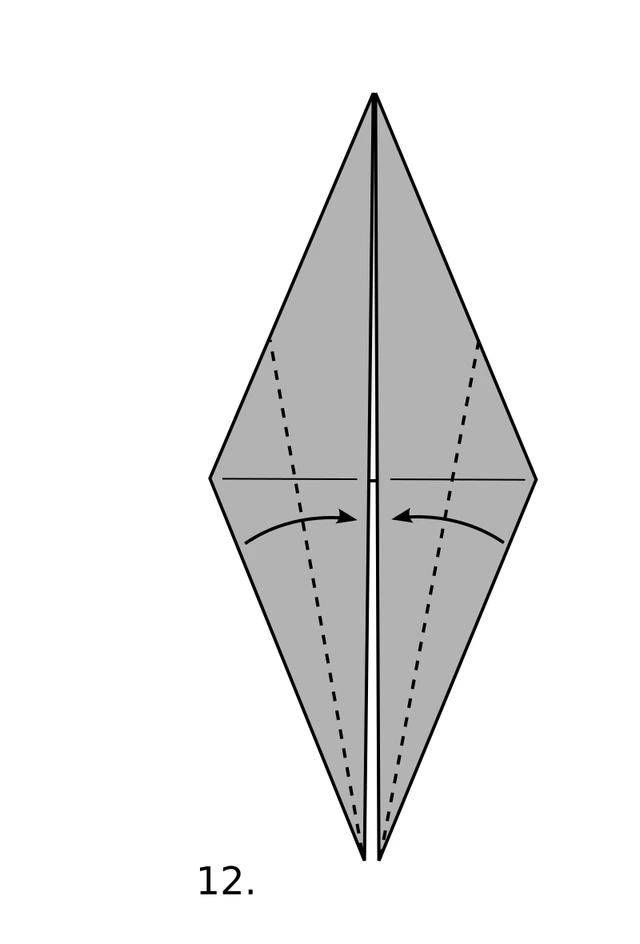 12
With two separate narrow points down, fold the lower edges to the center on the front and back.
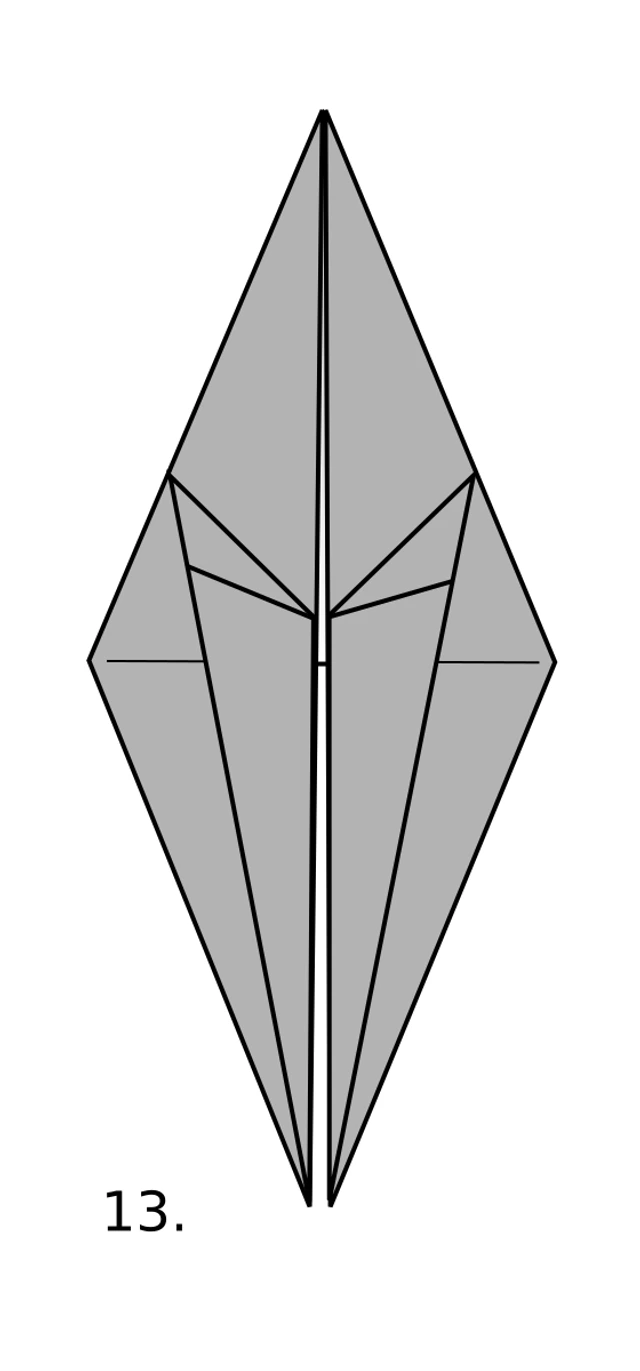 13
Check that two separate thin points remain below and two broad wing flaps remain above.
 14
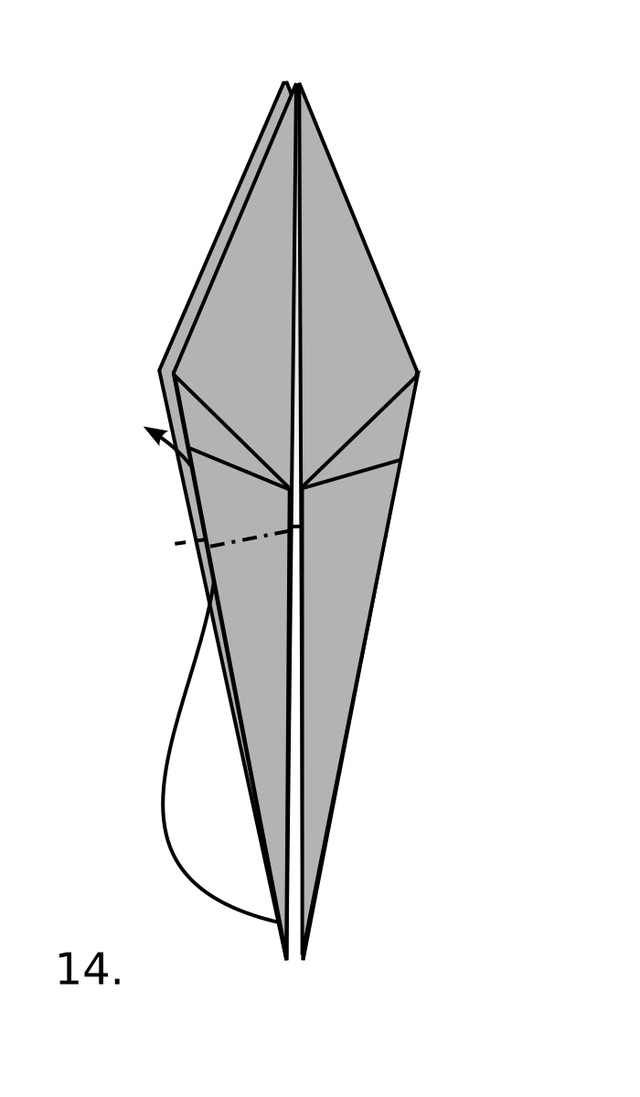
Inside-reverse-fold the left thin point upward: open its layers slightly, tuck the point between them, and close.
 15
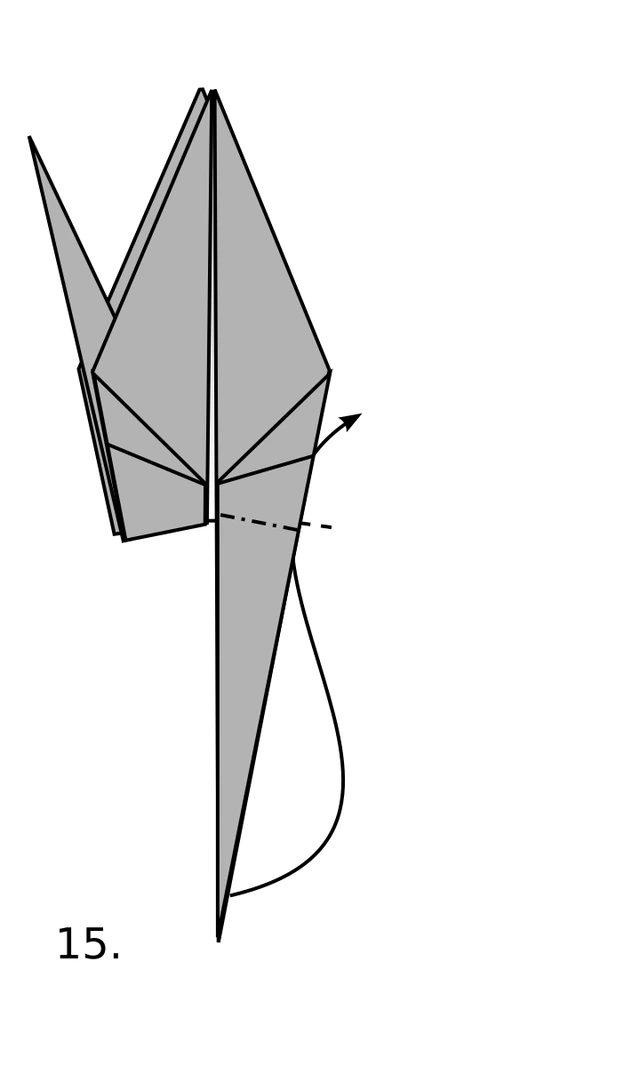
Inside-reverse-fold the other thin point upward to make the neck and tail.
 16
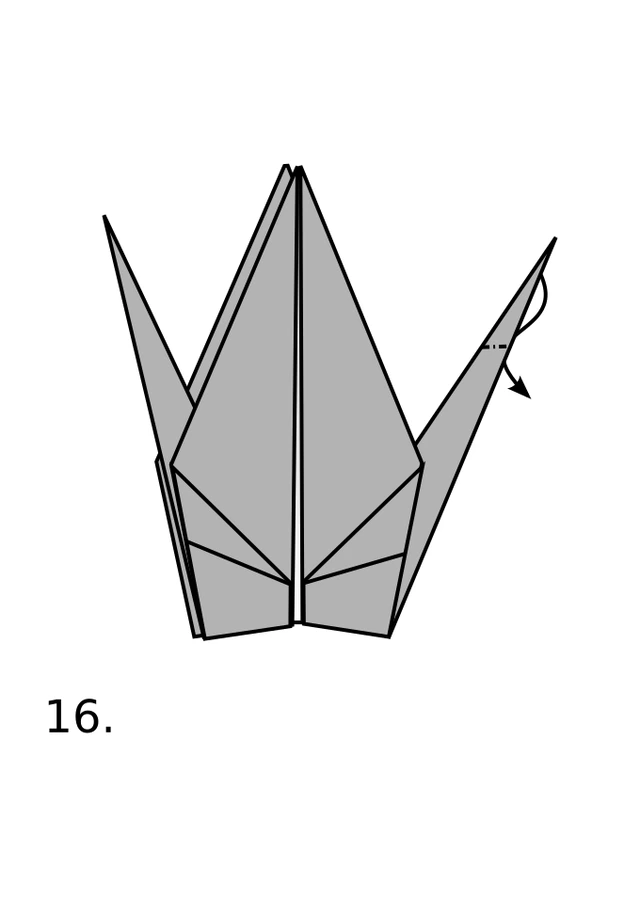
Choose one point for the head. Inside-reverse-fold its tip downward between the neck layers.
 17
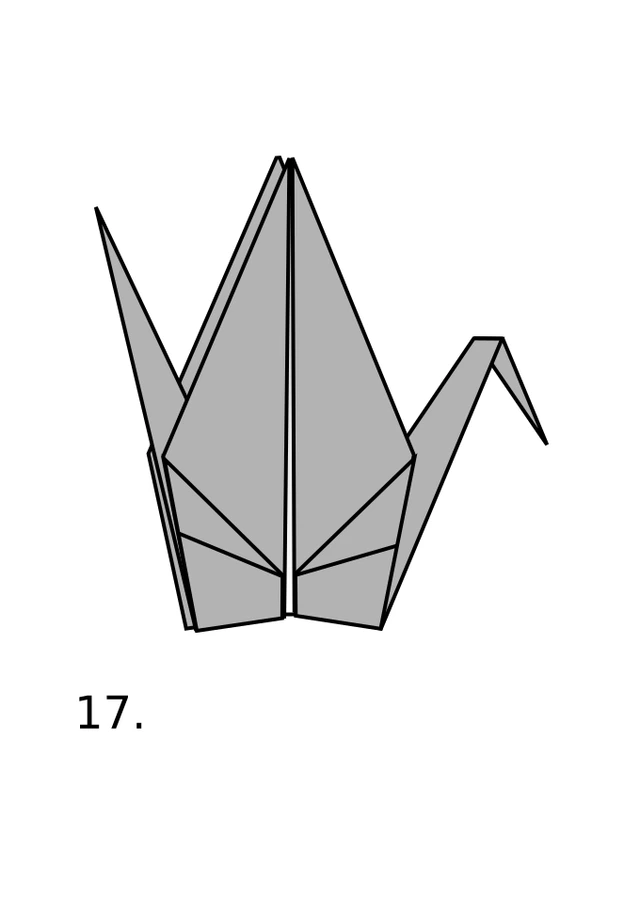
Arrange the head, tail and broad wings. The source shows the finished crane with wings upright; open them gently if desired.
Images are cropped from Andrew Hudson’s original 17-step diagram. Explanations were added for this page. Grey and white show paper faces, not required paper colors. No author endorsement; not physically tested by this site.
Andrew Hudson / Public Diagram Project; SVG layout: Origamidesigner · CC BY 3.0 US
Diagram credits
- Andrew Hudson · Crane / Public Diagram Projecthttps://ahudsonorigami.wordpress.com/2011/11/07/crane/
- CC BY 3.0 UShttps://creativecommons.org/licenses/by/3.0/us/
- Wikimedia Commons · Tsuru wiki.svg / CC BY 3.0https://commons.wikimedia.org/wiki/File:Tsuru_wiki.svg