Guide de réalisation · 24 illustrated sections
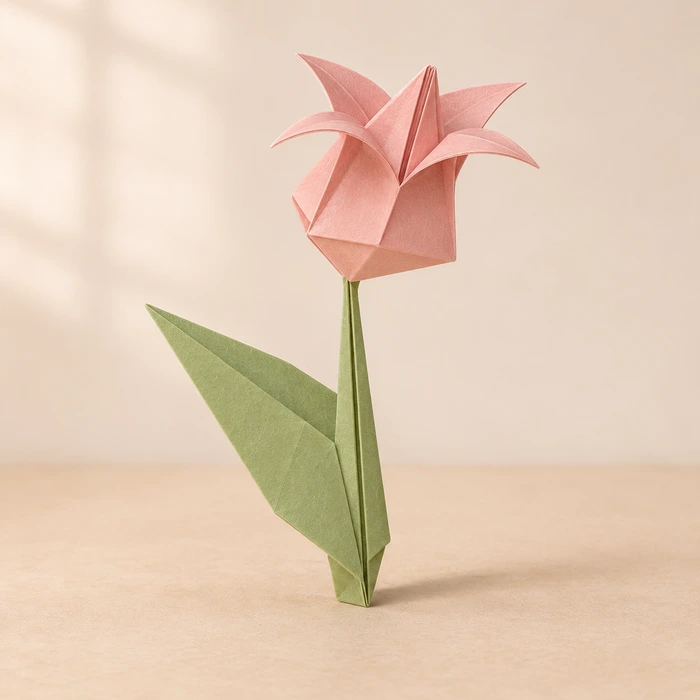
Origami Tulip and Leaf Stem
Follow 24 illustrated sections. Download the complete making guide and matching paper.
Étapes illustrées
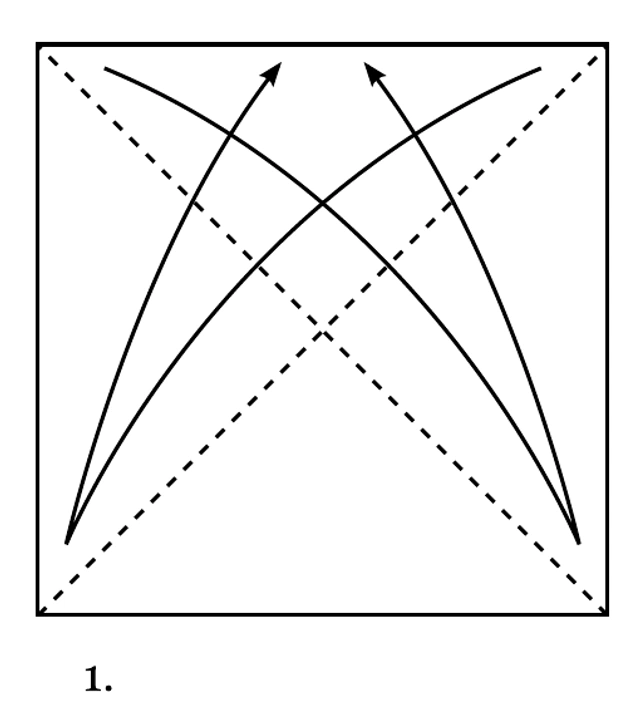 1
Flower 1: white side up, crease both diagonals and unfold.
 2
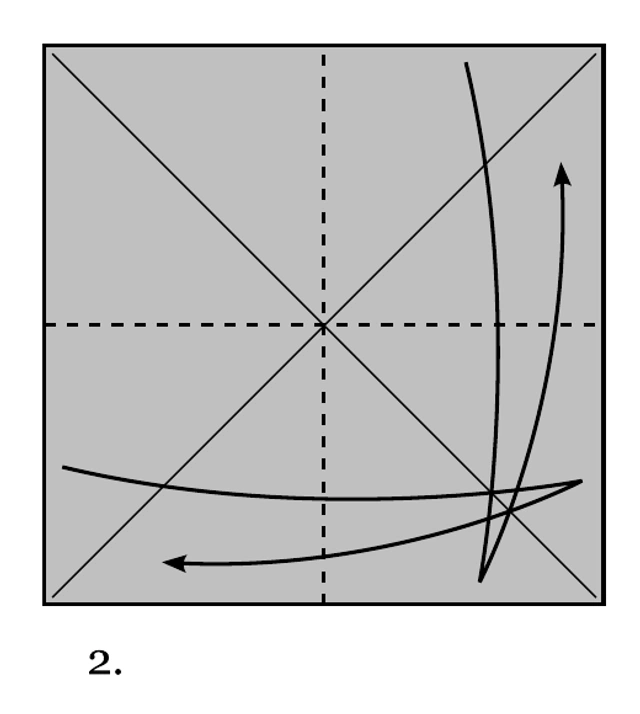
Flower 2: turn over, crease both midlines and unfold.
 3
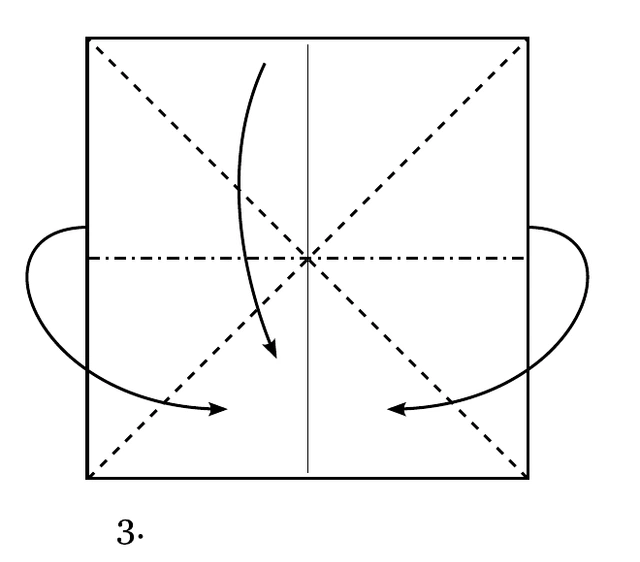
Flower 3: bring the sides inward along the midline and collapse the top down.
 4
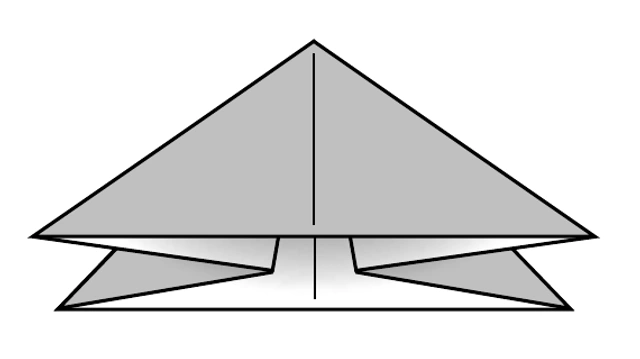
Flower 4: flatten into a double-layer triangle, or waterbomb base.
 5
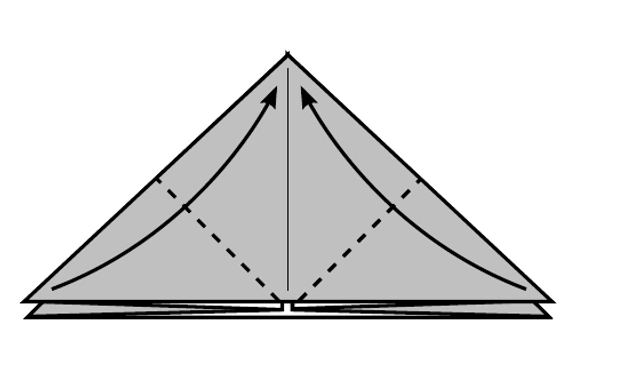
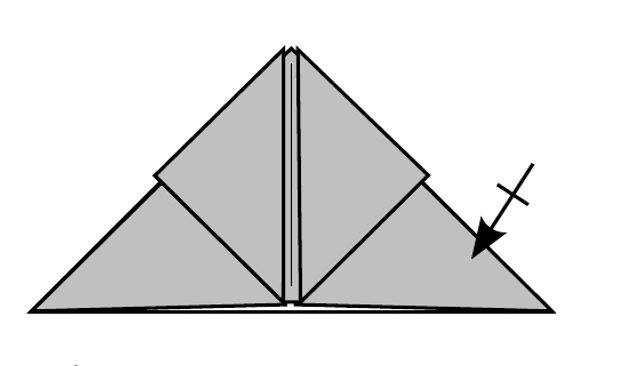
Flower 5: fold the two front bottom corners up to the top point.
 6
Flower 6: repeat on the back to form a diamond.
 7
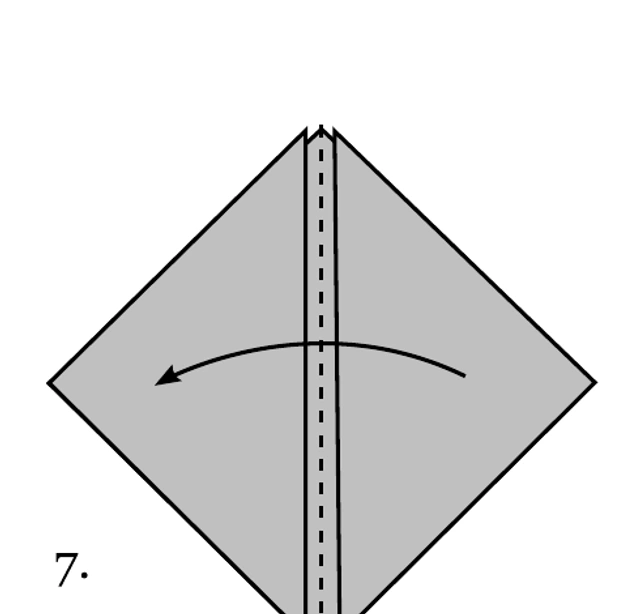
Flower 7: turn one front flap like a book page, and do the same on the back.
 8
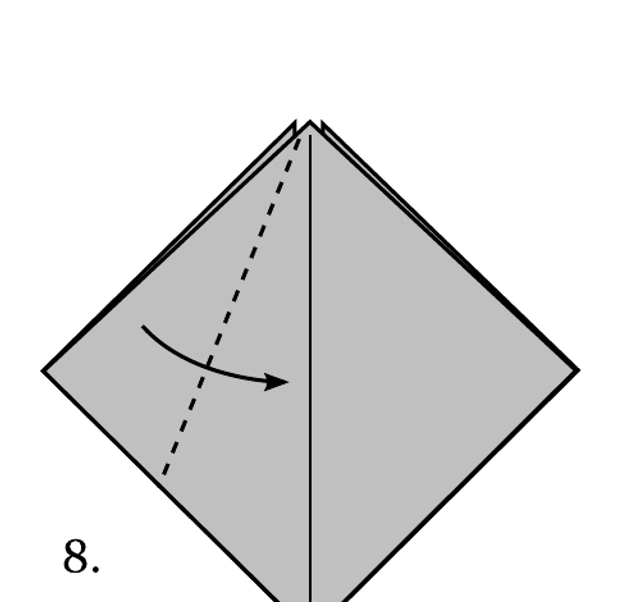
Flower 8: fold the left front edge across the central line as shown.
 9
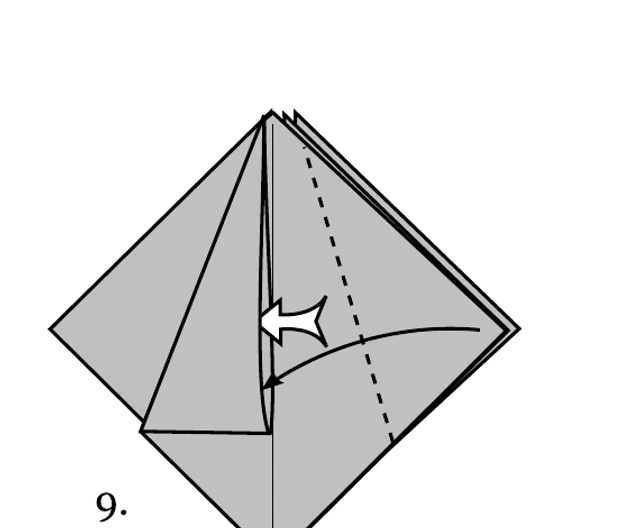
Flower 9: fold the right edge over and open the pocket at the left folded edge.
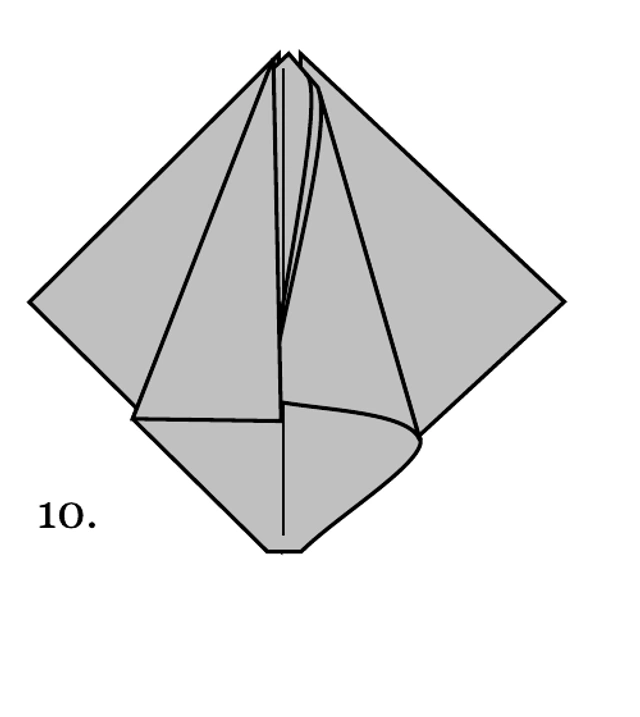 10
Flower 10: tuck the right corner inside that pocket.
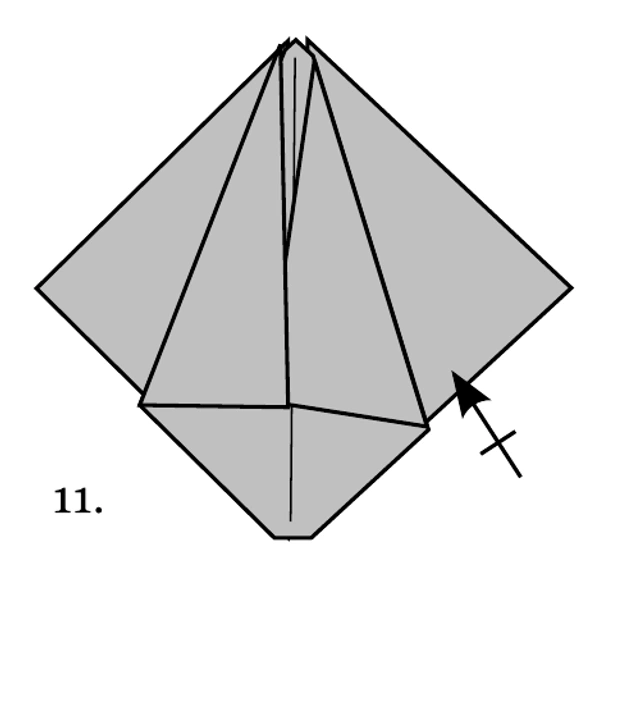 11
Flower 11: repeat the interlocking folds on the back.
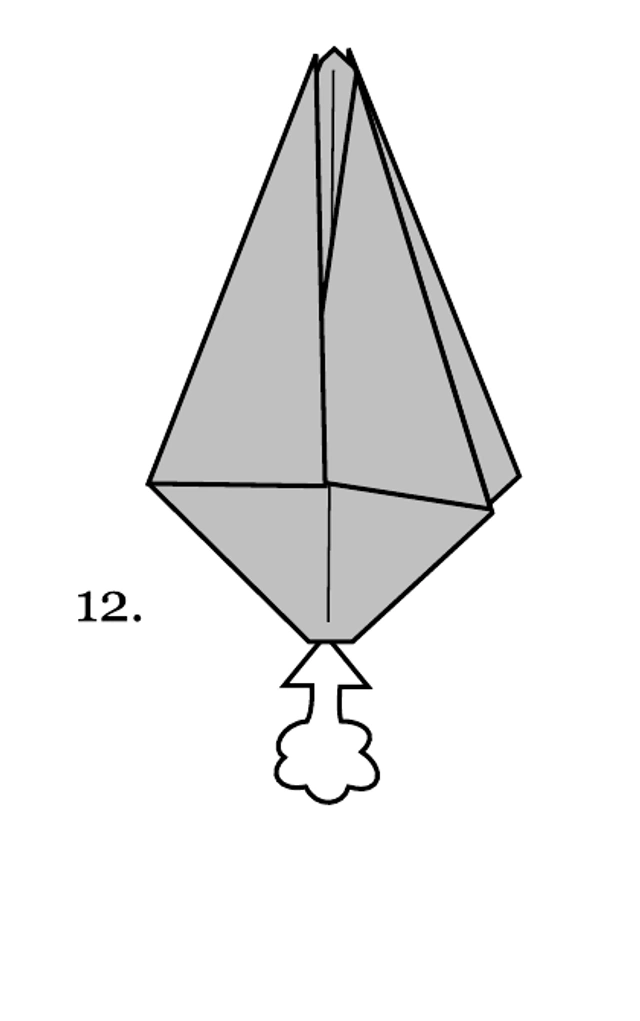 12
Flower 12: gently blow into the small hole at the bottom to inflate the flower.
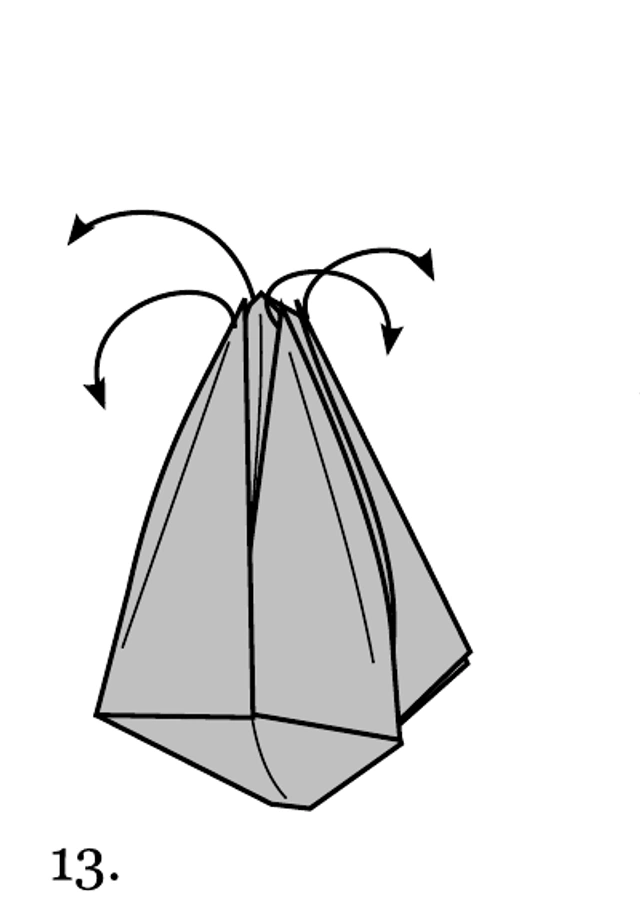 13
Flower 13: peel the four top petal tips outward.
 14
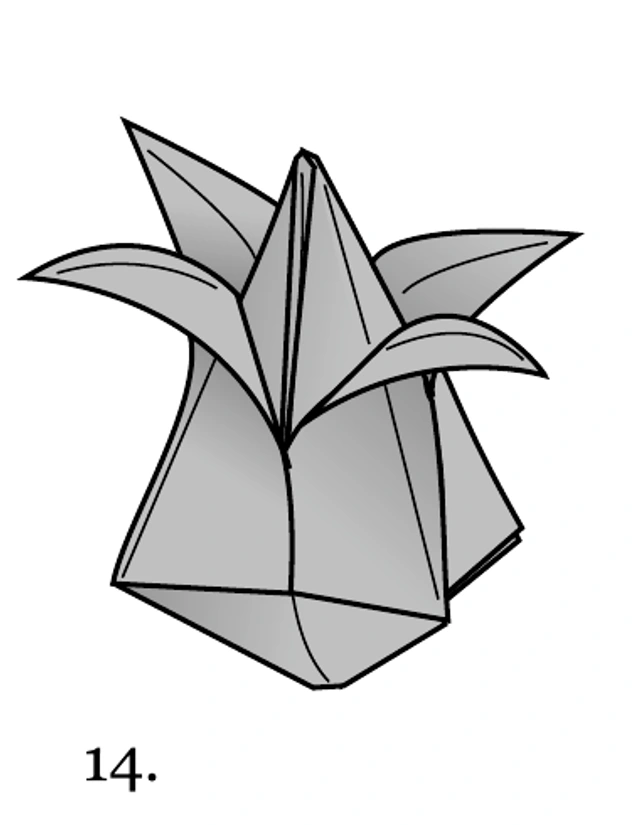
Flower 14: curl the petals slightly; keep the bottom hole available for the stem.
 15
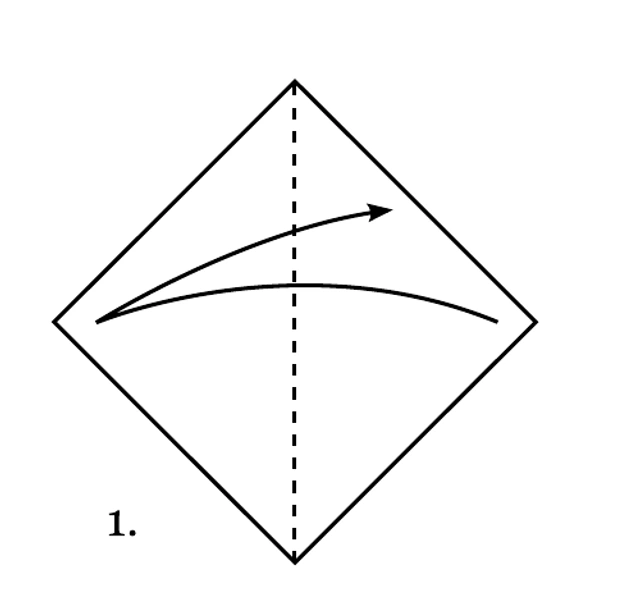
Stem 1: take the second, same-size square; crease a diagonal and unfold.
 16
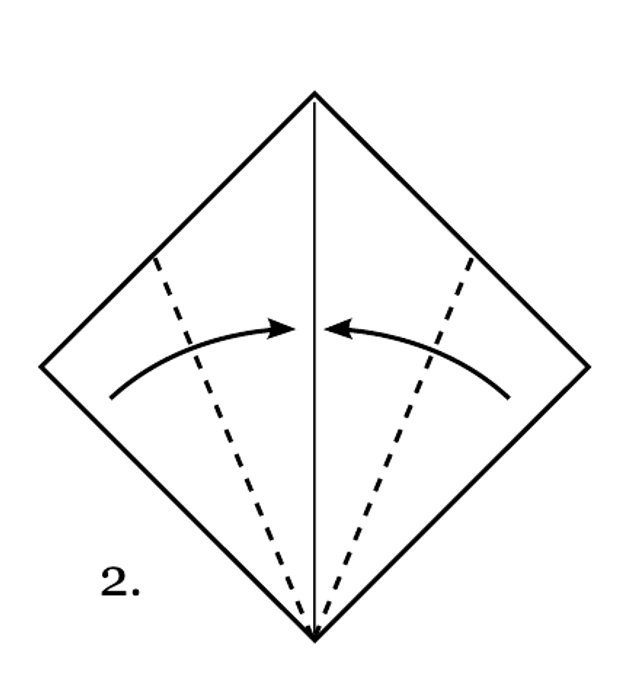
Stem 2: fold the two lower edges to the diagonal center line.
 17
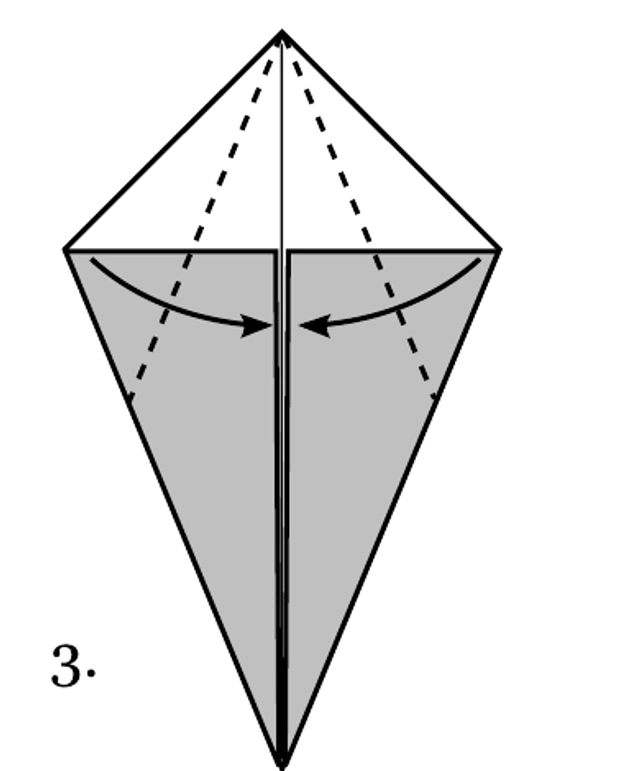
Stem 3: fold the two upper edges to the same center line.
 18
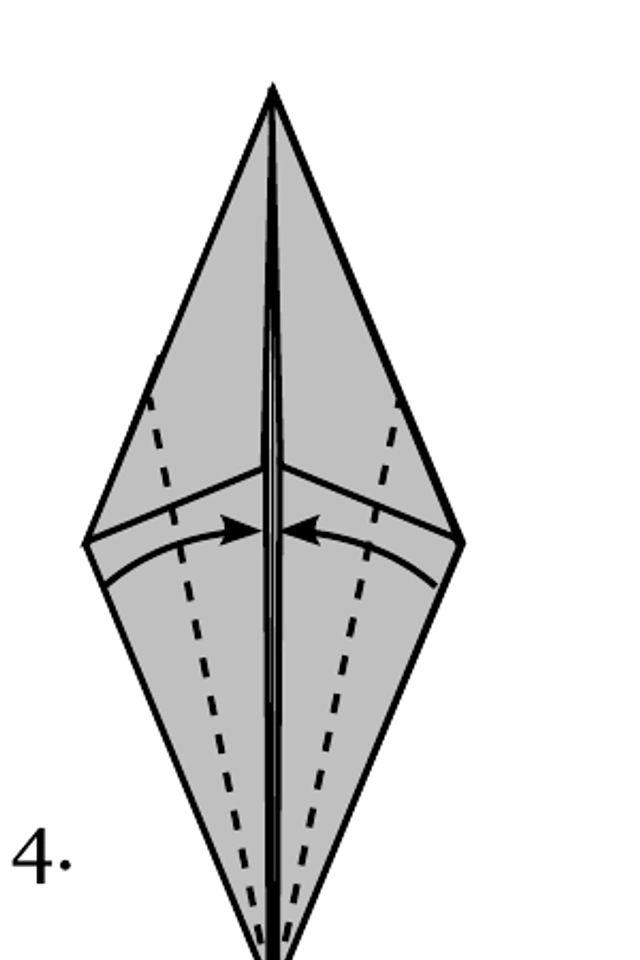
Stem 4: narrow the two lower edges to the center again.
 19
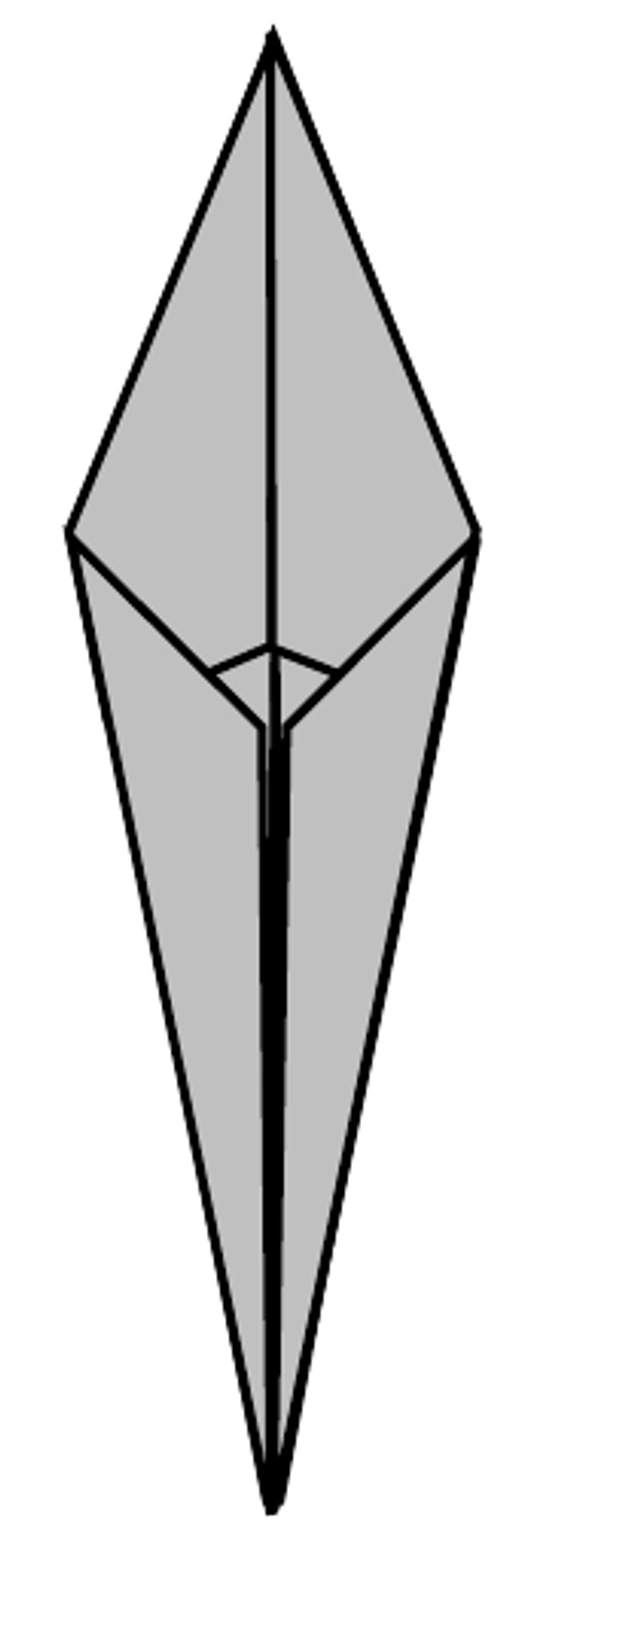
Stem 5: check the narrow kite shape is aligned.
 20
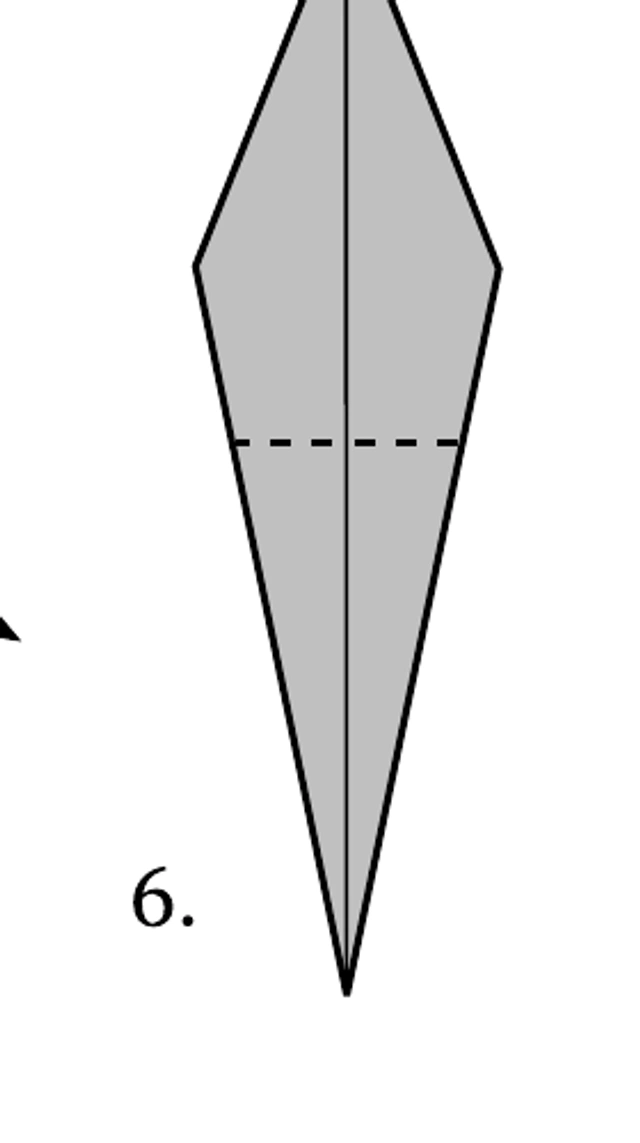
Stem 6: turn over, then fold the lower point upward at the marked horizontal crease.
 21
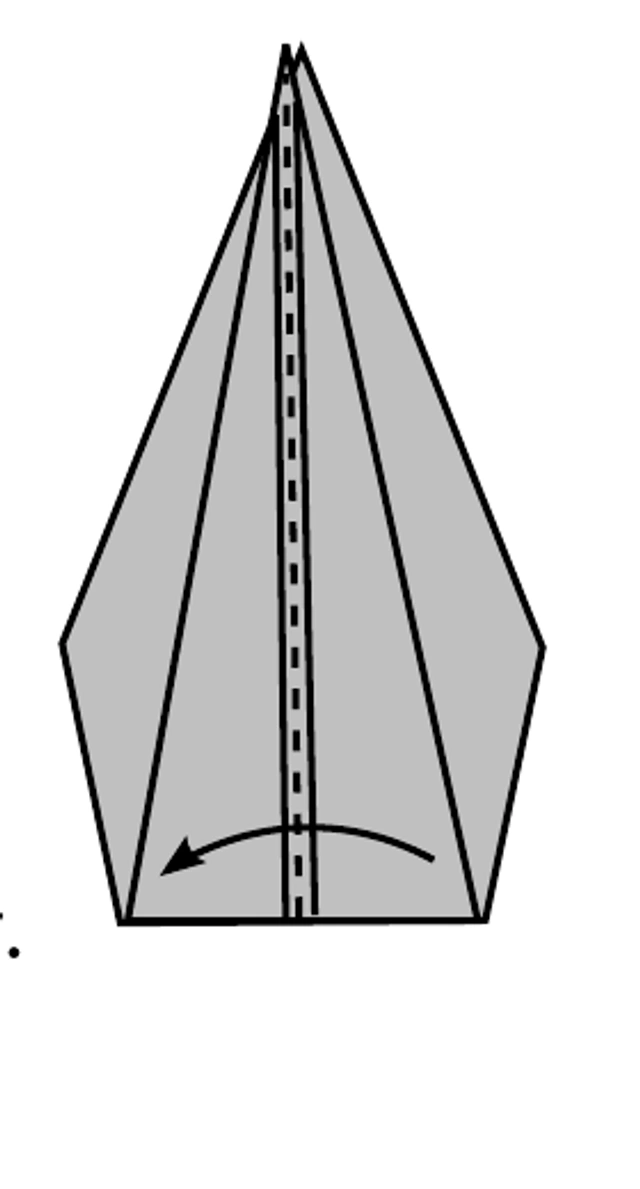
Stem 7: fold the whole model in half along its long center line.
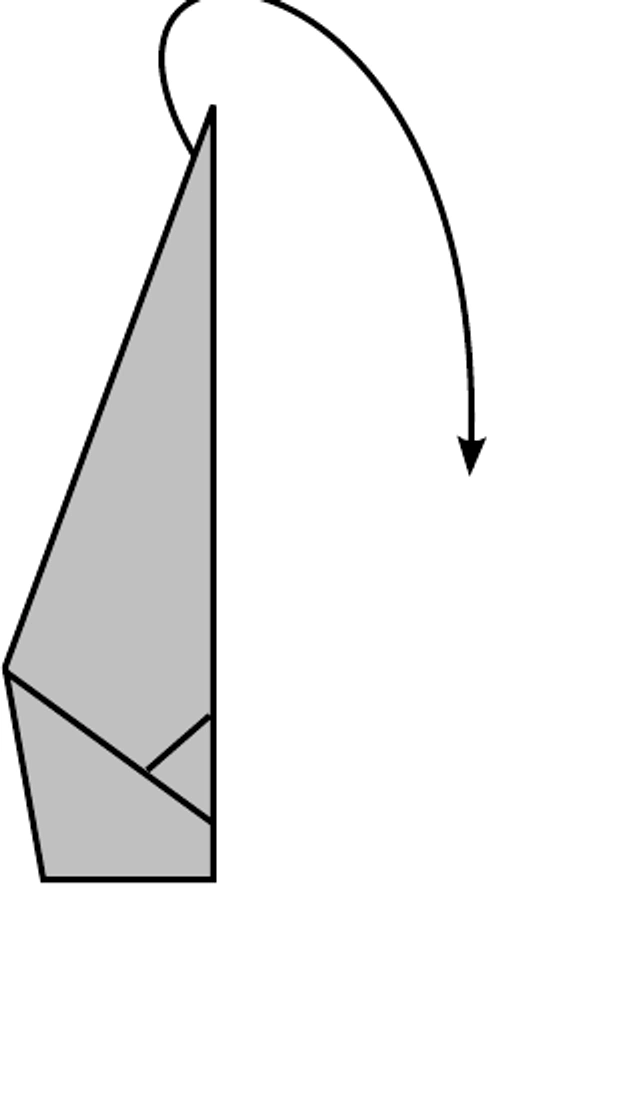 22
Stem 8: pull the outer section outward to separate the leaf from the stem.
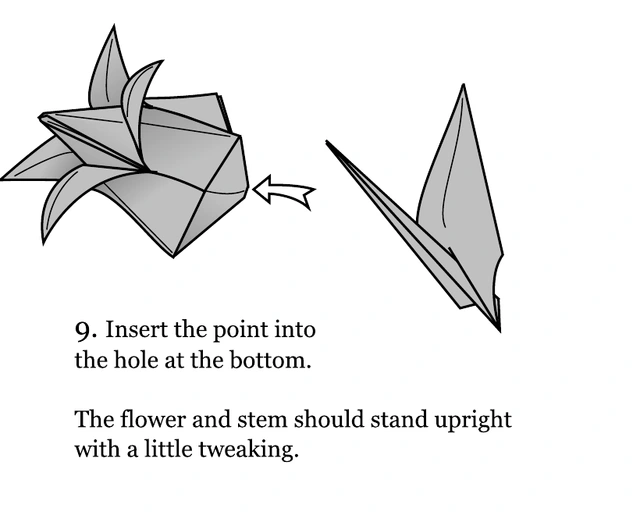 23
Assembly 9: insert the thin stem tip into the flower’s bottom hole. Adjust the leaf and base for balance.
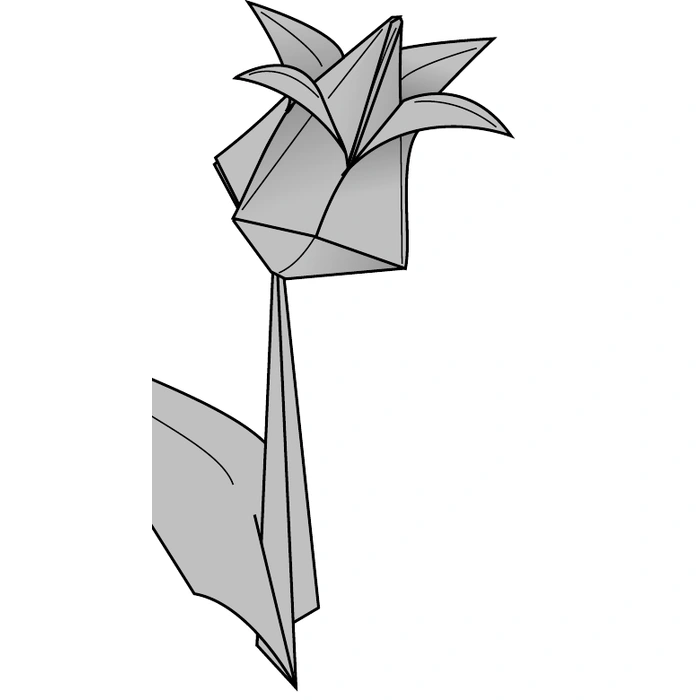 24
Check the completed structure against the original finished diagram, then gently adjust the folds.
Full folding diagram · click to enlarge
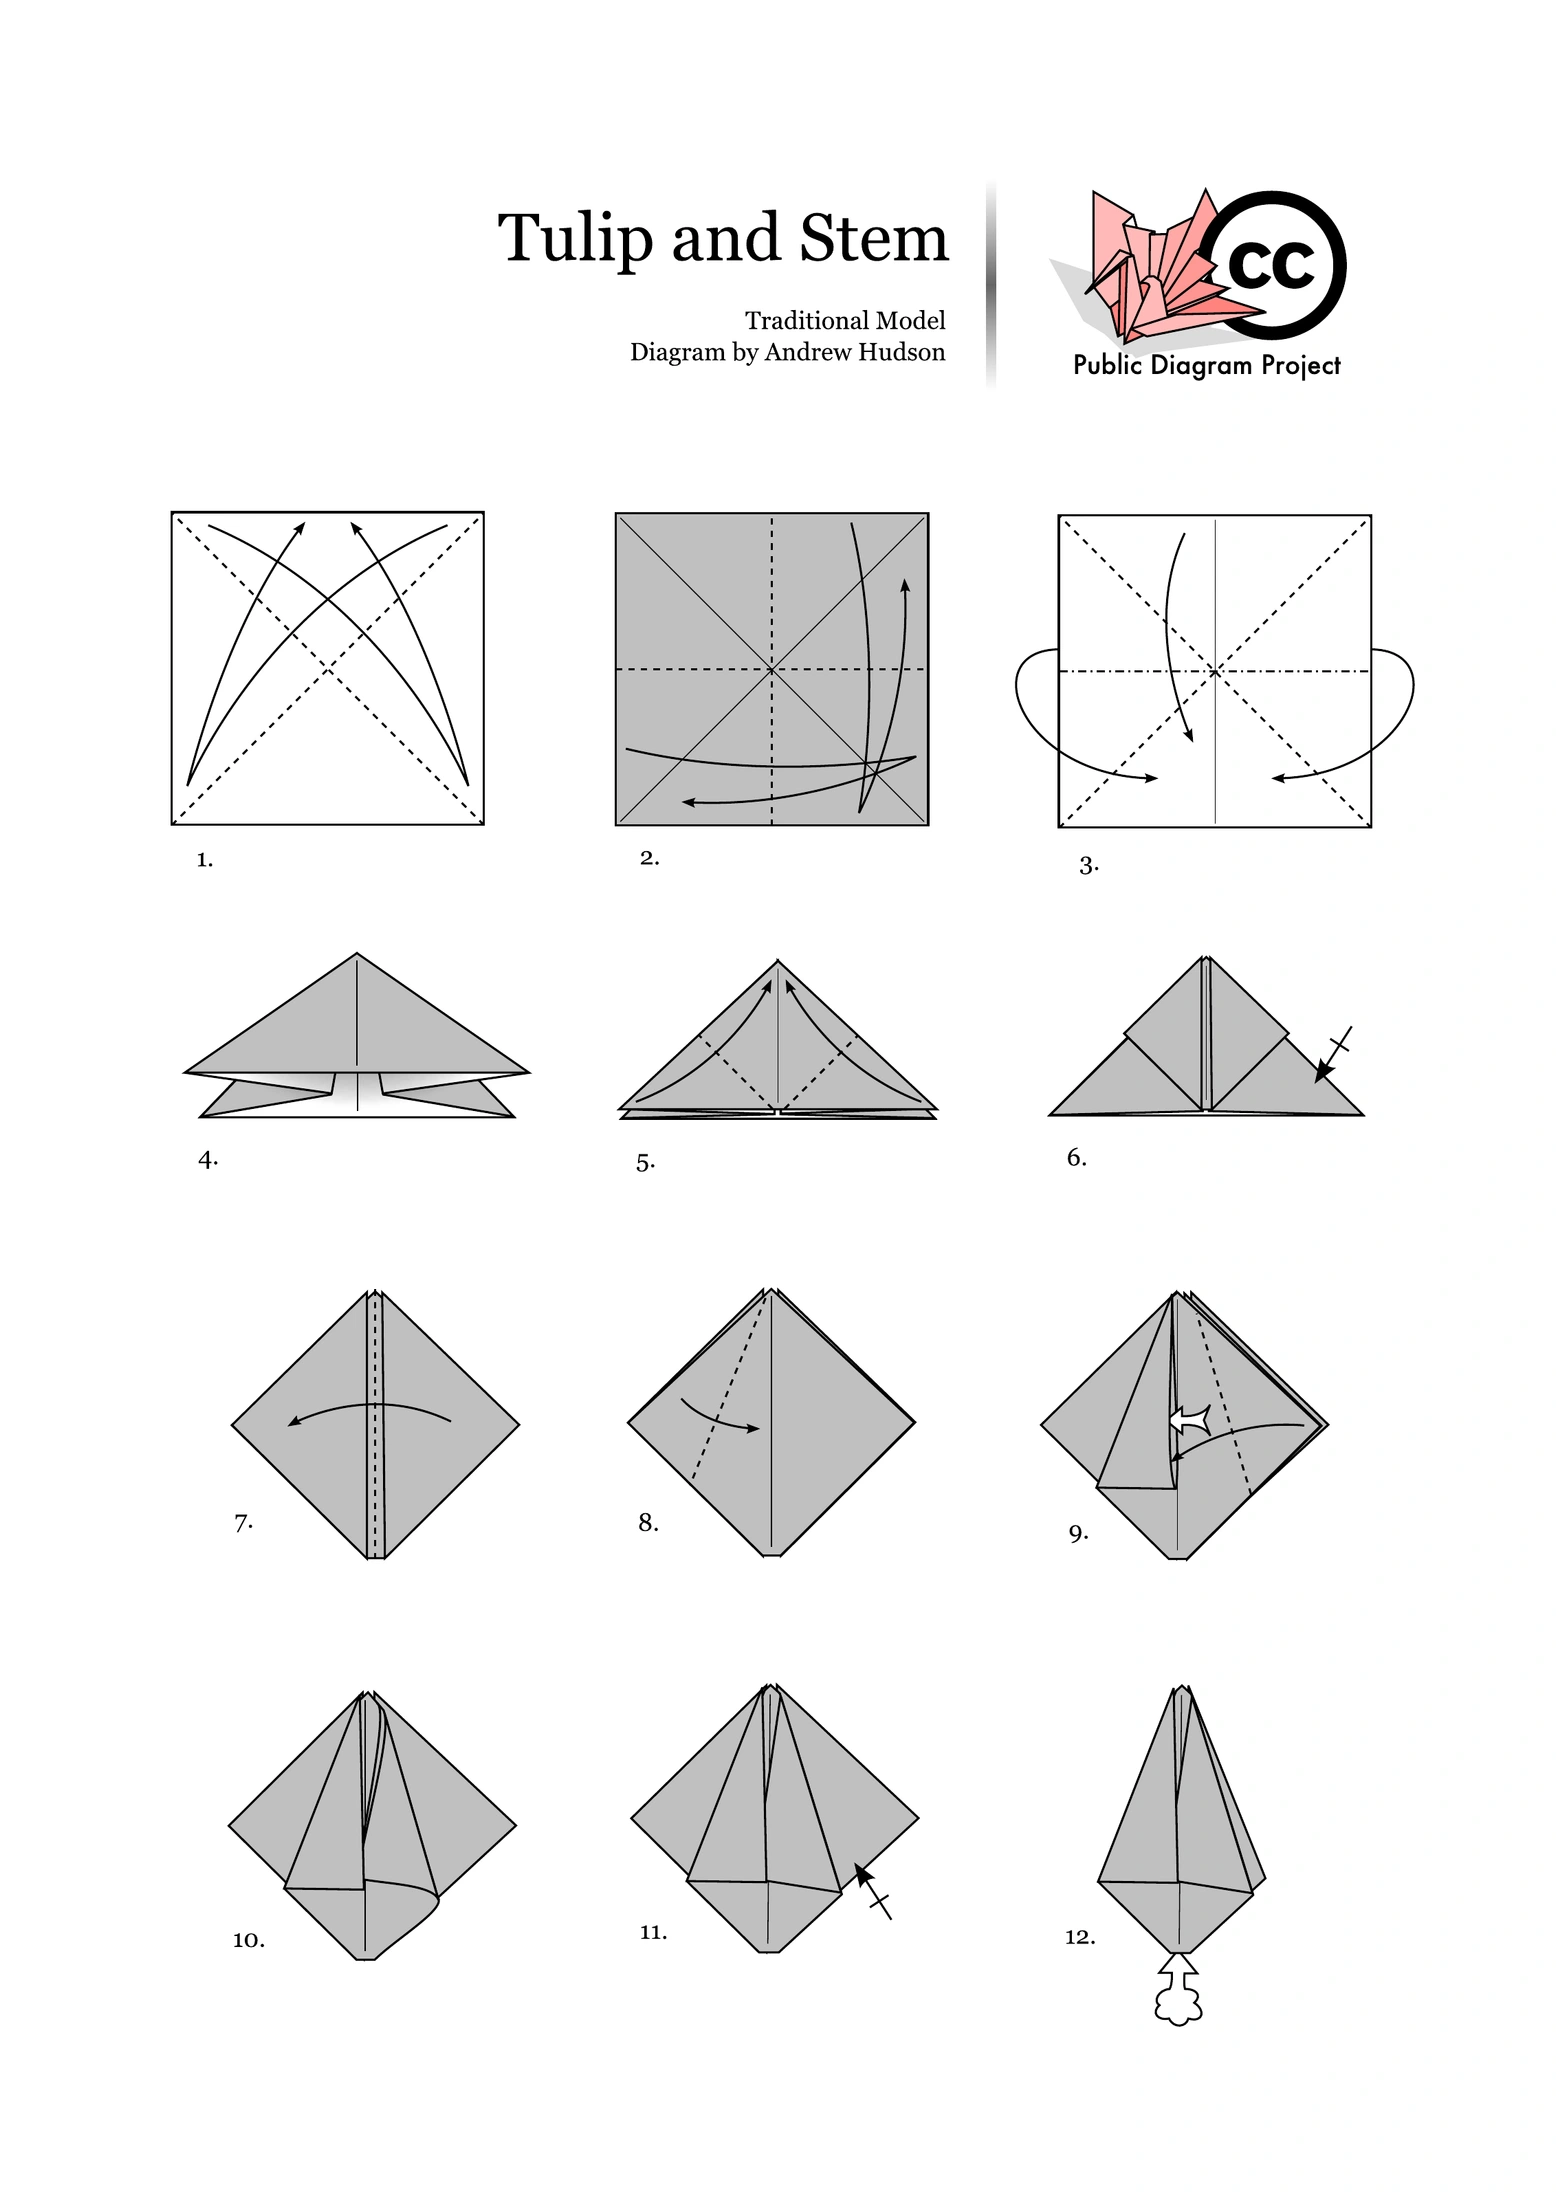
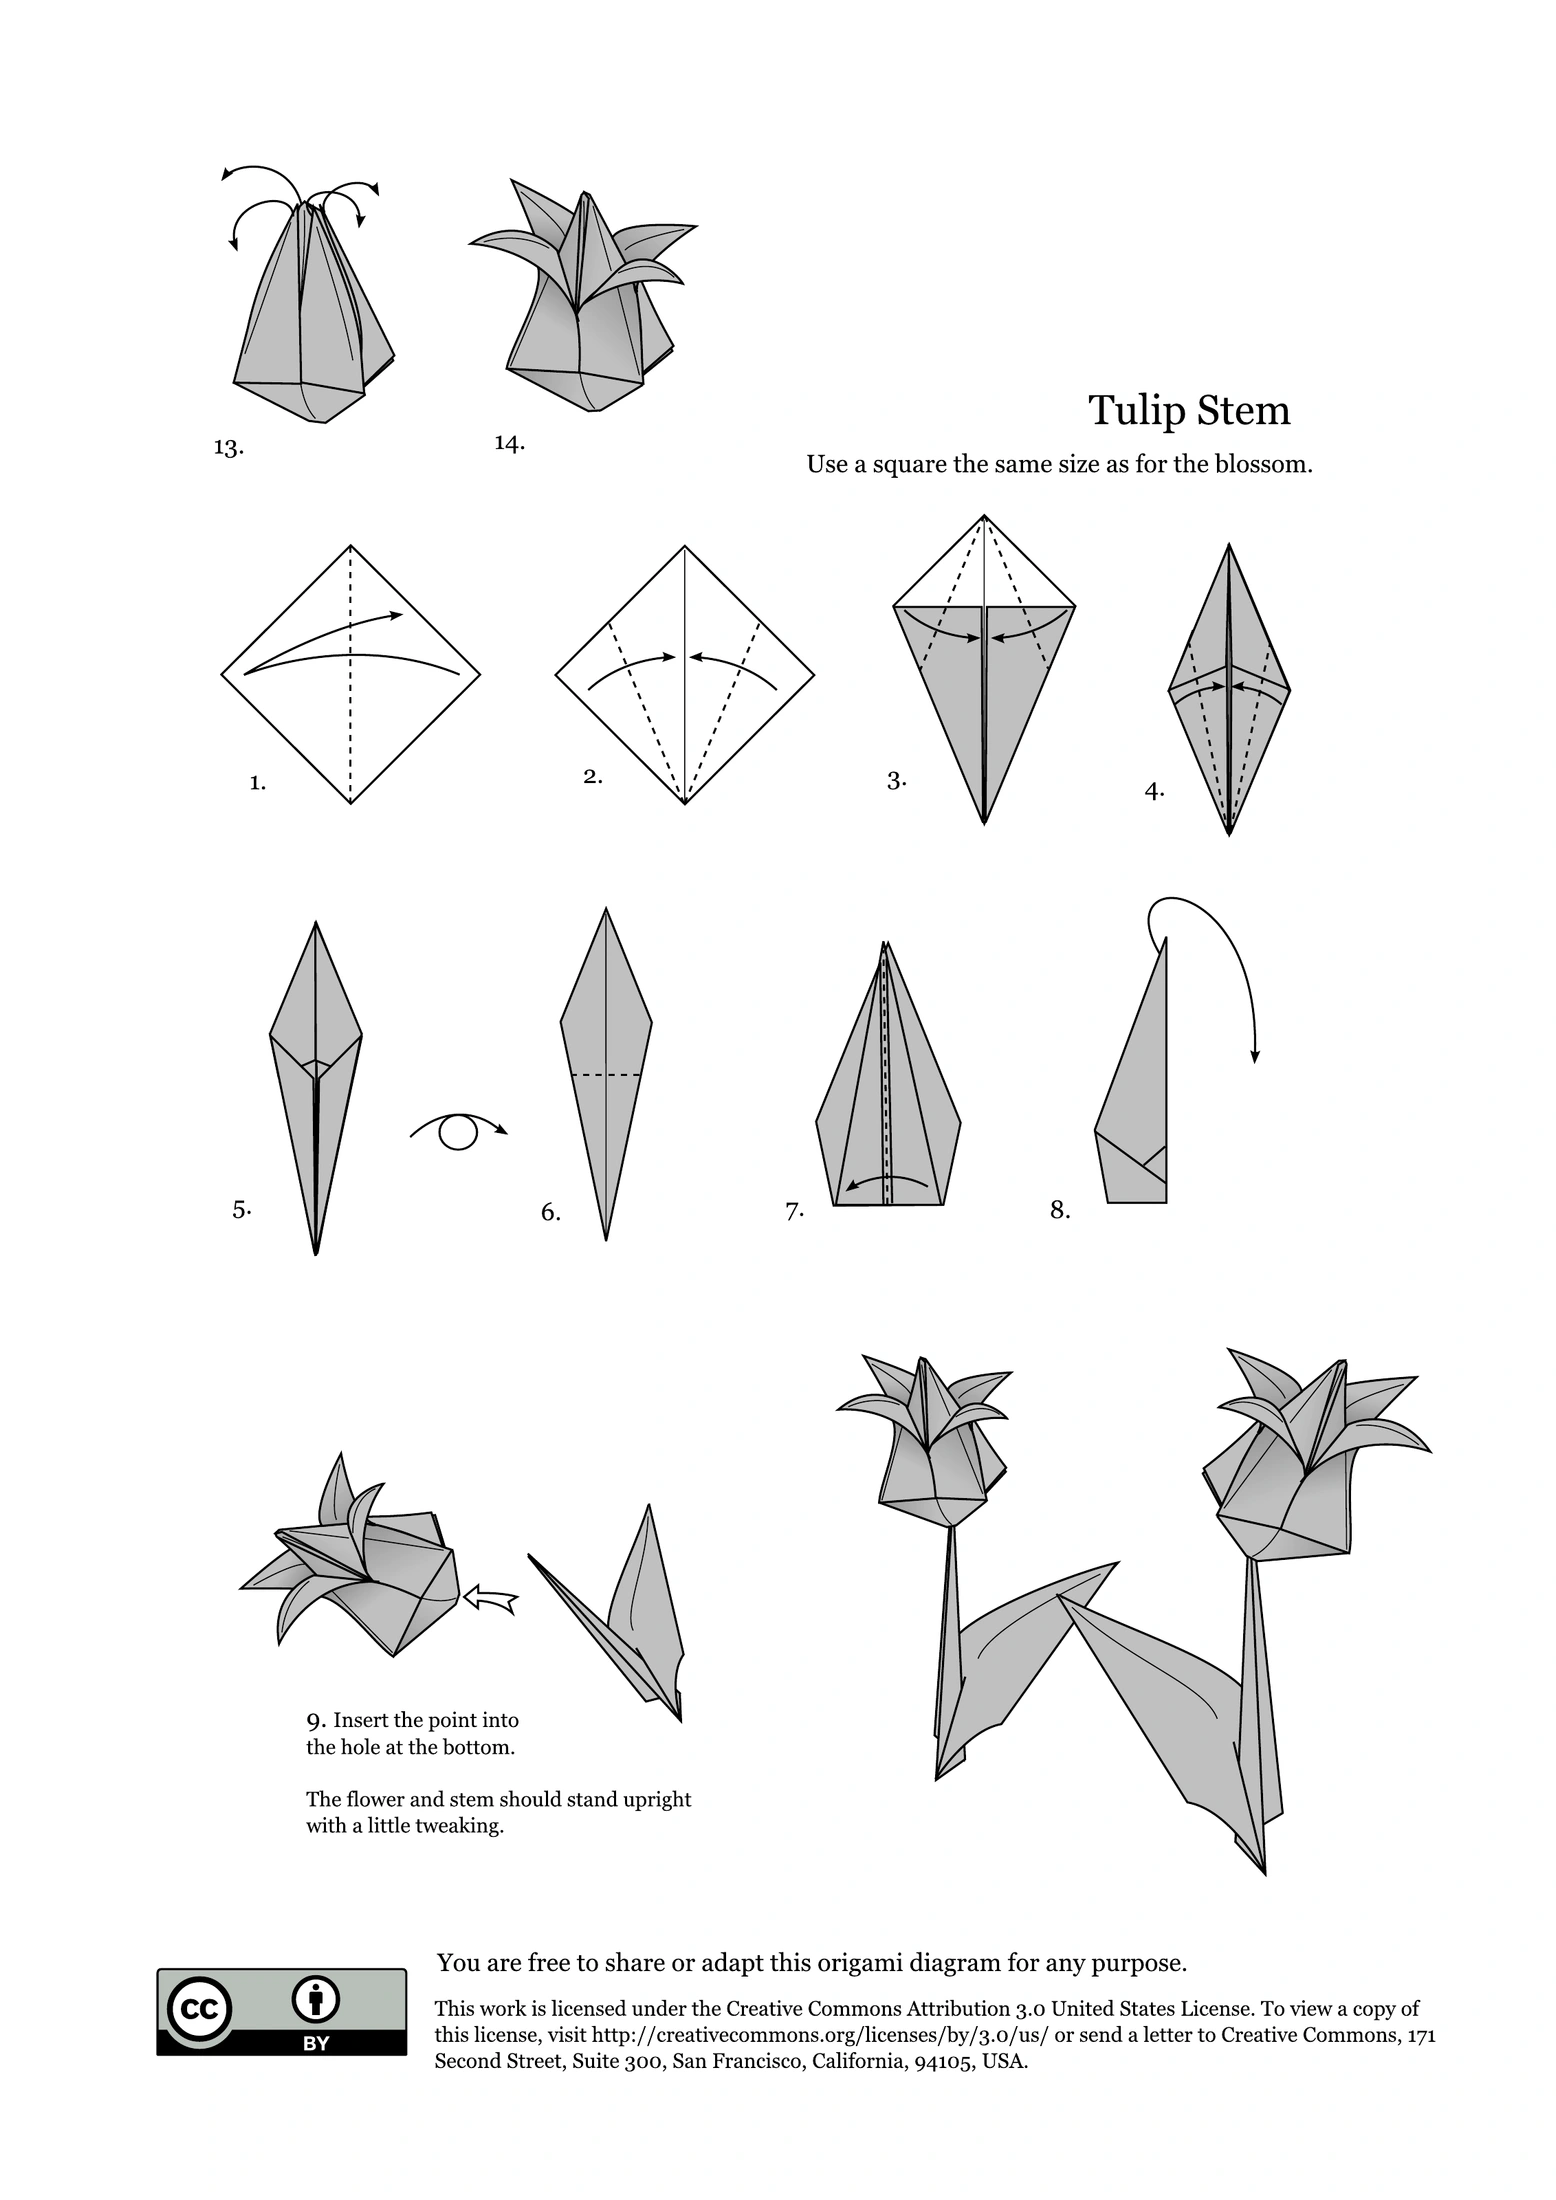
Figures retain the original folding sequence. Grey/white represent paper faces, not mandatory colors. Use thin paper and crease accurately. Instructions have been compared with the source; no physical test fold has been performed by this site.
Andrew Hudson / Public Diagram Project · Traditional model · CC BY 3.0 US
Diagram credits
- Andrew Hudson / Public Diagram Project · Traditional modelhttps://ahudsonorigami.wordpress.com/2012/02/21/tulip-and-stem/
- CC BY 3.0 UShttps://creativecommons.org/licenses/by/3.0/us/