তৈরির নির্দেশিকা · 6 illustrated sections
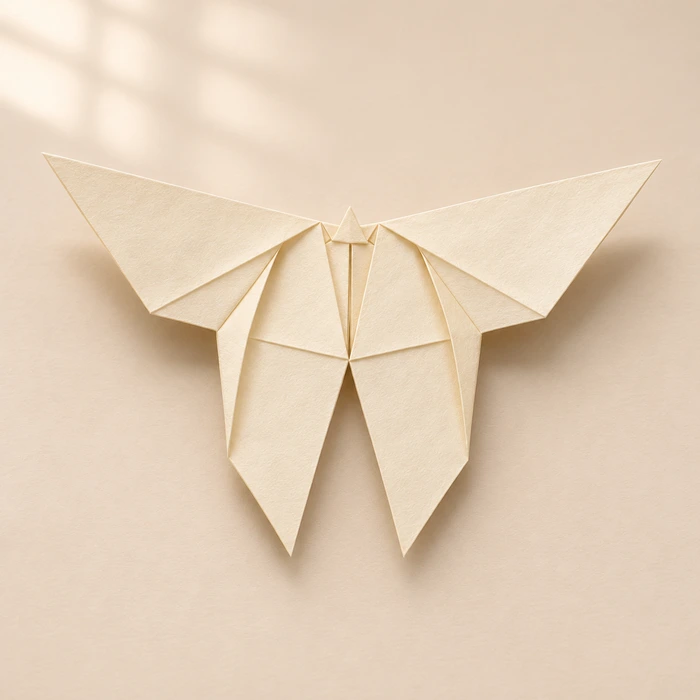
Yoshizawa Origami Butterfly
Follow 6 illustrated sections. Download the complete making guide and matching paper.
ছবিসহ ধাপ
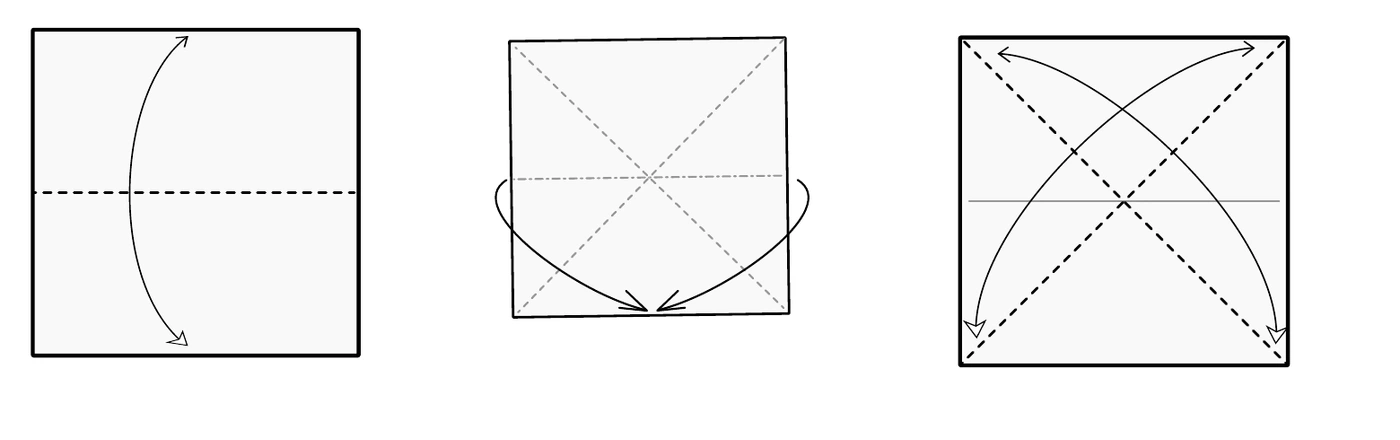 1
Read the three figures left to right. Crease a horizontal midline; prepare the collapse along that line. Crease both diagonals as shown.
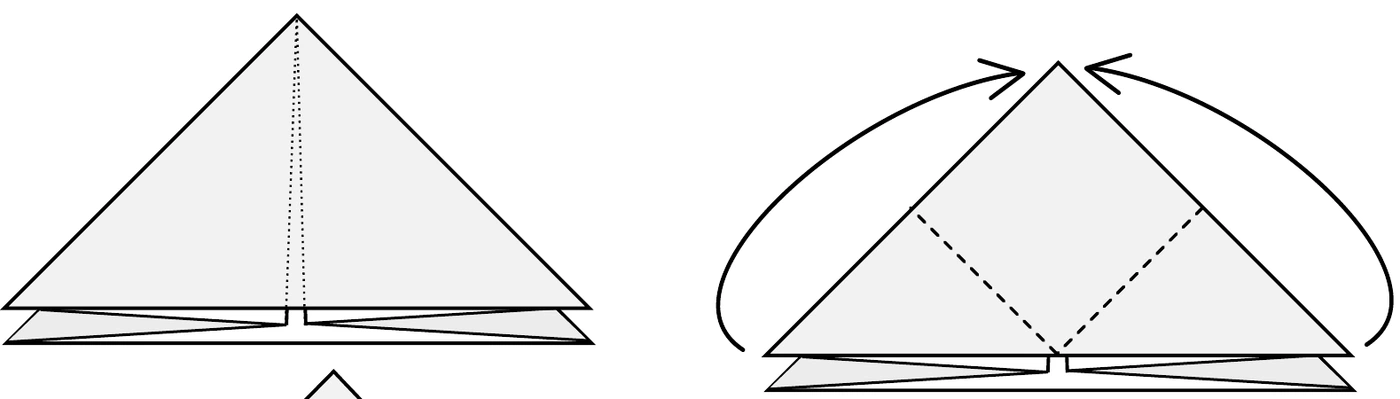 2
Collapse to a double-layer triangle. Fold the two front lower corners up to the top point.
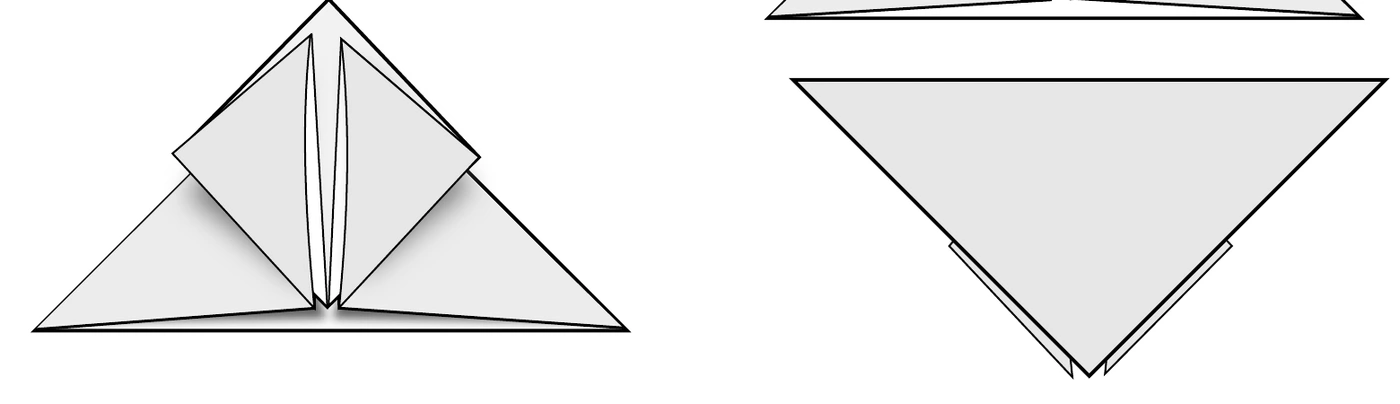 3
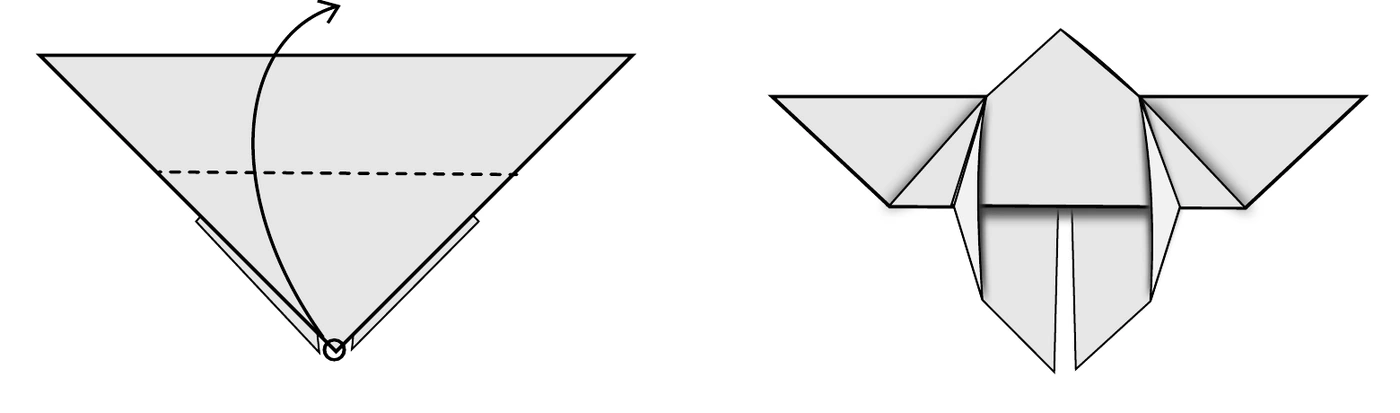
The left figure shows the two lifted corners. Turn the model over; position the triangle with its point facing down, as on the right.
 4
Lift that downward point up past the long top edge. Let the paper curve; do not force the entire model flat. The right figure is the result.
 5
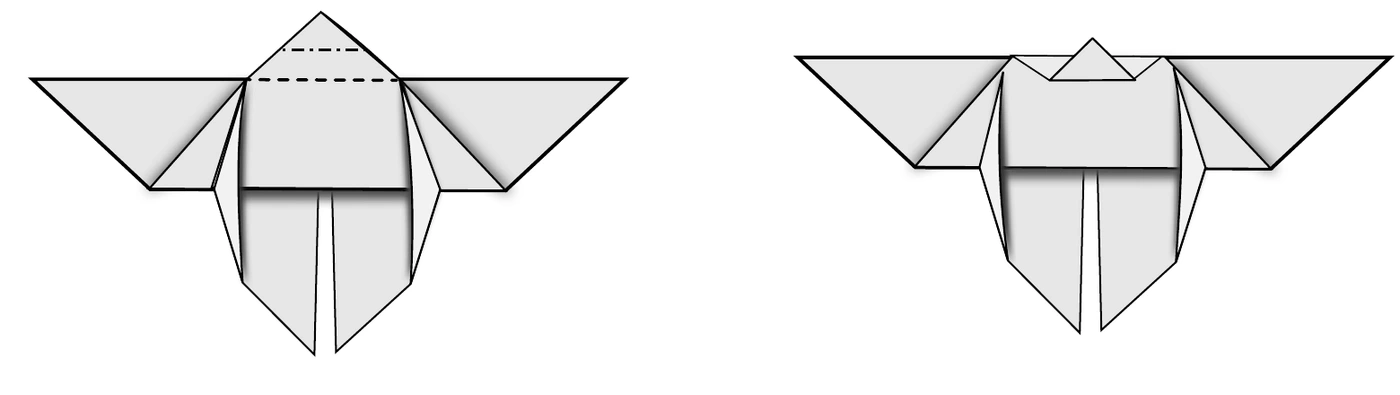
Fold the small projecting tip over the top edge to the back, locking the layers. The right figure shows the locked tip.
 6
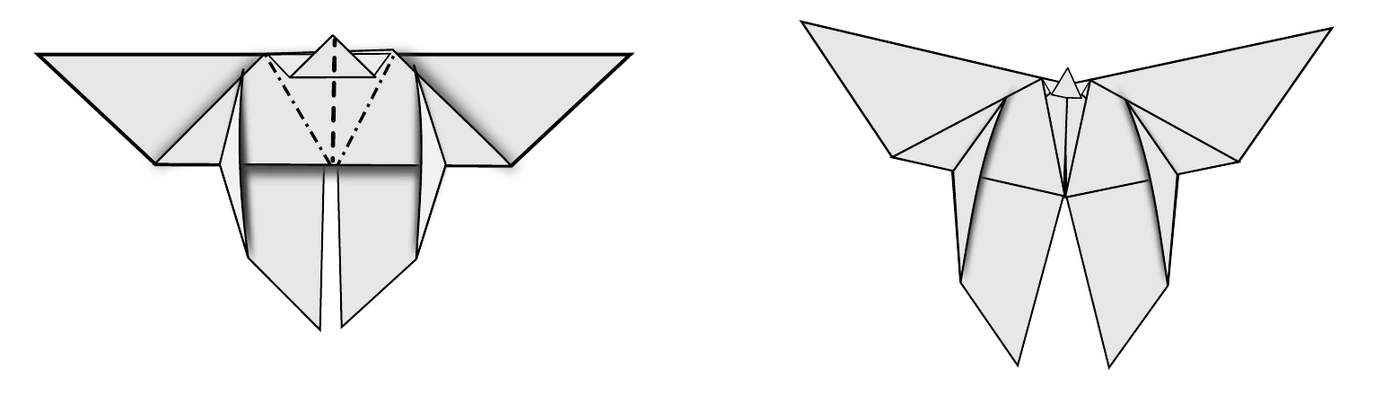
Pinch the body along the central fold and lift the wings slightly to create the three-dimensional butterfly.
Full folding diagram · click to enlarge
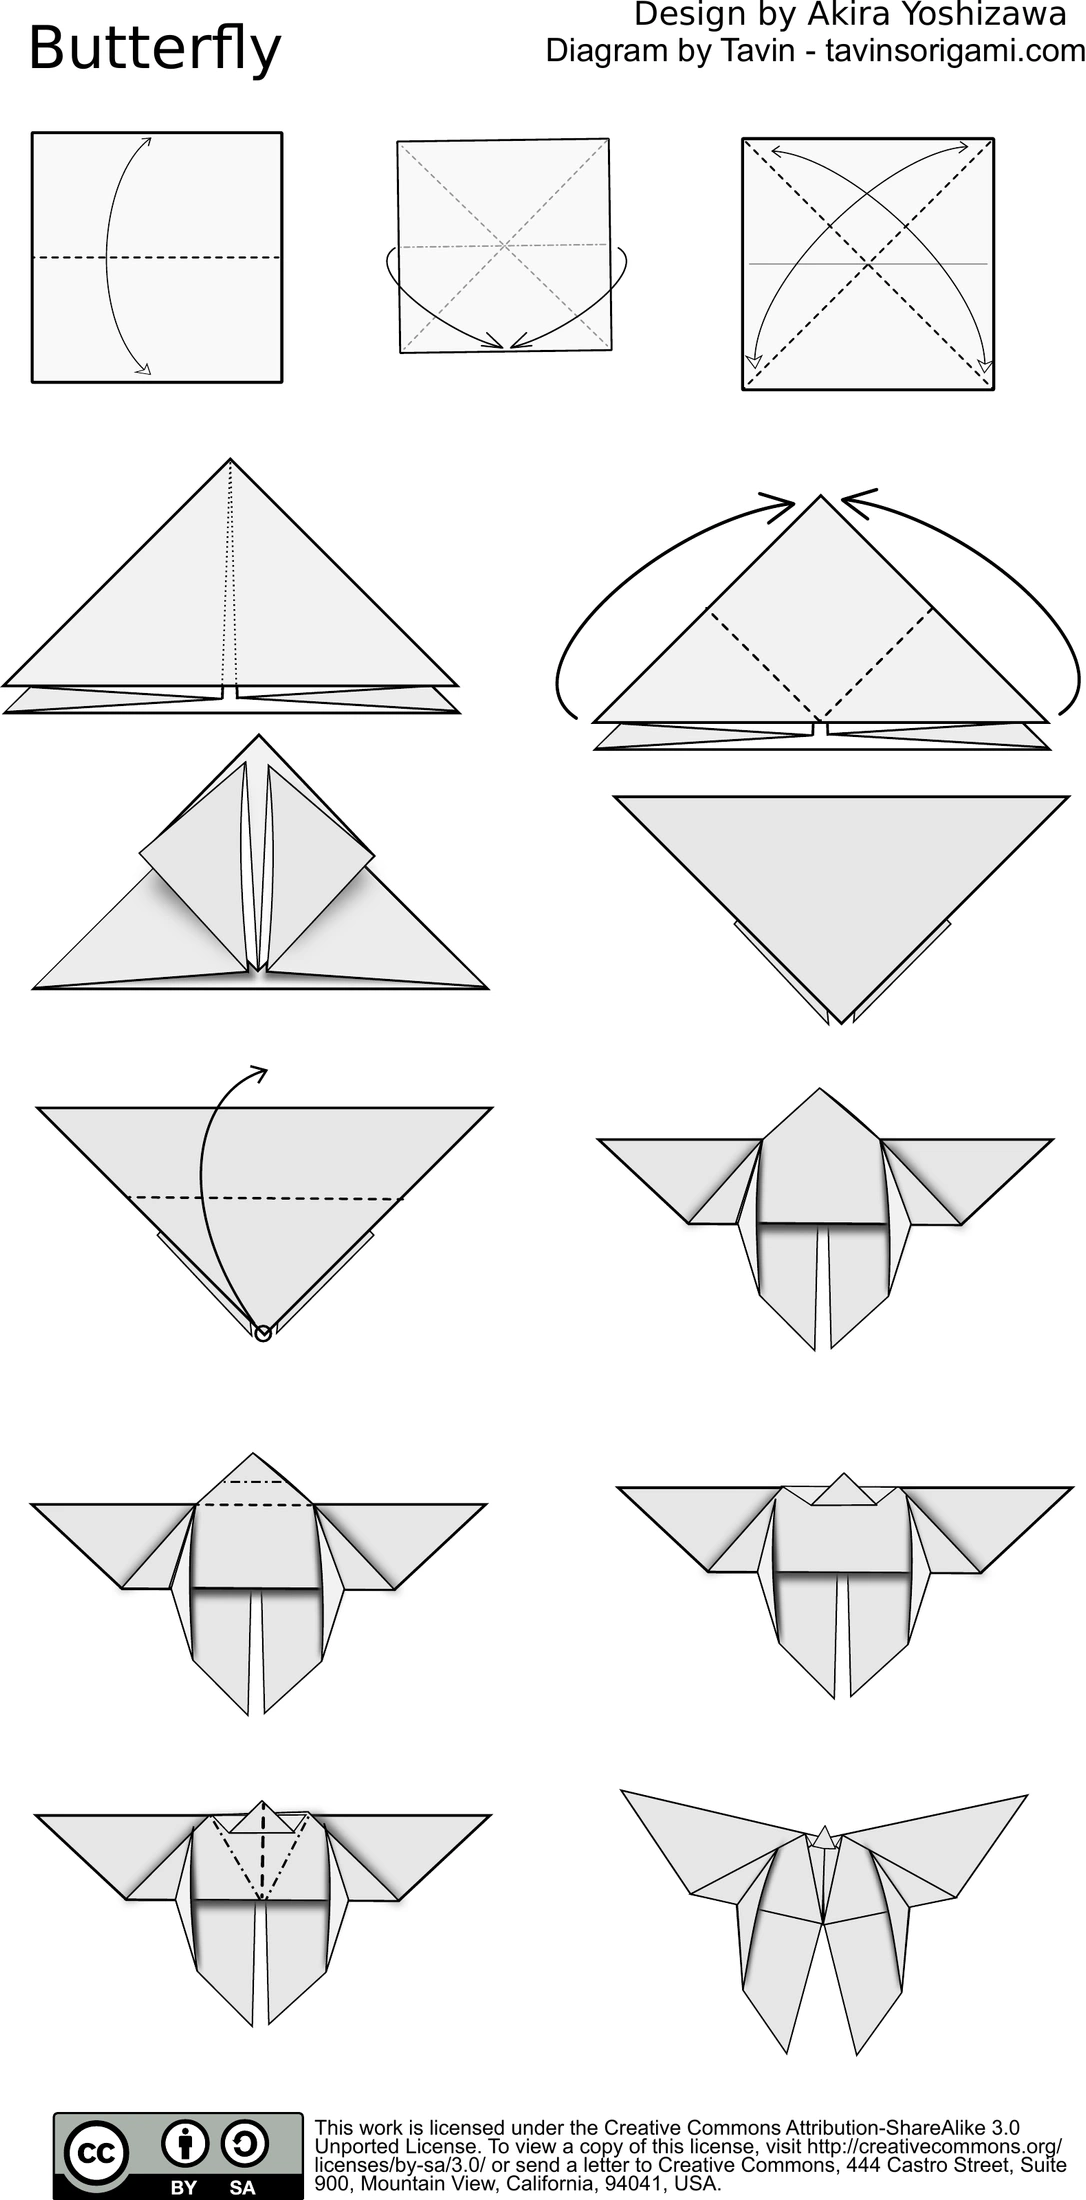
Figures retain the original folding sequence. Grey/white represent paper faces, not mandatory colors. Use thin paper and crease accurately. Instructions have been compared with the source; no physical test fold has been performed by this site.
Design: Akira Yoshizawa · Diagrams: Tavin · CC BY-SA 3.0
Diagram credits
- Design: Akira Yoshizawa · Diagrams: Tavinhttps://tavinsorigami.com/downloads/
- CC BY-SA 3.0https://creativecommons.org/licenses/by-sa/3.0/