
Guía de elaboración · 5 illustrated sections
Traditional Origami Lily
Follow 5 illustrated sections. Download the complete making guide and matching paper.
Pasos ilustrados
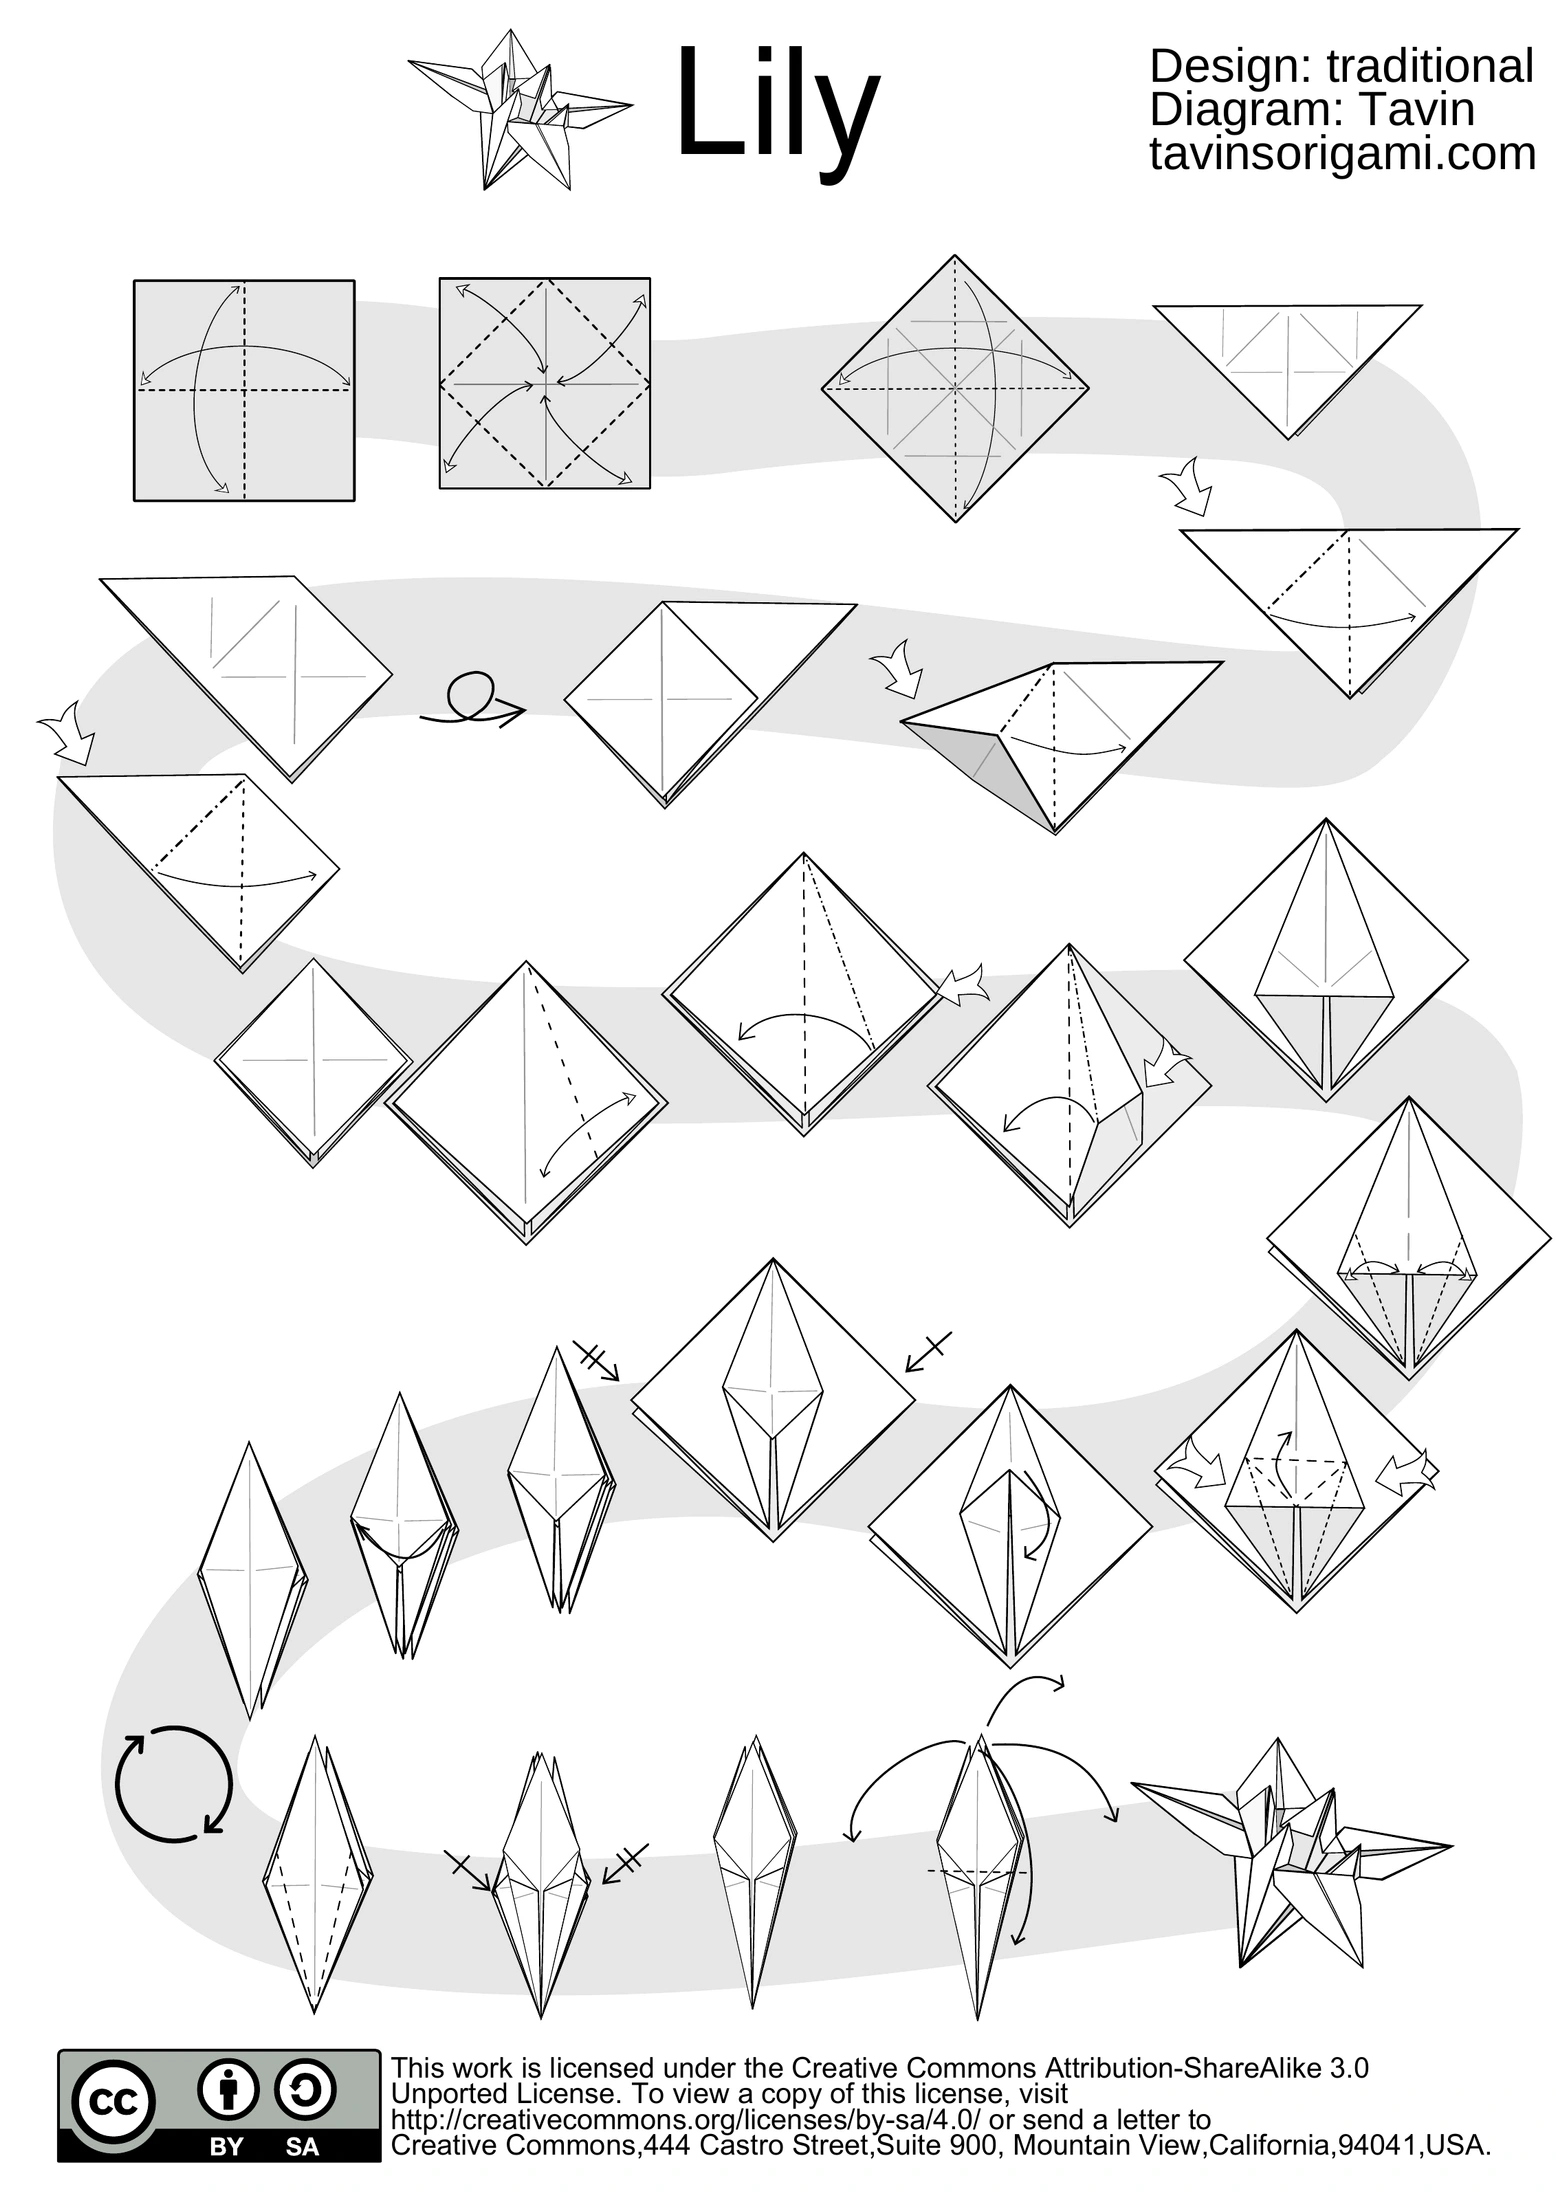
Full folding diagram · click to enlarge
- 1
Read the original diagram from the top left along the grey path. Crease both midlines. Fold all four corners to the center and unfold each one. Rotate the square 45 degrees, crease the two diagonals, then collapse it into the triangular base shown.
- 2
Follow the path from right to left. Open one triangular pocket and squash it flat; turn the model over and repeat on the opposite pocket. The left-hand lower figure shows the next squash fold.
- 3
Continue along the grey path, from the small square at left toward the right. Squash the remaining pockets. Fold the lower edges of the exposed flap to the center, crease and unfold. Prepare each equivalent flap.
- 4
Follow the path from right to left. Lift the lower point into a petal fold, bringing its sides inward. Repeat on the other flaps, then fold the raised slender points down as indicated.
- 5
Follow the final strip left to right. Rotate the model, narrow the lower side edges on each face, and gently bend the four upper petals outward to finish. The complete original sheet below preserves the entire reading path.
Figures retain the original folding sequence. Grey/white represent paper faces, not mandatory colors. Use thin paper and crease accurately. Instructions have been compared with the source; no physical test fold has been performed by this site.
Tavin · Traditional lily diagram · CC BY-SA 3.0; adaptations CC BY-SA 4.0
Diagram credits
- Tavin · Traditional lily diagramhttps://tavinsorigami.com/origami-lily-flower/
- CC BY-SA 3.0; adaptations CC BY-SA 4.0https://creativecommons.org/licenses/by-sa/4.0/