তৈরির নির্দেশিকা · 17 illustrated sections
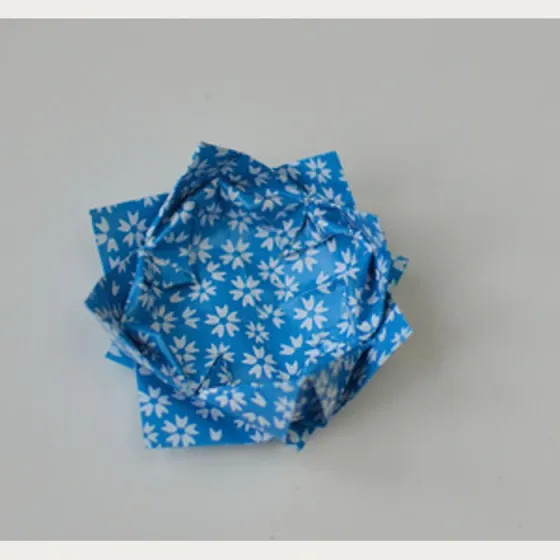
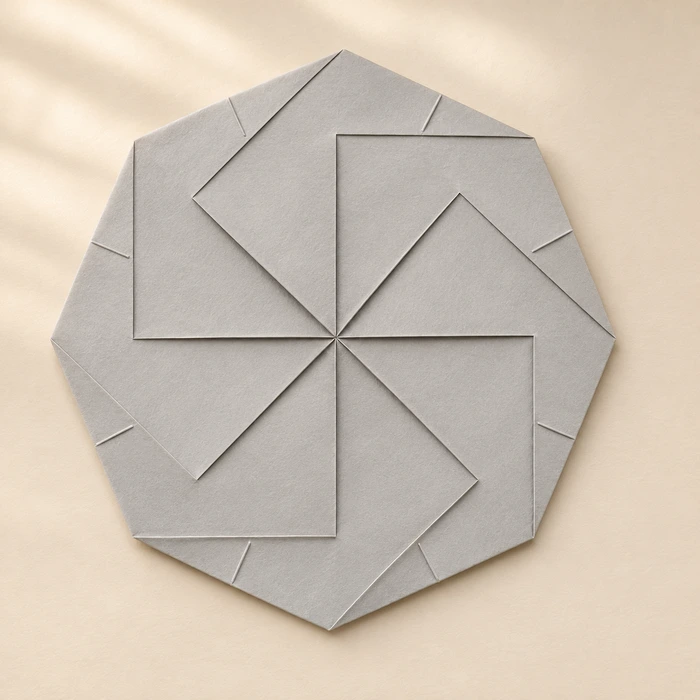
Octagonal Twist Paper Packet
Follow 17 illustrated sections. Download the complete making guide and matching paper.
ছবিসহ ধাপ
 1
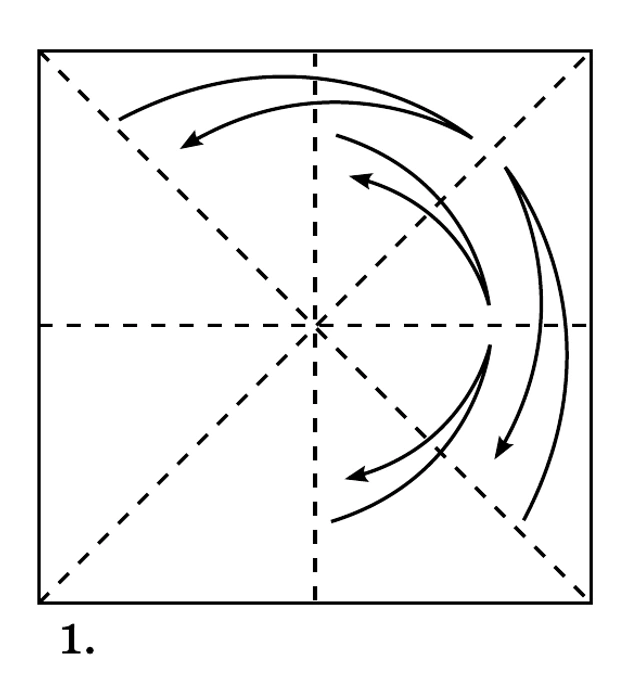
Crease the horizontal, vertical and both diagonal lines; unfold.
 2
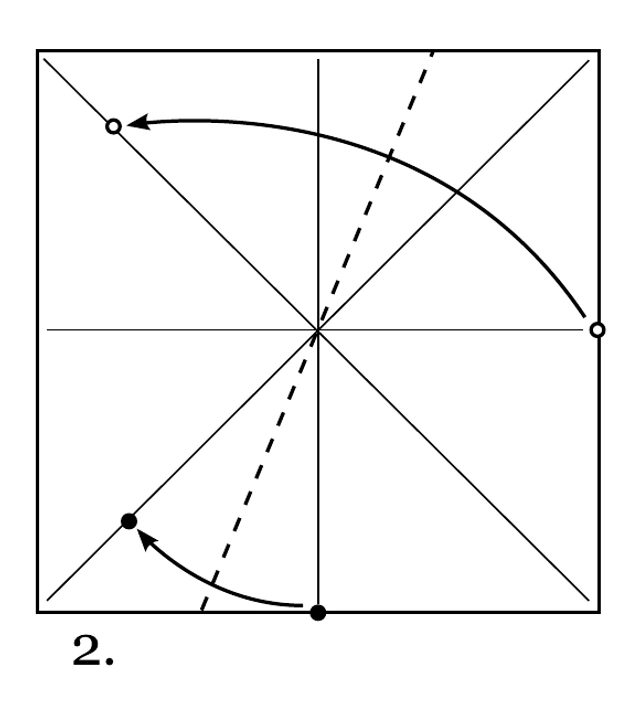
Bisect the angle between the vertical midline and diagonal, matching the marked reference points.
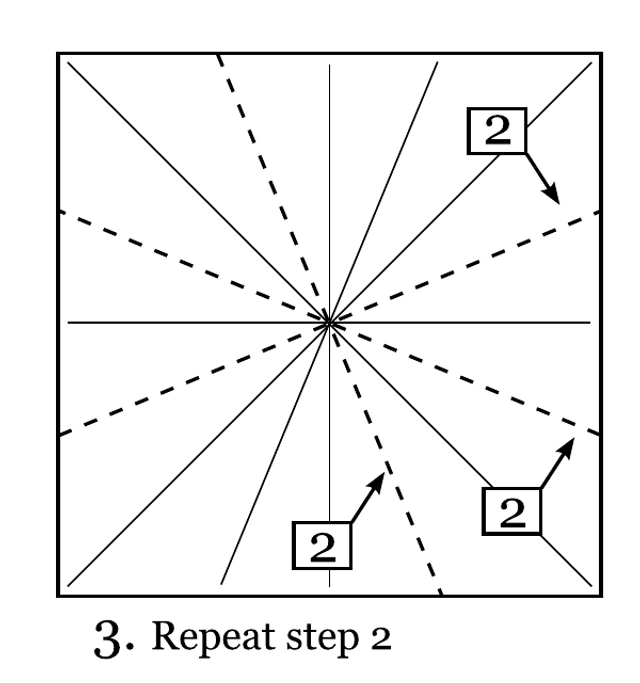 3
Repeat that angle-bisecting crease in the three marked sectors.
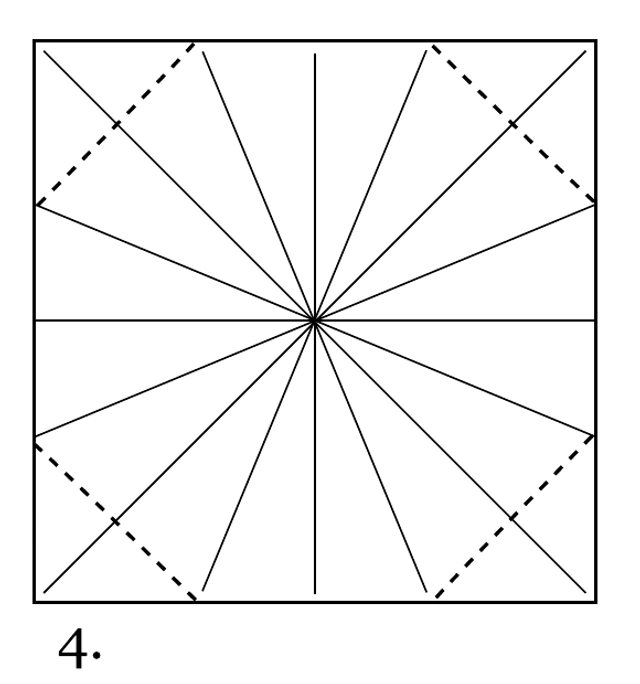 4
Fold each corner inward along the four short diagonal lines shown.
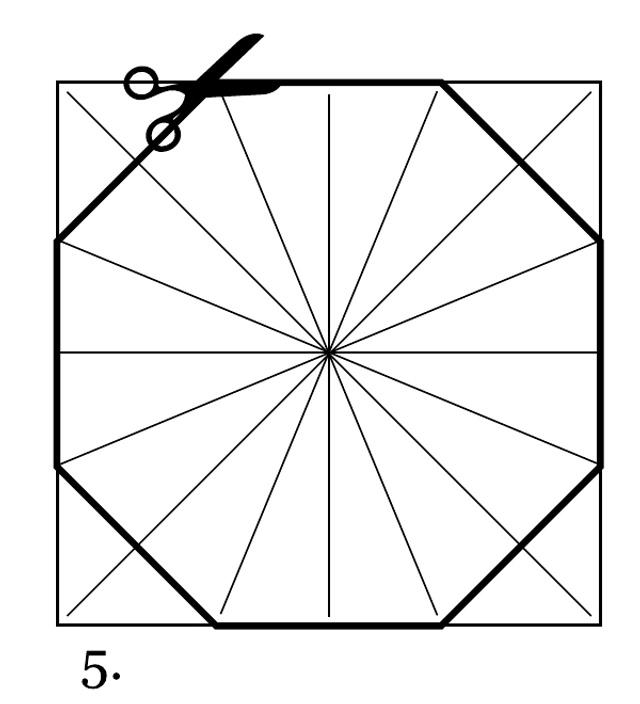 5
Unfold those corners and cut them off along the prepared lines to make the octagon.
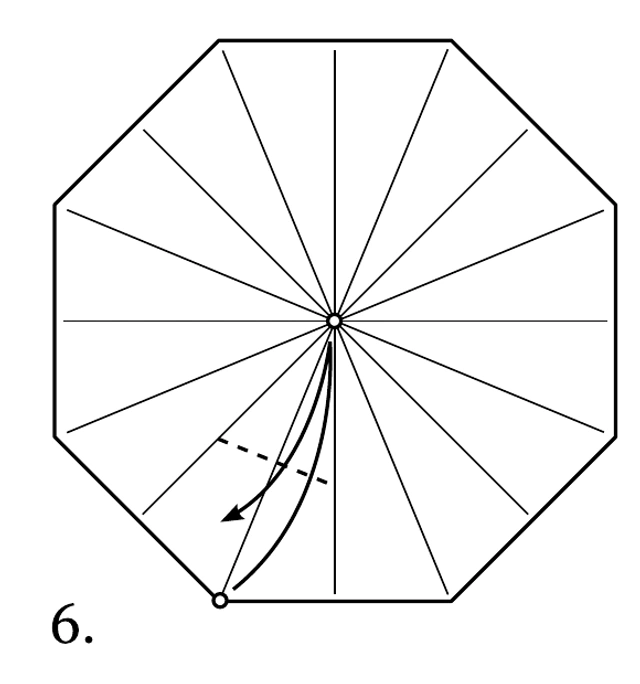 6
Fold the indicated bottom corner up to the central point, crease and unfold.
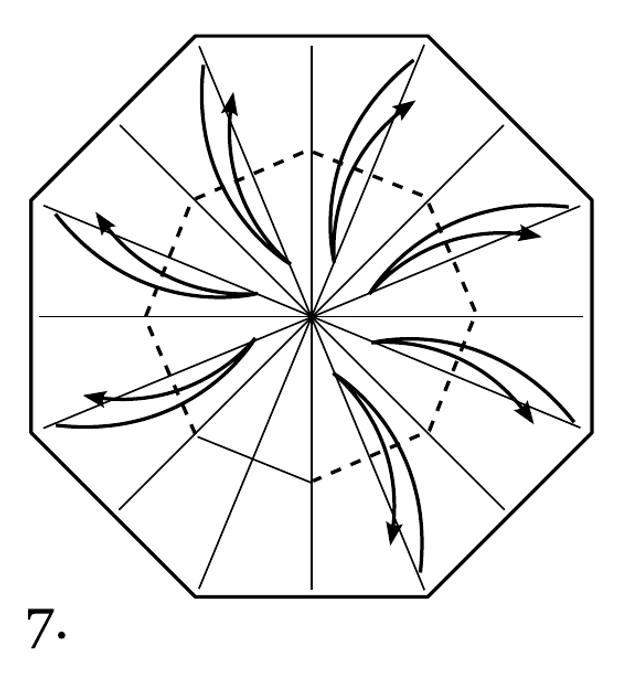 7
Repeat around all eight corners to form the smaller central octagon.
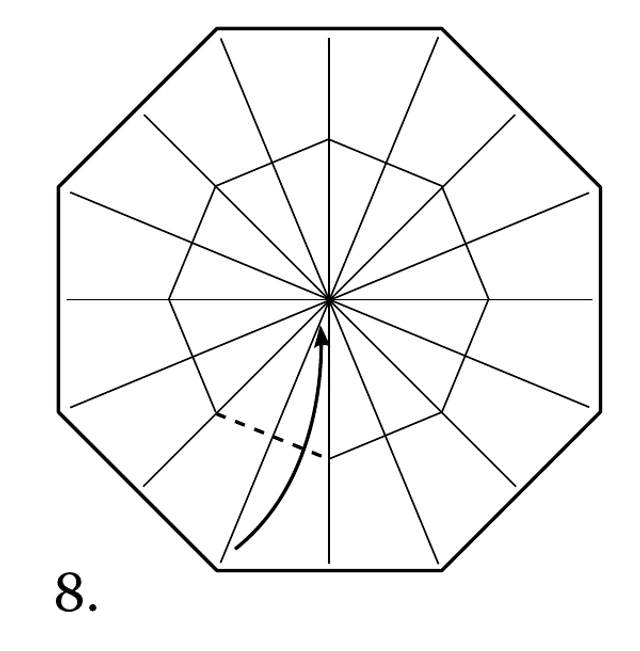 8
Fold the bottom edge up to the center point.
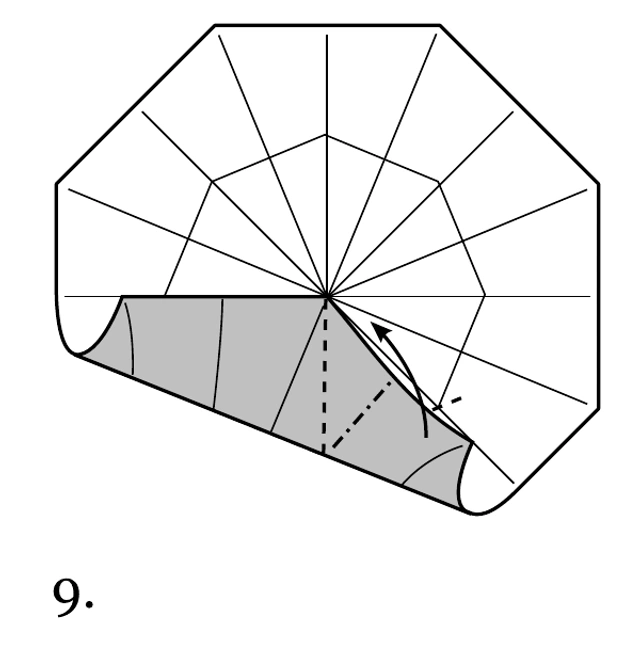 9
At the right end of that folded band, fold the corner inward along the diagonal arrow.
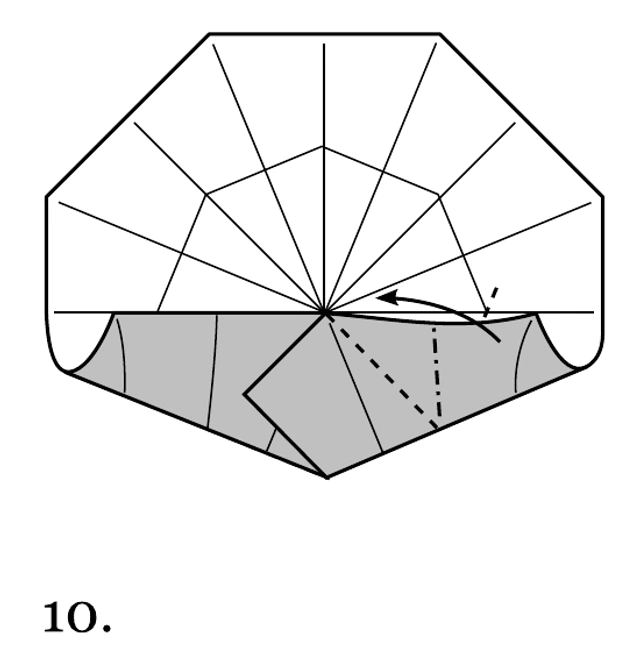 10
Flatten that corner to match the shown angled bottom edge.
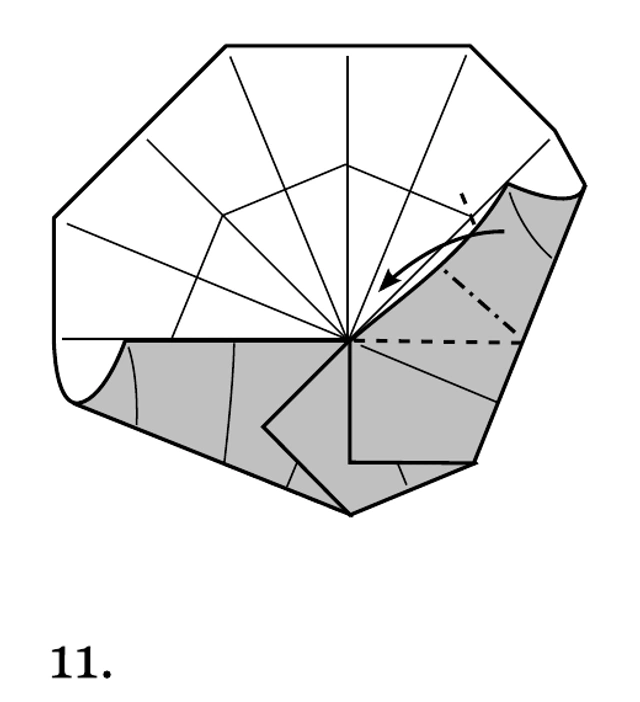 11
Move to the next side clockwise and fold it toward the center.
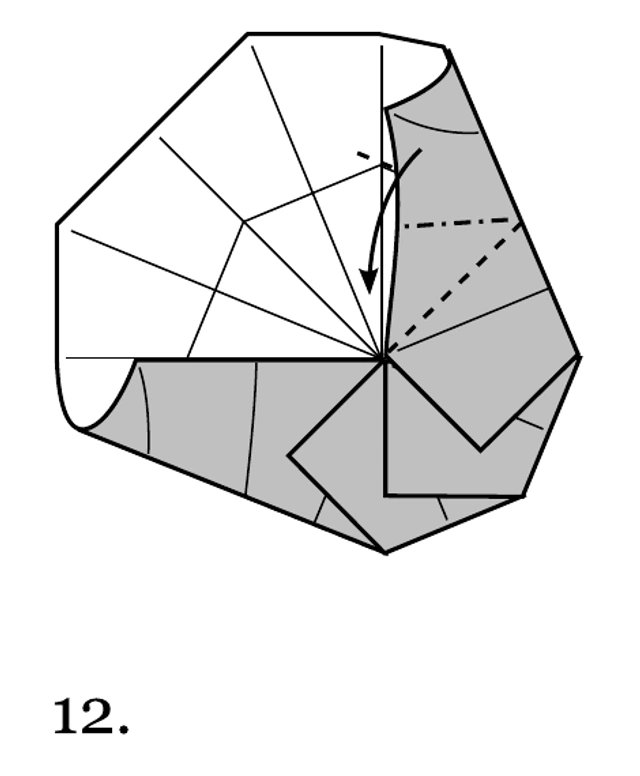 12
Fold its corner in the same way, building the next overlapping flap.
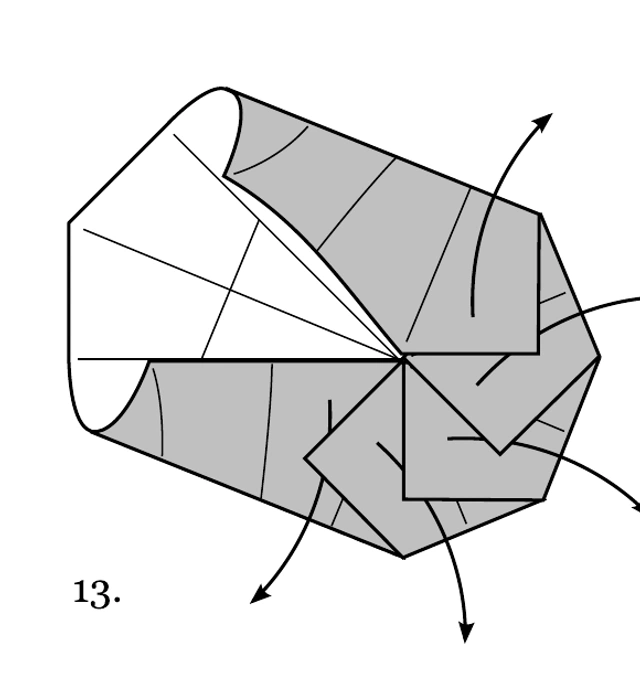 13
Unfold the prepared section without erasing the creases.
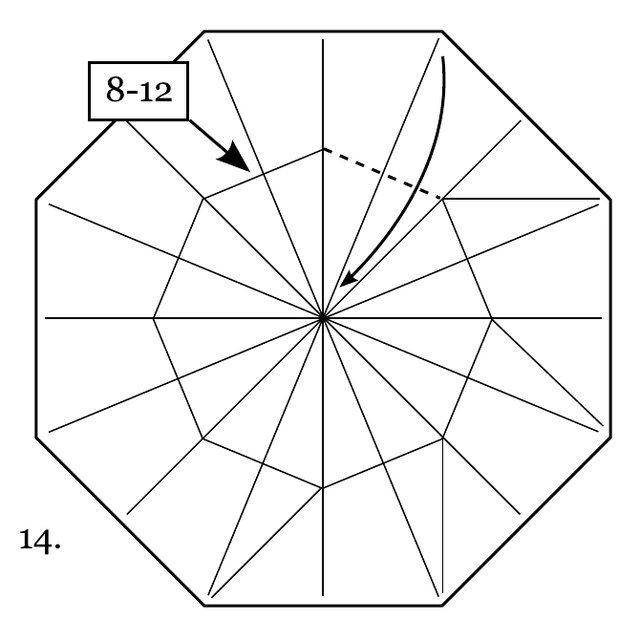 14
Repeat original steps 8–12 around the other sides to prepare every sector.
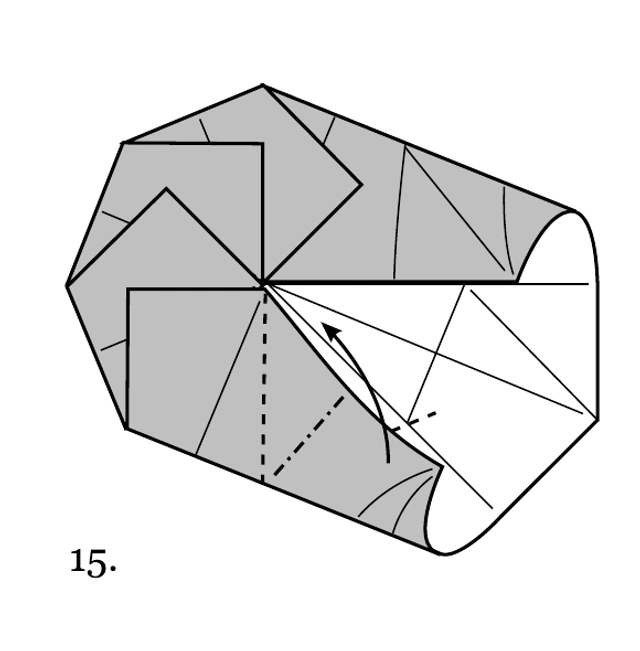 15
Refold the sides successively in the same direction, overlapping the flaps into a spiral.
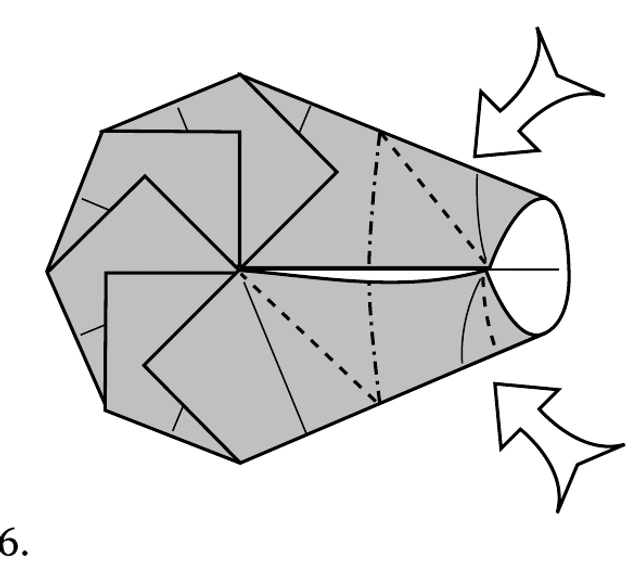 16
Tuck the last flap underneath its neighbor, guide the creases inward and flatten the octagonal packet.
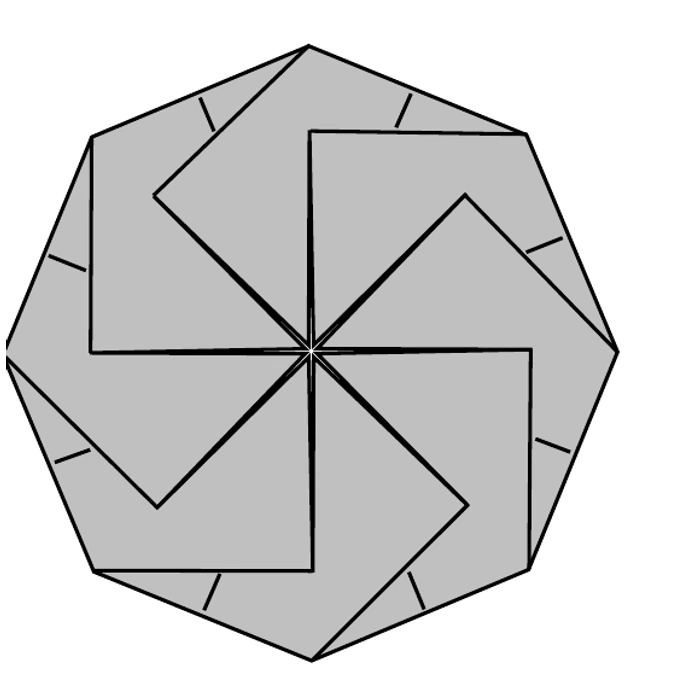 17
Check the completed structure against the original finished diagram, then gently adjust the folds.
Full folding diagram · click to enlarge
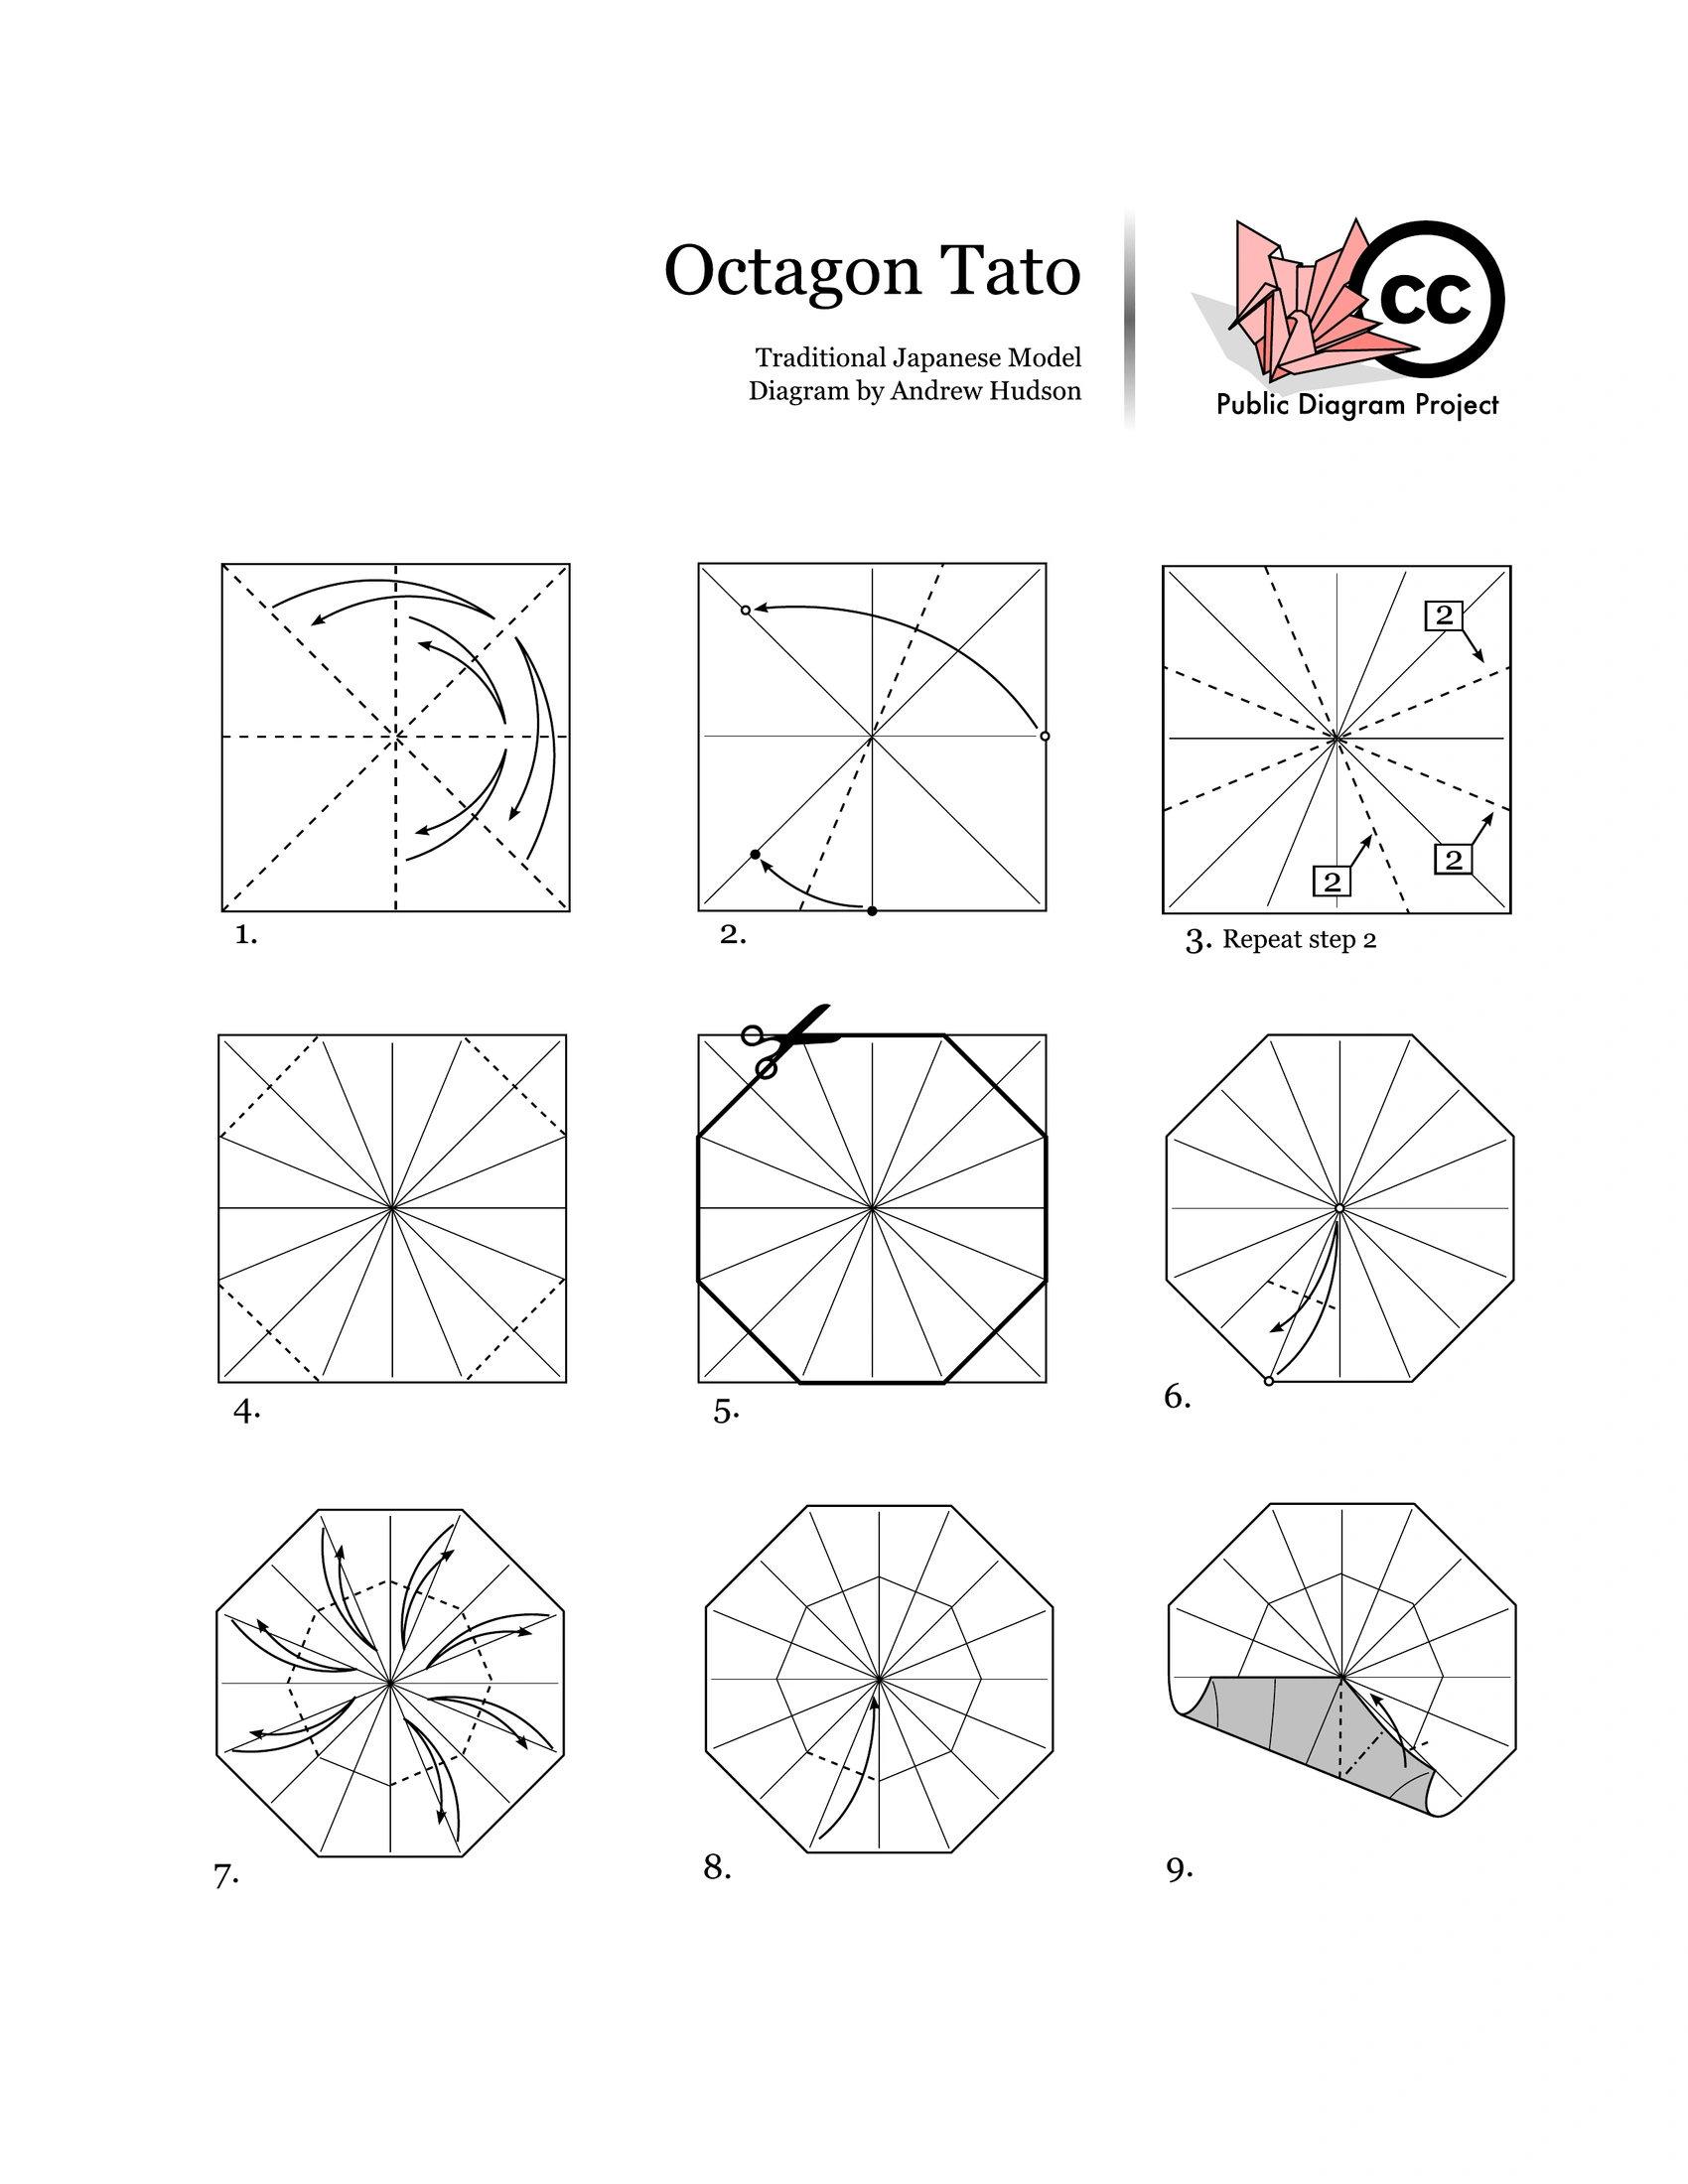
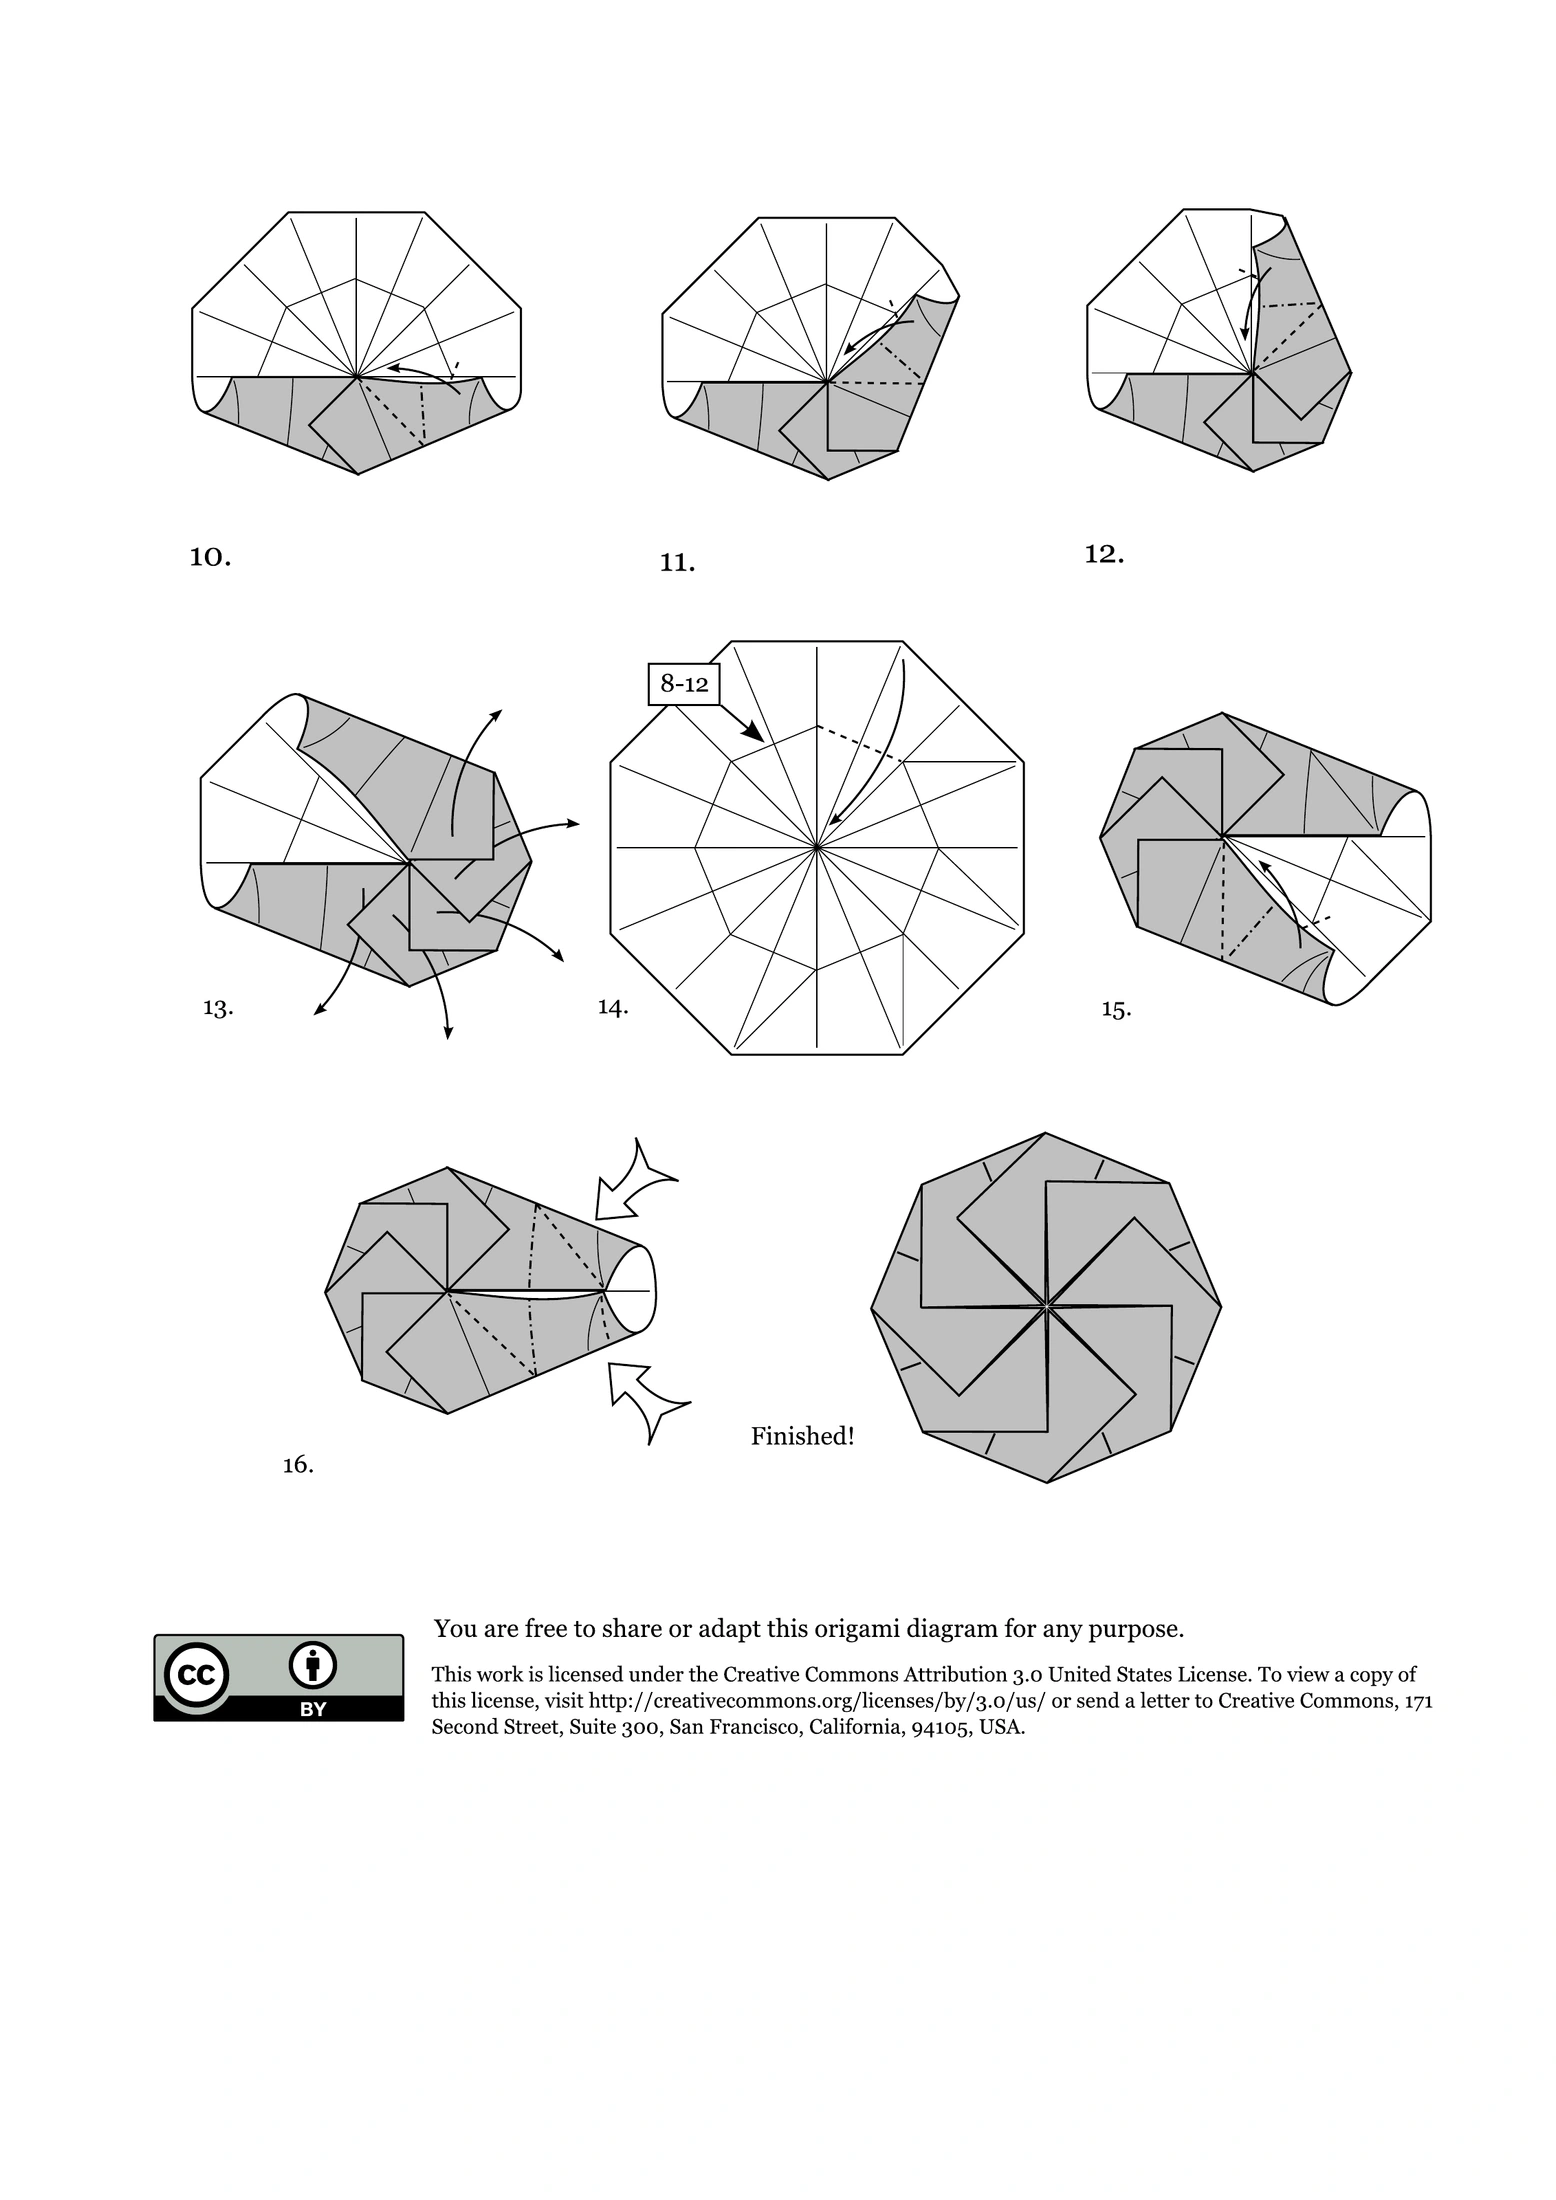
Figures retain the original folding sequence. Grey/white represent paper faces, not mandatory colors. Use thin paper and crease accurately. Instructions have been compared with the source; no physical test fold has been performed by this site.
Andrew Hudson / Public Diagram Project · Traditional model · CC BY 3.0 US
Diagram credits
- Andrew Hudson / Public Diagram Project · Traditional modelhttps://ahudsonorigami.wordpress.com/2011/11/07/twist-tato/
- CC BY 3.0 UShttps://creativecommons.org/licenses/by/3.0/us/