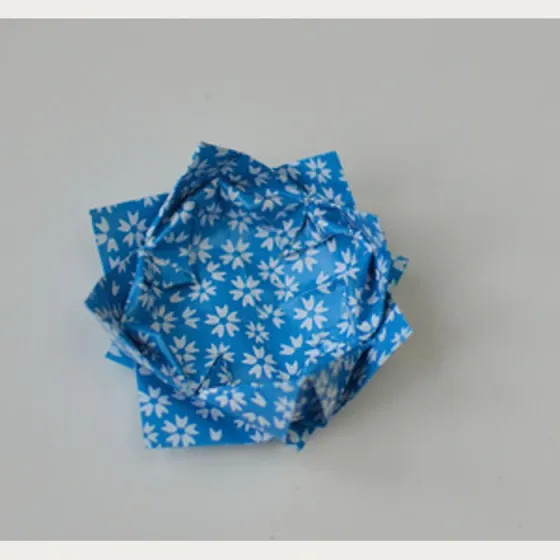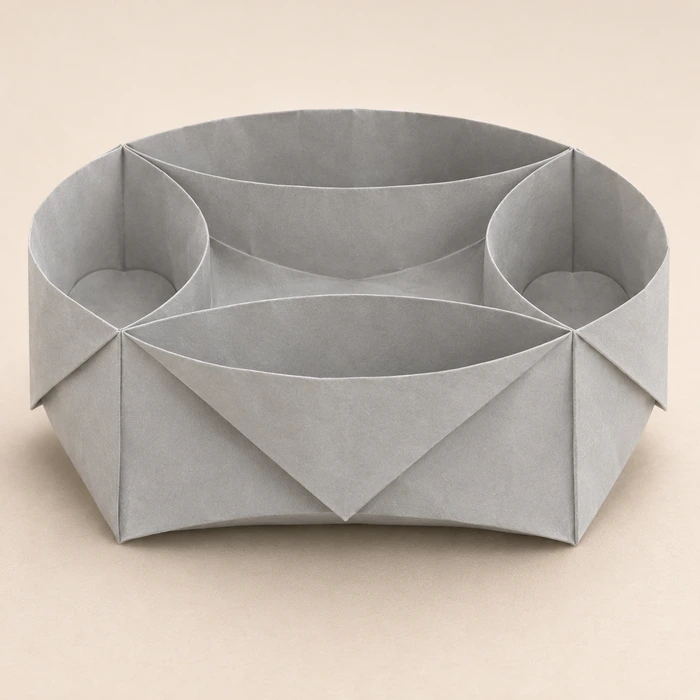
তৈরির নির্দেশিকা · 16 illustrated sections
Five-Compartment Origami Bowl
Follow 16 illustrated sections. Download the complete making guide and matching paper.
ছবিসহ ধাপ
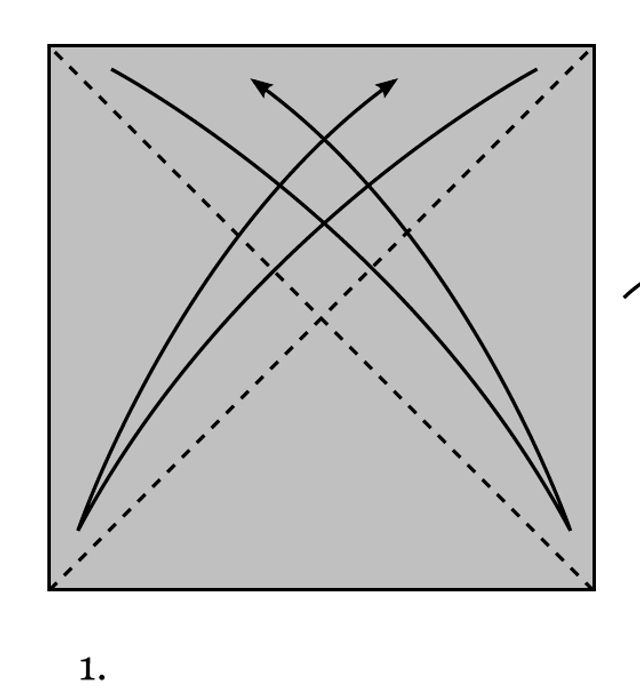 1
Colored side up: crease both diagonals and unfold.
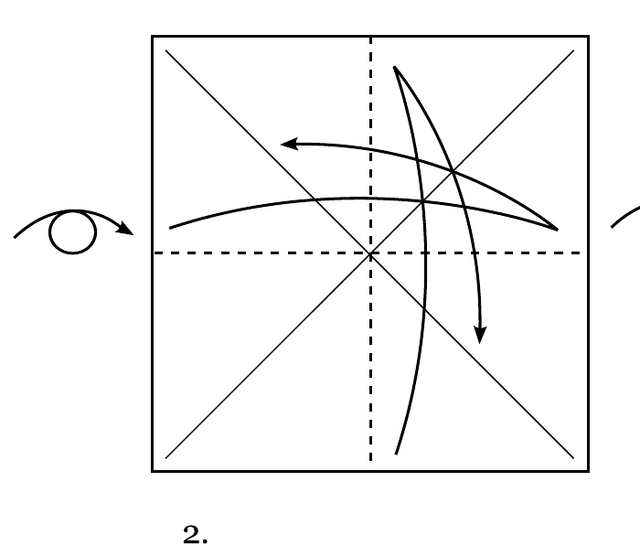 2
Turn over; crease both midlines and unfold.
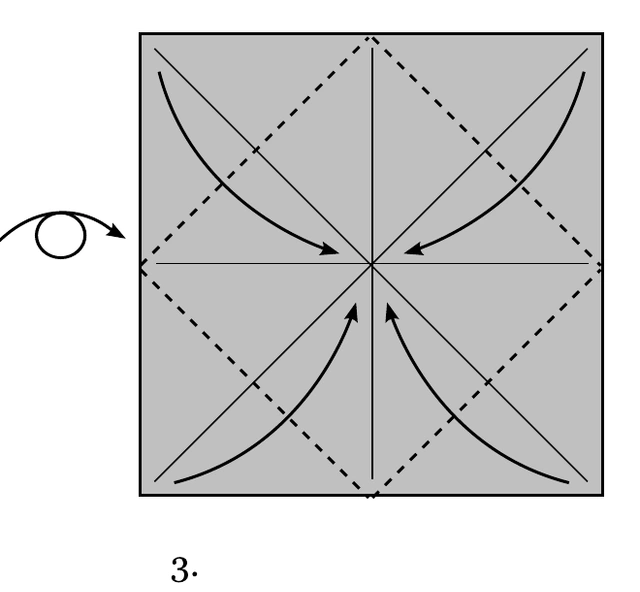 3
Turn over again. Fold all four corners to the center.
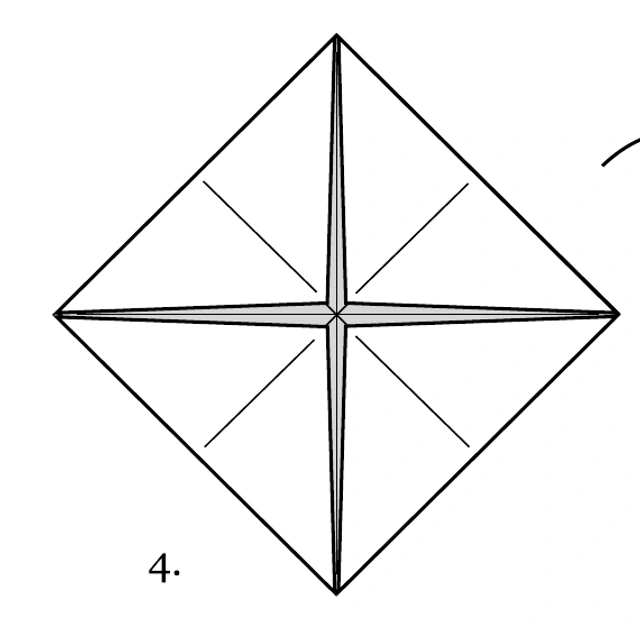 4
Check the four corner tips meet precisely at the center.
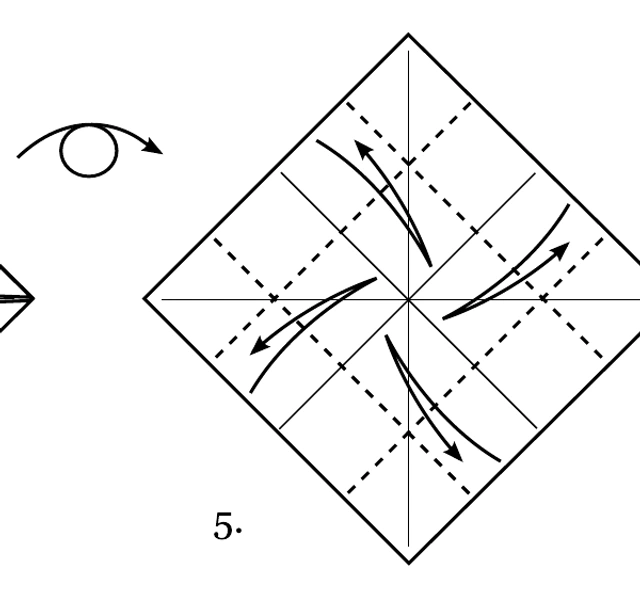 5
Turn over. Fold each edge to the center line to make the four indicated creases; unfold each time.
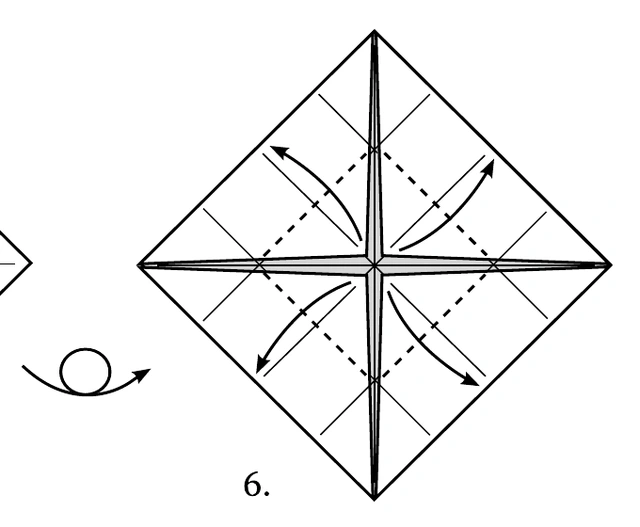 6
Turn back. Fold the central tips outward along the indicated lines and unfold.
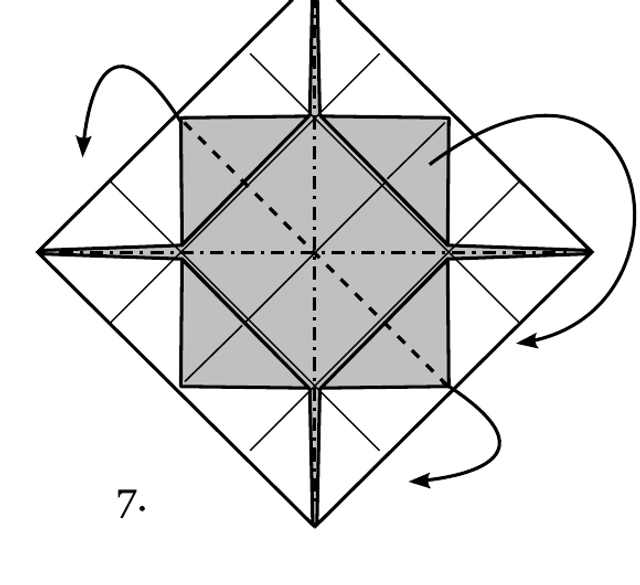 7
Use the central diagonal creases to collapse the model into a triangle; the outer corner flaps remain outside.
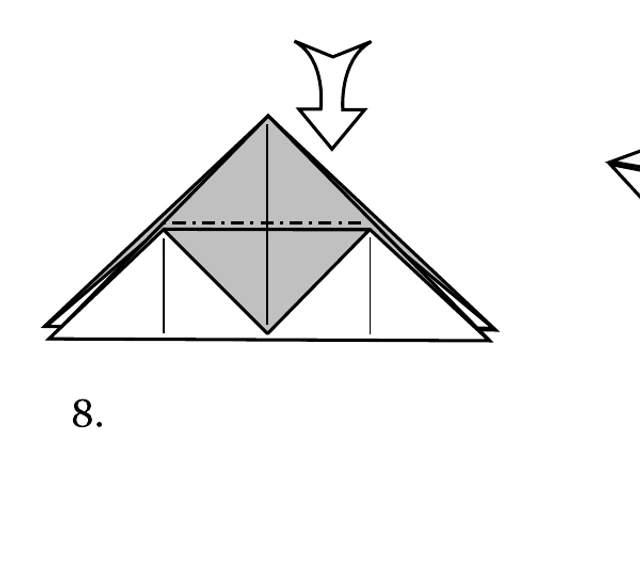 8
Press the collapsed triangle flat.
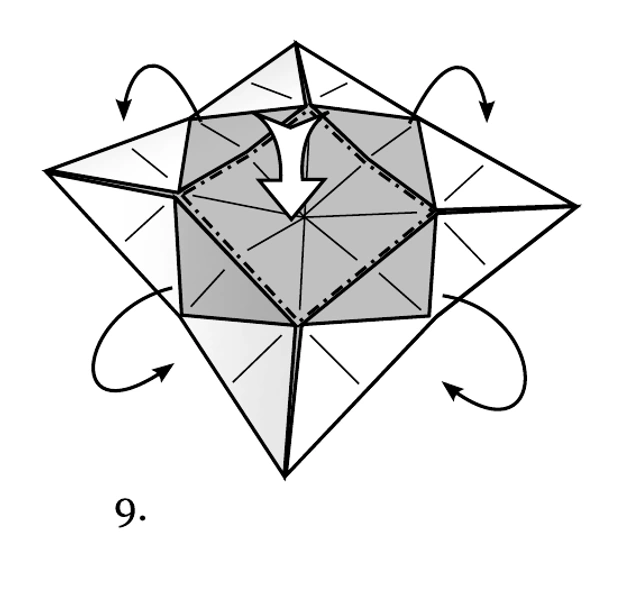 9
Open, change the diagonal direction, and collapse again along the arrows to prepare the same creases on all sides.
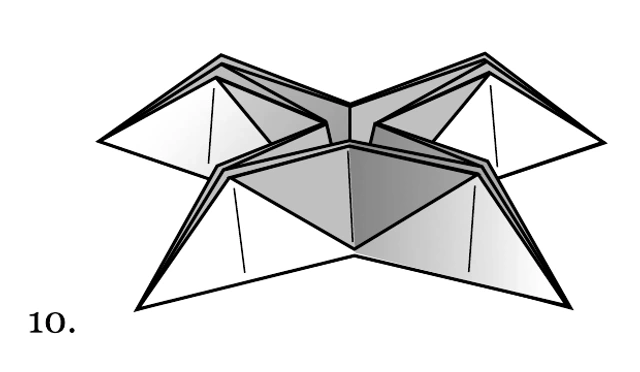 10
Check the four projecting corners and the raised central section match this view.
 11
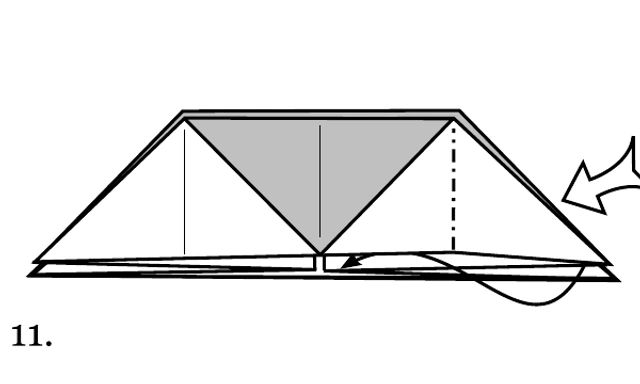
Inside-reverse-fold the projecting right corner into the model along its marked vertical crease.
 12
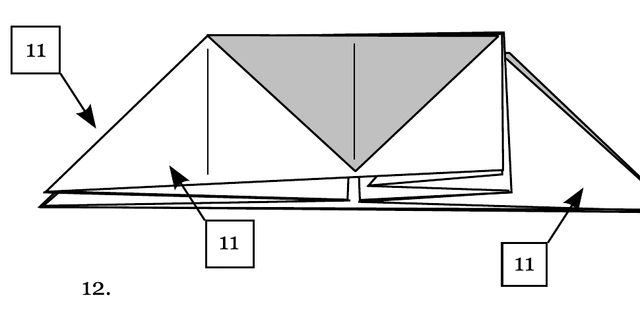
Repeat the inside reverse fold on the other three projecting corners.
 13
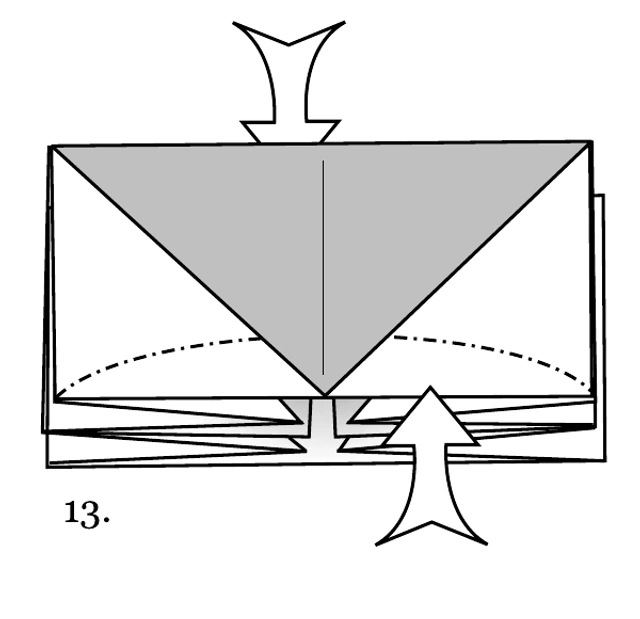
Open the pocket at the lower edge and squash it along the curved arrows.
 14
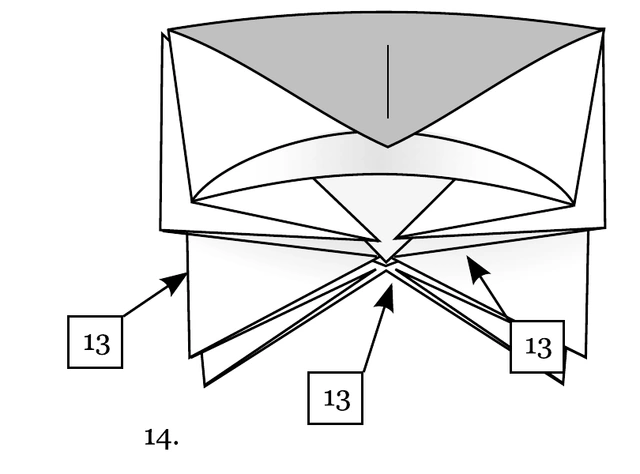
Repeat step 13 on the remaining three pockets.
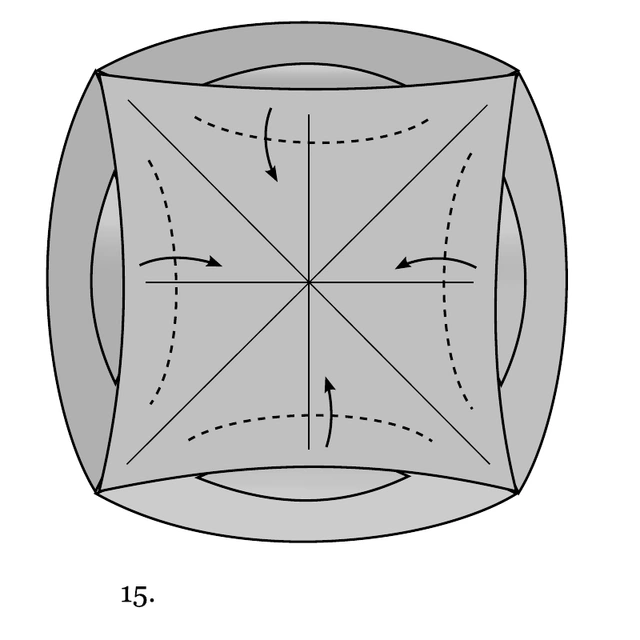 15
Open the center from above, gently pushing the four walls outward to form the organizer.
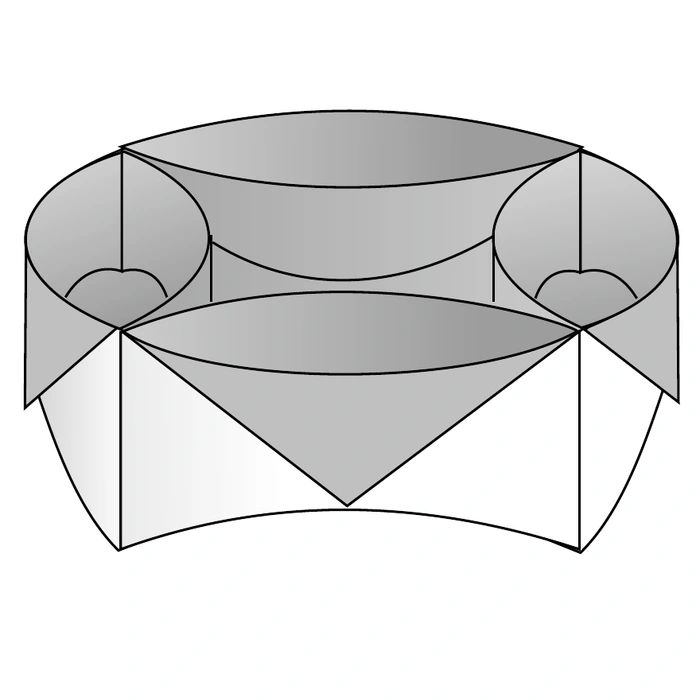 16
Check the completed structure against the original finished diagram, then gently adjust the folds.
Full folding diagram · click to enlarge
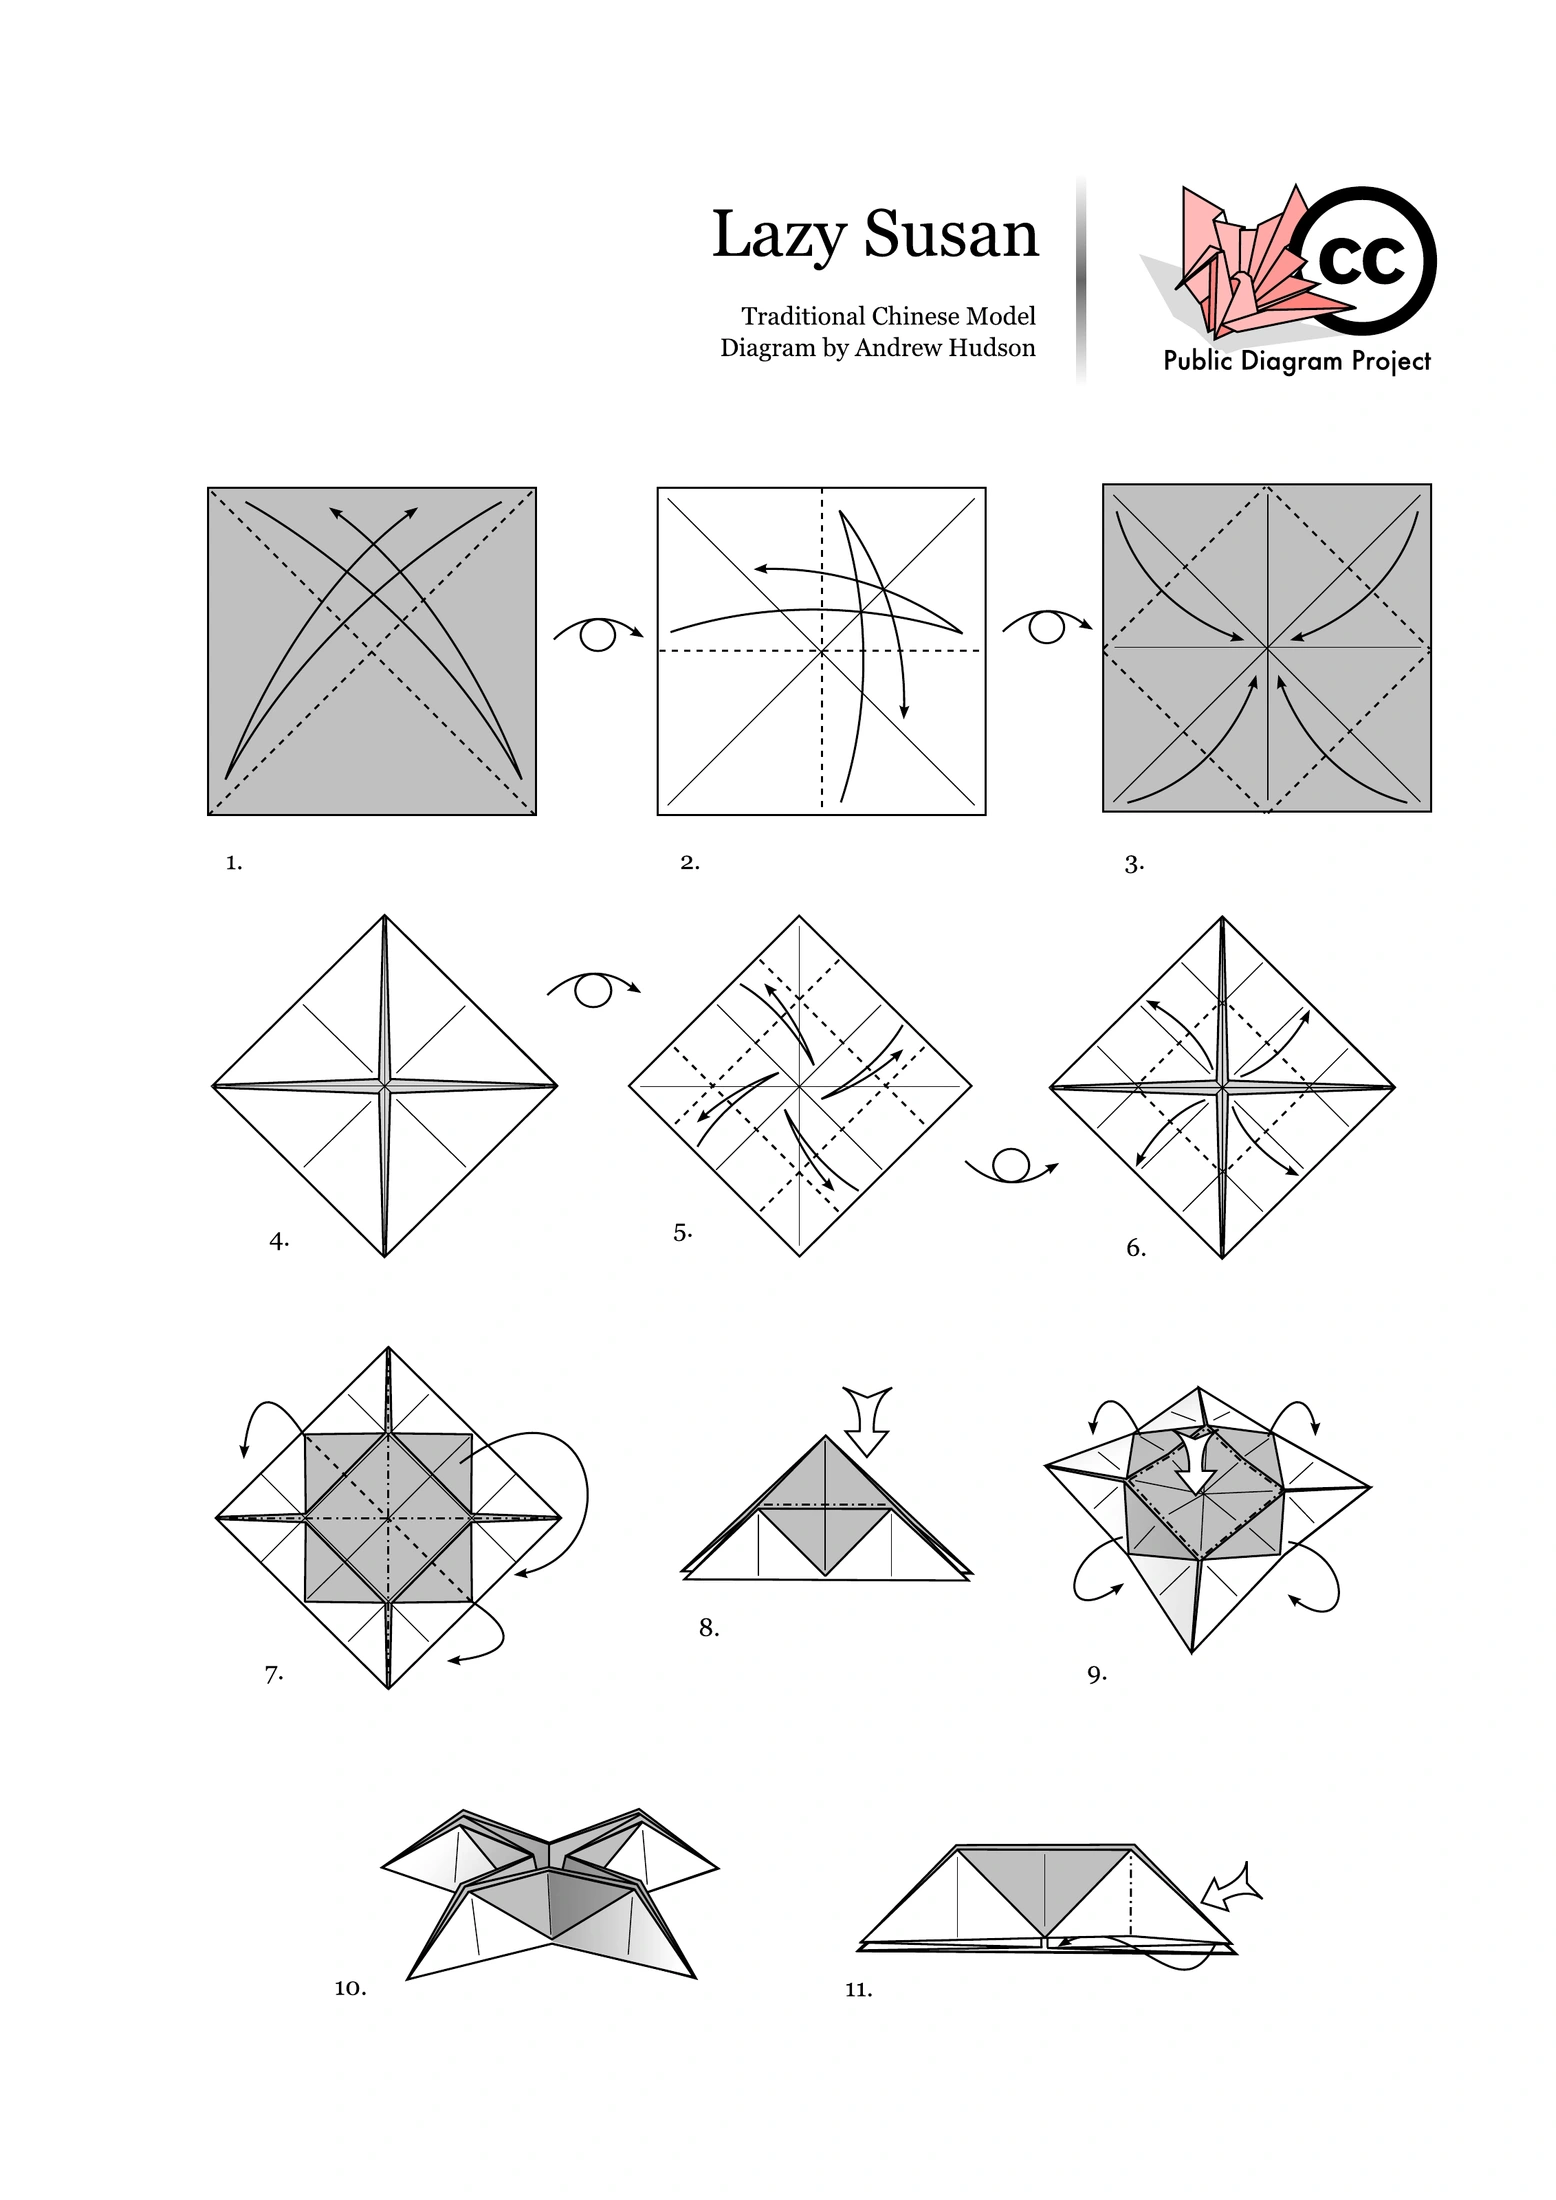
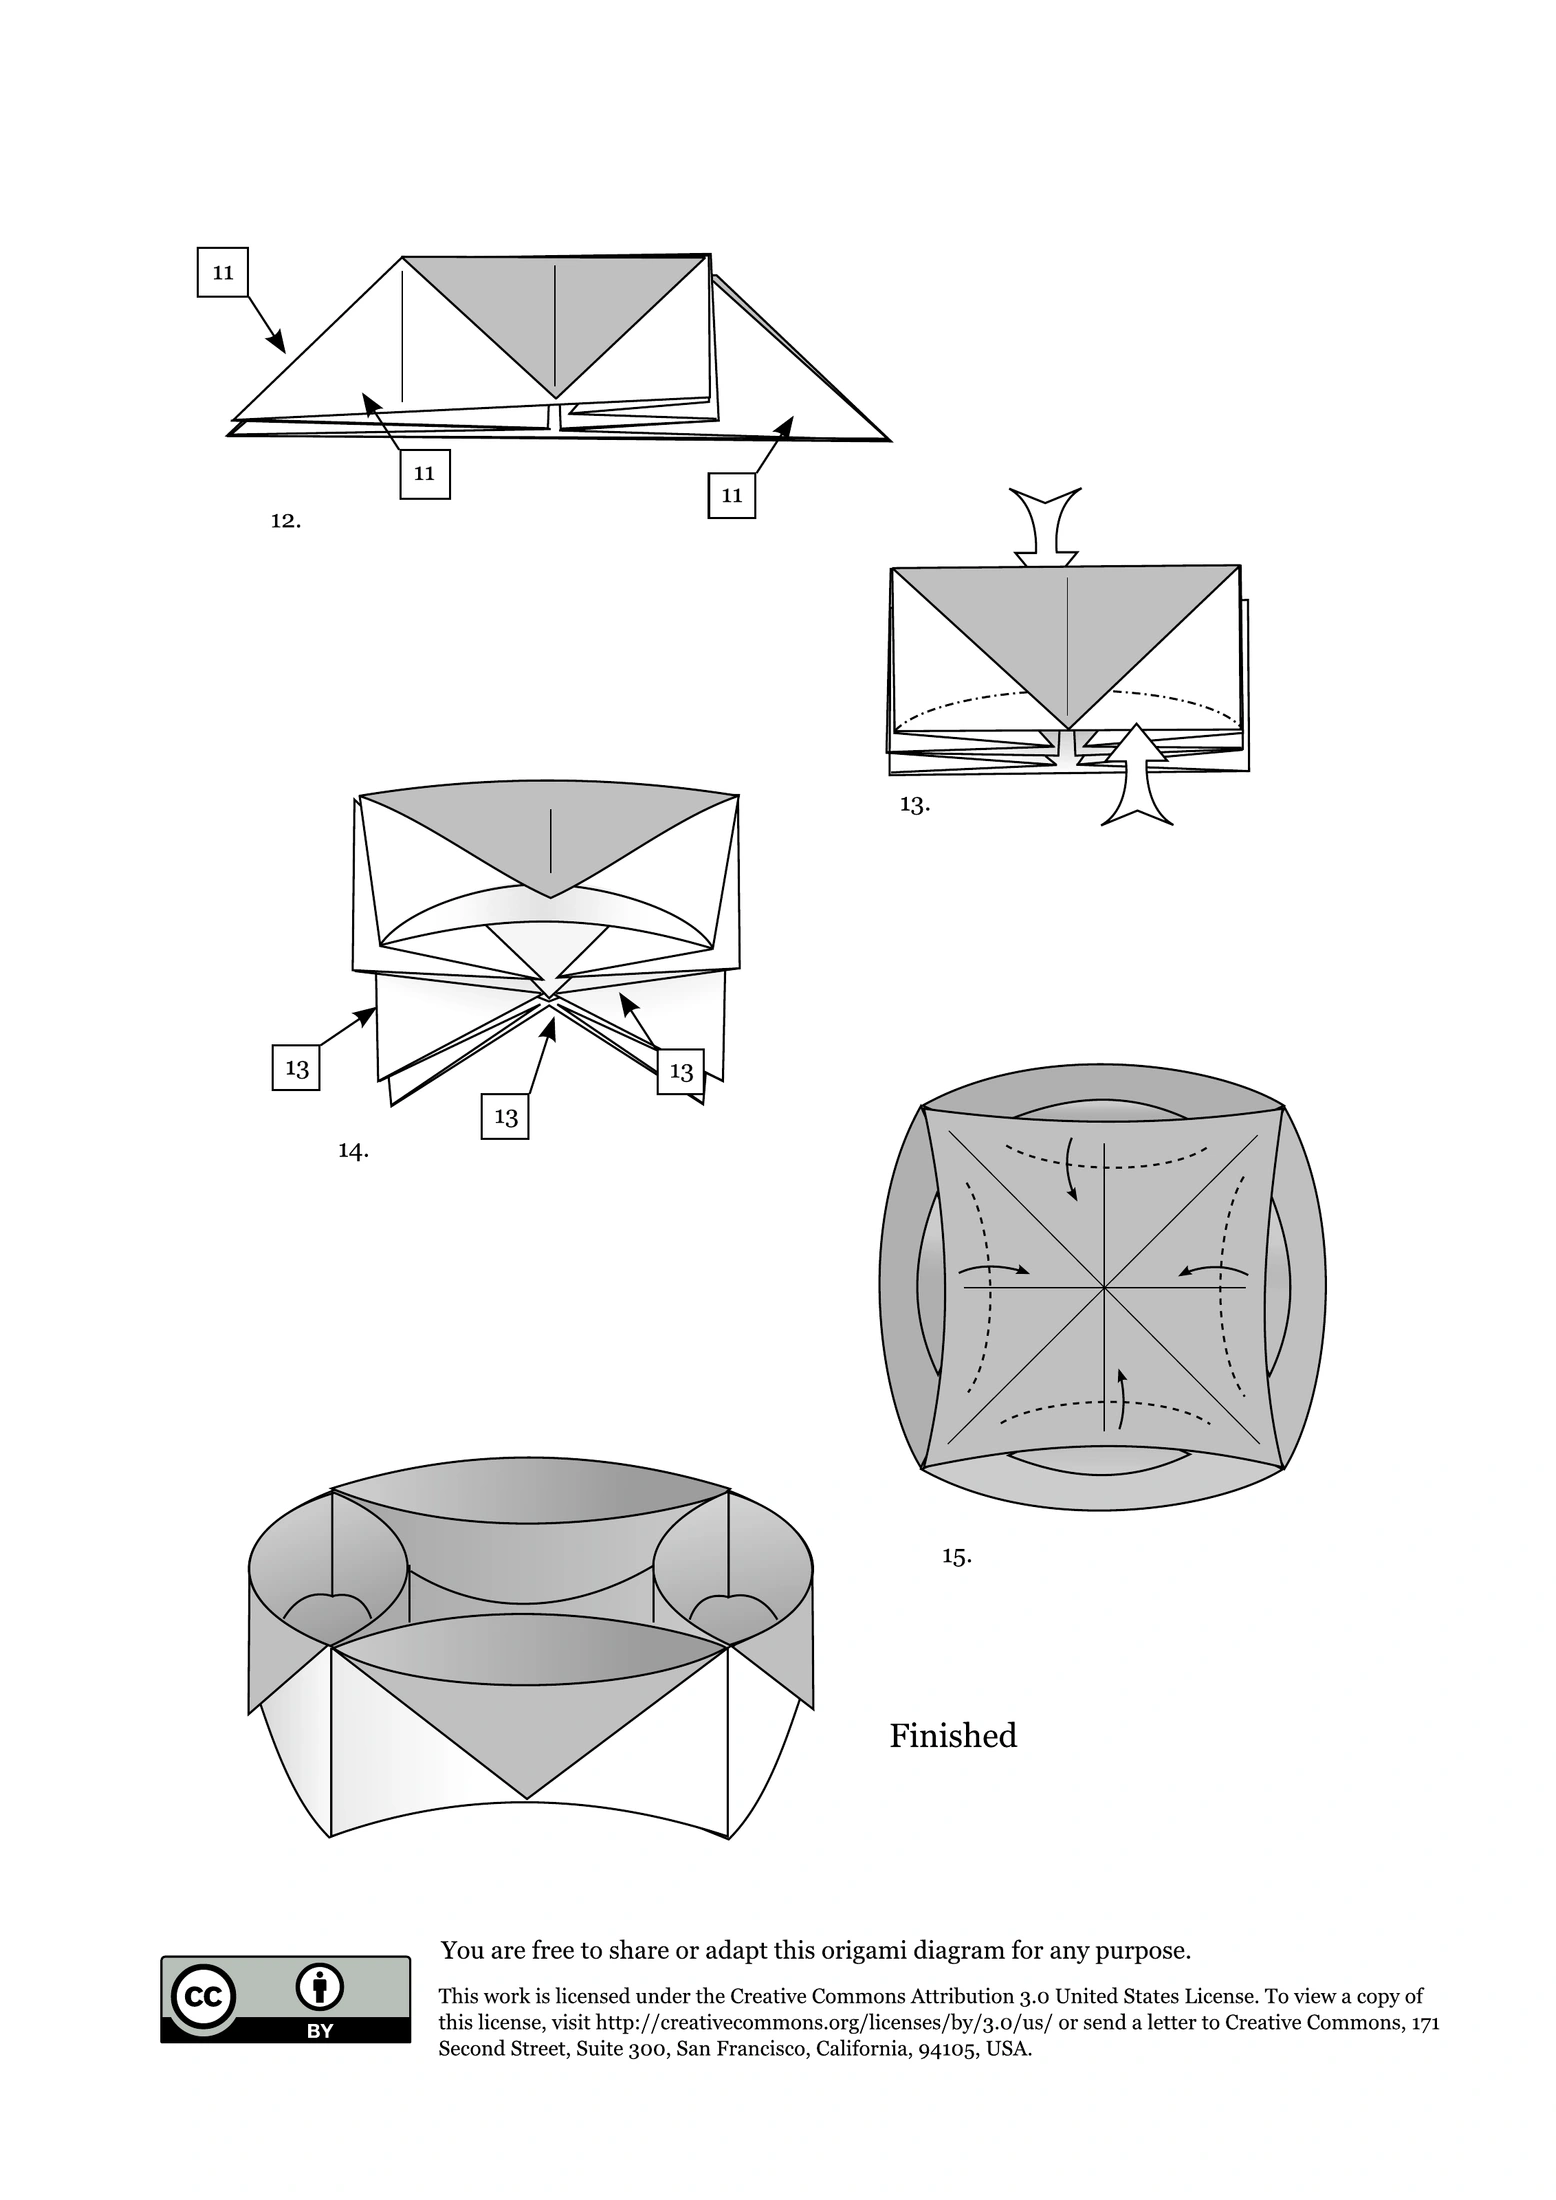
Figures retain the original folding sequence. Grey/white represent paper faces, not mandatory colors. Use thin paper and crease accurately. Instructions have been compared with the source; no physical test fold has been performed by this site.
Andrew Hudson / Public Diagram Project · Traditional model · CC BY 3.0 US
Diagram credits
- Andrew Hudson / Public Diagram Project · Traditional modelhttps://ahudsonorigami.wordpress.com/2011/11/06/lazy-susan/
- CC BY 3.0 UShttps://creativecommons.org/licenses/by/3.0/us/